Installation Instructions
Document No. 129-606
July 15, 2010
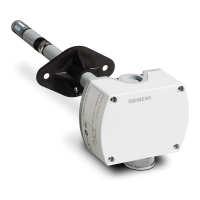
QFM81.2, QFM81.21 Duct Hygrostats
Item Number 129-606, Rev. AA Page 1 of 2
Product Description
These instructions explain how to install a QFM81.2
or QFM81.21 Duct Hygrostat.
Product Numbers
QFM81.2 Duct Hygrostat with external setpoint
QFM81.21 Duct Hygrostat
Required Tools
• Screwdriver
• Electric drill
• 7 mm Wrench
Expected Installation Time
15 minutes
Installation
Air Duct Mounting
If the duct hygrostat is used for control, mount in the
exhaust air duct after the room to be controlled.
If the duct hygrostat is used for monitoring the
maximum or minimum humidity level, mount in the
supply air duct.
Mounting Positions
The immersion sensor stem must be mounted either
horizontally or vertically with the stem pointing
downward. Do not mount with the stem pointing
upward. (See Figure 1.)
SEN0508R1
Figure 1. Acceptable Mounting Positions.
Ensure that the air to be measured is sufficiently
mixed at the point of measurement for accurate
humidity measurements.
The mounting orientation is dependent on the air
velocity in the ductwork: at <5 m/s, the holes in the
stem must face the airflow; at >5 m/s, they must be
perpendicular to the direction of airflow. (See
Figure 2.)
SEN0509R1
<
5
m
/
s
>
5
m
/
s
Figure 2. Mounting Orientations.
Minimum Immersion Length
NOTE: When mounting the hygrostat in air ducts,
the minimum immersion length of the stem
is 5.12 inches (130 mm).
The mounting flange supplied with the unit allows
the immersion length to be adjusted between
5.12 inches (130 mm) and 6.14 inches (156 mm).
Figure 3. Mounting Flange.