2
Technical Specifi cation (Continued)
Installation
Contents
ACCURACY, as per IEC 62053-21
Measurement Accuracy
MAX / MIN Active 1%
MAX / MIN Reactive 1%
MAX Apparent Power 1%
Active Power 1%
Apparant Power 1%
Reactive Power 1%
Measurement Accuracy
Voltage V
L-N
± 0.5% of Full scale (300V AC)
Voltage V
L-L
± Full scale 0.5%
Current ± 0.5% of Full scale (6A)
Frequency ± 0.1%
For L-N Voltage >20V,
For L-L Voltage >35V
Power factor ± 0.01% Digit
Active energy Class 1
Reactive energy Class 1
Apparent energy Class 1
Required Tools
4 nos. Terminal Clamps Rubber Gasket x1
Cross recessed Phillips head
For installing the meter
Prepare the panel cutout with proper dimensions as shown below.
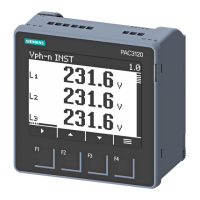
FRONT PANEL DESCRIPTION
OUTLINE
Dimensions (in mm)
PANEL CUTOUT
Dimensions (in mm)
96
5
50
1. Insert unit into the panel 2. Position the clamps (as shown in the
fi gure) and push the same into the slots in
their respective locations.
3. Push/Slide all 4 clamps towards the panel
evenly till the lowest possible tooth of the
clamp is engaged. Ensure the meter is
properly tightened and it does not move.
PANEL
GASKET
UNIT
1
2
3
4
Base clamp
position
Base clamp
SLIDING
SLIDING
CLAMP
Note: Terminal screw tightening torque: 0.7 N-m to 0.8 N-m (6 In-Lb to 7 In-Lb)
3
For demounting the meter
Pull the arm of the sliding clamps in outward
direction (opposite to meter) and drag the
sliding clamps away from the panel.
Dis-assemble the snap fi tted base clamps from
the meter using a screw-driver
Push the meter from back side out of the panel
window and remove the gasket from the meter
Installation Guidelines
1. This equipment, being built-in-type, normally becomes a
part of main control panel and in such case the terminals
do not remain accessible to the end user after installation
and internal wiring.
2. Conductors must not come in contact with the internal
circuitry of the equipment or else it may lead to a safety
hazard that may in turn endanger life or cause electrical
shock to the operator.
3. Circuit breaker or mains switch must be installed between
power source and supply terminals to facilitate power ‘ON’
or ‘OFF’ function. However this switch or breaker must be
installed in a convenient position normally accessible to
the operator.
4. Before disconnecting the secondary of the external
current transformer from the equipment, make sure that
the current transformer is short circuited to avoid risk of
electrical shock and injury.
5. The equipment shall not be installed in environmental
conditions other than those mentioned in this manual.
6. The equipment does not have a built-in-type fuse.
Installation of external fuse of rating 275V AC / 0.5Amp for
electrical circuitry is highly recommended.
7. Remove the scratch-guard from the meter display during
commissioning of the panel.
Mounting distance
The distance to be maintained between two meters while
mounting on a panel door should be at least 100 mm.
100 mm
100 mm 100 mm
100 mm
 Loading...