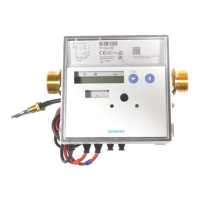
Modbus module WZU-485E-MOD
WZU-485E-MOD Subject to change without prior notice 1
1. Safety Information
Comply with ESD protection measures.
Avoid short-circuits on the PCB.
When connecting, turn off the mains supply.
Route connecting cables only through the bush
sleeves of the meter.
Do not cut the bush sleeves shorter than necessary
because this may lower the degree of protection.
2. Description of function
WZU-485E-MOD is an add-on communication module for the
following types of meters: T550 (UH50…) (firmware 5.15 and
higher) and T550 (UC50…).
The module is intended and preconfigured for data transmis-
sion using the Modbus RTU protocol on RS485.
Note: An external power pack must power the module
(not included in the module’s scope of delivery).
3. Items delivered
1. Communication module WZU-485E-MOD
2. Screw connector for RS485 interface and power supply
3. Jumper bridge (red)
4. Installation and assembly
Up to 2 communication modules can be installed.
Note: WZU-485E-MOD may only be combined with
an M-Bus module in slot “module 2”. Only one of them
may be operated in fast read-out mode with an up-
date interval shorter than 15 min.
Installing the communication module
The communication modules are connected via a 6-pole reac-
tion-free connector so that installation or replacement is possi-
ble at any time.
To install a communication module proceed as follows:
Press the 4 side lugs of the housing cover inwards and
remove the cover.
Put the communication module into the correct position.
Note: The module WZU-485E-MOD may only be
fitted at slot “module 1”.
Place the communication module carefully in both guide
slots and push it in.
Wait for the module indication on the meter display (Loop 4:
“Modul1 MI / G4”).
To connect the power supply and the communication cable
of WZU-485E-MOD, open 2 sleeves matching the cross
section of the respective cables.
Note: Open the cable sleeves in such a way that they
enclose the cable tightly.
Guide cables through the bush sleeves from the outside.
Connect the the power supply to terminals 24V and GND,
and the communication cable to terminals A+ and B-.
Note: For the connection to the screw terminal, a slot
screwdriver with 2.5 mm tip is needed.
Attention: Connecting the power supply to terminals
A and B can cause permanent damage to the module.
Insert the screw connector into its counterpart on the com-
munication module.
Secure the cables with the metal strain relief.
Note: The jumper bridge must not be inserted during
operation.
5. LCD display
Note: Both display range and data displayed can differ
from this description depending on the meter parame-
terization. Certain button functions can also be blocked.
Supply and data
connection terminal
Service button (under
the housing cover)