17
PART REMOVAL, REPLACEMENT & TOOL ADJUSTMENTS, Continued
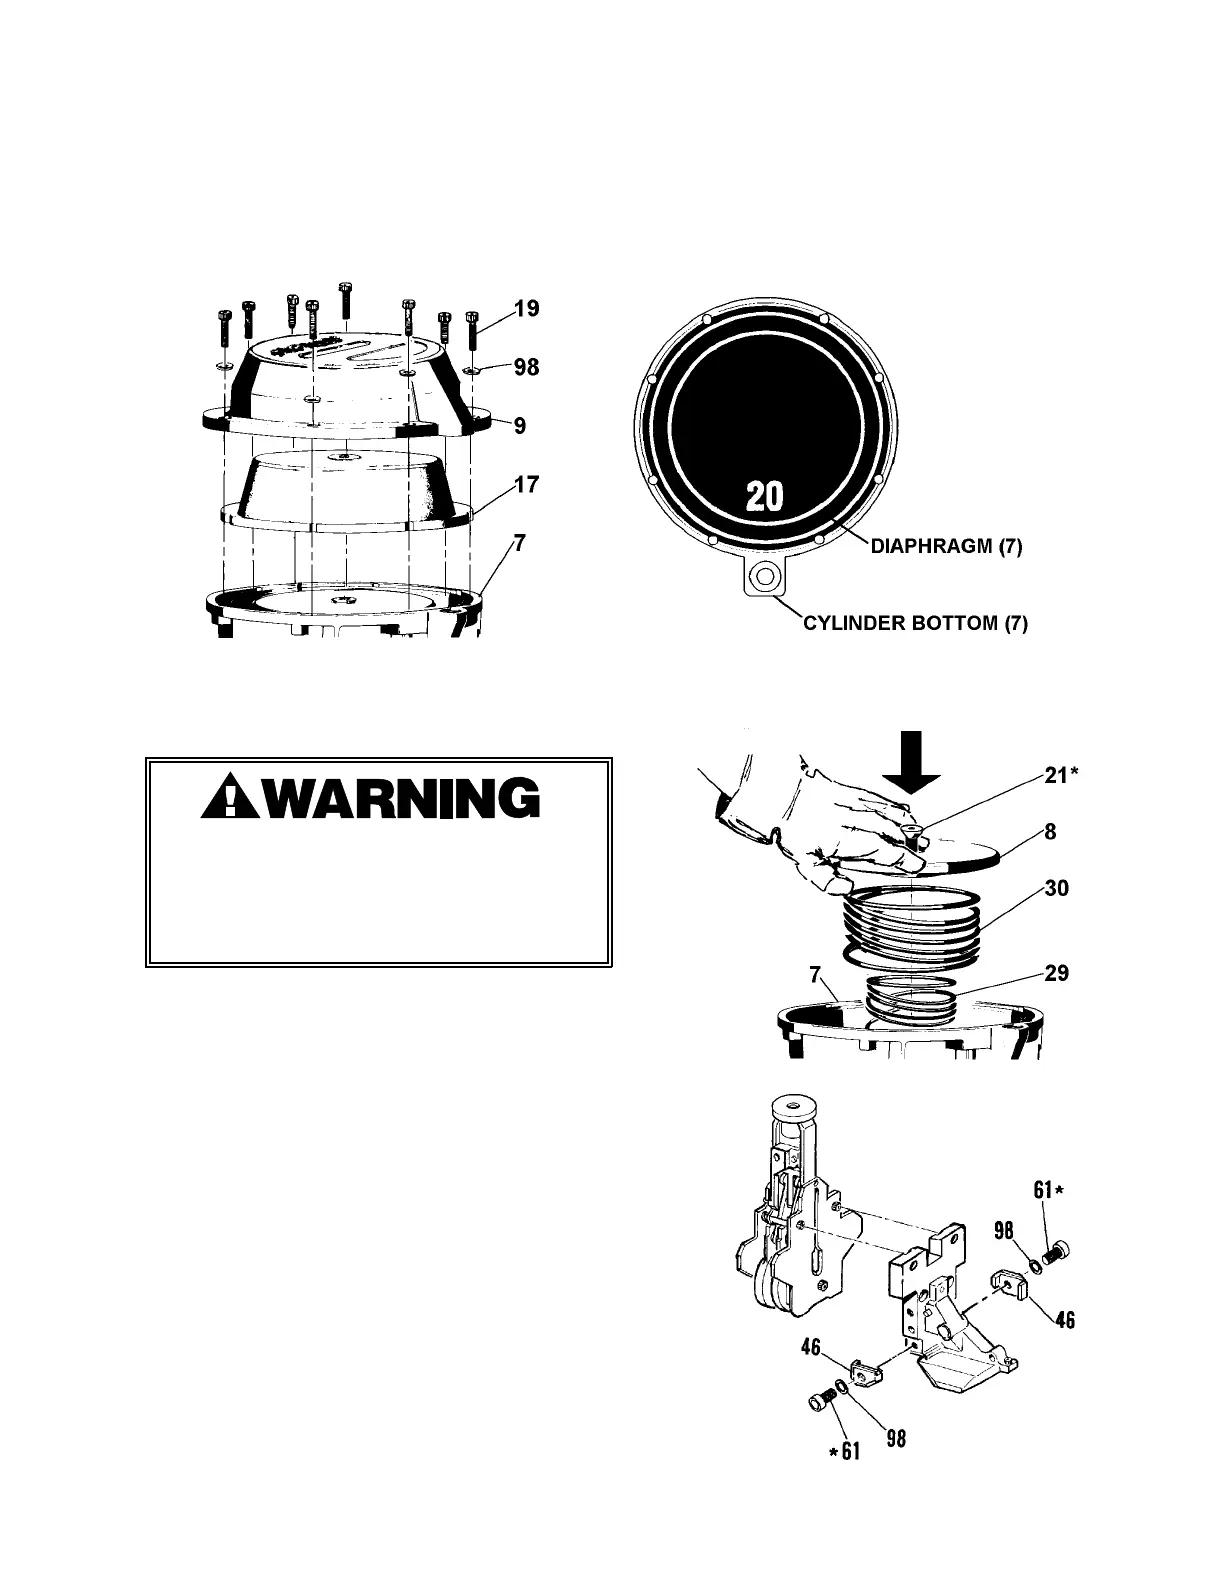
STEP 5 - SEALER MECHANISM (For additional part information see pages 22, 23, 24, 25)
1. With the hanger and guard assembly removed from the tool, turn the tool upright and remove
the eight cap screws (19) and washers (98) from the cover (9). Remove the cover and note
the position of the diaphragm (17) with the number "20" centered at the rear of the tool. This
positioning matches the screw holes in the cover and cylinder bottom with the cutouts in the
diaphragm.
2. Grip the cylinder bottom (7) and loosen the cap screw (21) that attaches the piston (8) to the
piston rod (39). Grip the piston firmly with one hand while removing the cap screw because
the two large springs (29,30) are compressed.
Compression springs (Keys 29 & 30) are
compressed and under tension. Use care
when removing the piston (Key 8). Failure to
follow the above could result in serious
injury to avoid personal injury.
3. Once the piston and springs have been removed,
the sealer mechanism along with the tensioner
foot, support plate, and cutter will drop out
from the bottom of cylinder. The tensioner
foot and cutter assembly will also separate
from the sealer assembly at this time. Set
these aside for later inspection.
* Secure with Loctite #242.