3
4.1) Adjustable parameters Min/Max Default
Volume of sound signals and voice warnings 0-8 4
Sound signals and voice warnings volume with delayed input 0-8 4
Arming/disarming warning sound volume 0-8 4
Tamper detection sensibility 0-8 0
Exclude tamper protection against opening no no
Exclude tamper protection against forced removal yes-no no
Sound duration time (seconds): Y=180 - N=control panel's alarm duration yes-no Y
Flashing during pre-alarm yes-no yes
Flashing when arming (3 flashes) and disarming (1 flash) yes-no yes
Flashing during armed condition (1 flash every 10 sec. - 2 during alarm events) yes-no no
LED steady ON during Alarm events, not adjustable yes yes
4.2) RECORDING AUDIO MESSAGES
Type of message LED condition LED colour Message length Message condition
PRE-ALARM flashing orange 5 seconds not reported
PRE-ALARM steady on orange 5 seconds reported
ALARM 1 flashing red 5 seconds not reported
ALARM steady on red 5 seconds reported
ALARM 2 flashing green 10 seconds not reported
ALARM 2 steady on red 10 seconds reported
Three voice warning messages are available:
PRE-ALARM: warning is broadcasted during any input delay.
VOICE WARNING 1 and 2: each detector can be setup to enable a voice warning instead of siren's sound (sound SYSTEM ALARM). Recorded message should have dissuasive
characteristics with are relevant to the position of the associated detector/s.
CHIME Alarm: if a detector is used with a "warning bell" function, it can broadcast an appropriately recorded audio warning 2 instead of sounding.
Note: 1) each warning is repeated for preset alarm duration; 2) siren will be silenced during any type of alarm by disarming the system; 3) sound warning will be broadcasted if
audio warning has been recorded
Audio message recording procedure
Remove board from siren's bottom without disconnecting cables. Remove microphone's hole plug and use the TAMPER key as shown below. LED must be turned off once
recording has been completed. Be careful not to deform antennas and place plug back over microphone's hole.
1. Press Tamper key until green light turn on, then release it. LED light will become orange.
2. Press and hold Tamper key and record an appropriate Pre-alarm voice warning. You will be able to playback audio when tamper key is released at the end of recording’s
scheduled time.
3. LED flashes red-green at the end of playback. Press Tamper key to delete audio and record again. LED light will stay on steadily to report that audio has been recorded.
4. Press Tamper key lightly to switch to another message. LED will change colour accordingly.
5. LED will switch off and tamper key will return to its standard operation after 10 seconds of idleness.
Note: A recorded message can be listened to pressing the tamper button for 2 seconds: at the end it returns to the point 3.
5) TESTING SIREN : Go to: General -Test, then follow the on-screen instructions to test connection with control panel and siren controls.
You can also press "Panic" key on the control panel’s display or keyboards for a few seconds to test installed sirens. Press "Panic" key again to mute sirens.
6) INSTALLATION
Warning! Siren must be installed and commissioned complying with current regulations. Before establishing the device's location, siren must be enrolled to the control panel and
you must make sure that the position selected for the unit is within the radio range of the control panel by setting control panel's TEST. Install the unit in a location that is difficult
to reach, but were it can be seen, to prevent intentional damage attempts. Use the provided mounting template and follow the drawing's indications to wall mount the unit.
7) BATTERIES REPLACEMENT : Replace batteries when requirement is reported by the device and/or the control unit. Use the batteries showed in the drawings.
Enable control panel's TEST mode before replacing the batteries (see control panels instruction manual). Caution! Used batteries must be disposed of in compliance with current
regulations, even when equipment is scrapped and must therefore be removed from the devices before they are scrapped
8) TECHNICAL SPECIFICATIONS (see diagram) : While preserving operations and intended use, the manufacturer reserves all rights to change products’ technical specifications to
make improvement at any time and without prior notice. In addition to the above, the following specifications pertain to the device’s operating temperature and standard use
(residential): 20 degree Celsius (± 5 degree Celsius).
7200 - Sirène sans fil pour l'exterieur - bidirectionnel et DualBand - avec messages vocaux optionnels
1) CONSIGNES DE SÉCURITÉ ET MISES EN GARDE : Ces appareils ne peuvent être utilisés que dans le cadre d'un de nos systèmes d'alarme et tel que décrit dans ce manuel et dans
le manuel des centrales compatibles du système, codes 7001 et 7002.
Ils peuvent être installés à l'intérieur des locaux ou à l'extérieur, dans les limites de température indiquées et protégés de manière adéquate contre les intempéries. L'ouverture
des appareils, mis à part le logement des piles, entraîne la déchéance immédiate de la garantie industrielle.
Toute autre utilisation doit être considérée comme impropre et interdite ! Le fabricant ne répond pas des dommages résultant d’une utilisation impropre du produit, autre que
celle prévue dans ce manuel.
1.1) DÉCLARATION DE CONFORMITÉ : Silentron s.p.a. déclare, sous sa seule responsabilité, que les produits décrits dans ce manuel satisfont aux exigences essentielles de la
Directive CE 1999/5/CE - R&TTE. La déclaration complète est disponible sur le site www.silentron.com/CE-declaration.html
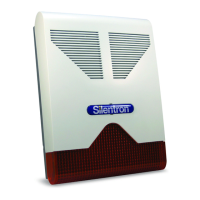
2) GÉNÉRALITÉS : Sirenya Evolution est une sirène sans fil faisant partie du système d'alarme Silentron Advanced. Cette sirène de forte puissance sonore peut également diffuser
des messages vocaux. Grâce à son flash à LED, elle signale l'état d'alarme et permet de dissuader l'intrus. Elle fonctionne sur piles et convient pour une installation en extérieur, à
l'abri des intempéries et du vandalisme.
3) FONCTIONNEMENT : Commandée par la centrale, la sirène émet des flashs et peut diffuser un son haute puissance ou des messages vocaux préenregistrés, en fonction du
détecteur qui a déclenché l'alarme. En effet, lors de la configuration de chaque détecteur, il est possible de choisir le type d'alerte signalée par la sirène. De plus, la sirène peut
confirmer à travers des signaux sonores et des flashs différents l'armement et le désarmement de la centrale ainsi que l'état de pré-alarme, si le détecteur qui le déclenche est un
détecteur temporisé. Cet état peut être également confirmé par un message vocal, en alternative au signal sonore. La connexion sans fil avec la centrale est contrôlée en
permanence (supervision) et la sirène est protégée contre les effractions, l'ouverture et l'arrachement, conformément à la réglementation en vigueur. En fonction de la
configuration choisie, la sirène peut indiquer, en émettant des flashs différents, que la centrale est armée et/ou qu'une alarme s'est produite lors de la période d'armement.
3.1) Commandes envoyées par la centrale à la sirène: résultat optique exclusion résultat sonore exclusion
ARMEMENT TOTAL 3 flashs LED oui 3 bips oui
ARMEMENT PARTIEL néant néant
DÉSARMEMENT 1 flash LED oui 1 bip oui
 Loading...