13
4.1. Silk'n™ device description
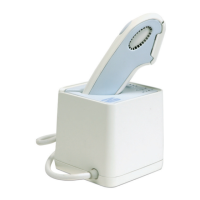
Your Silk’n™ consists of a bAse Unit and an Applic Ator.
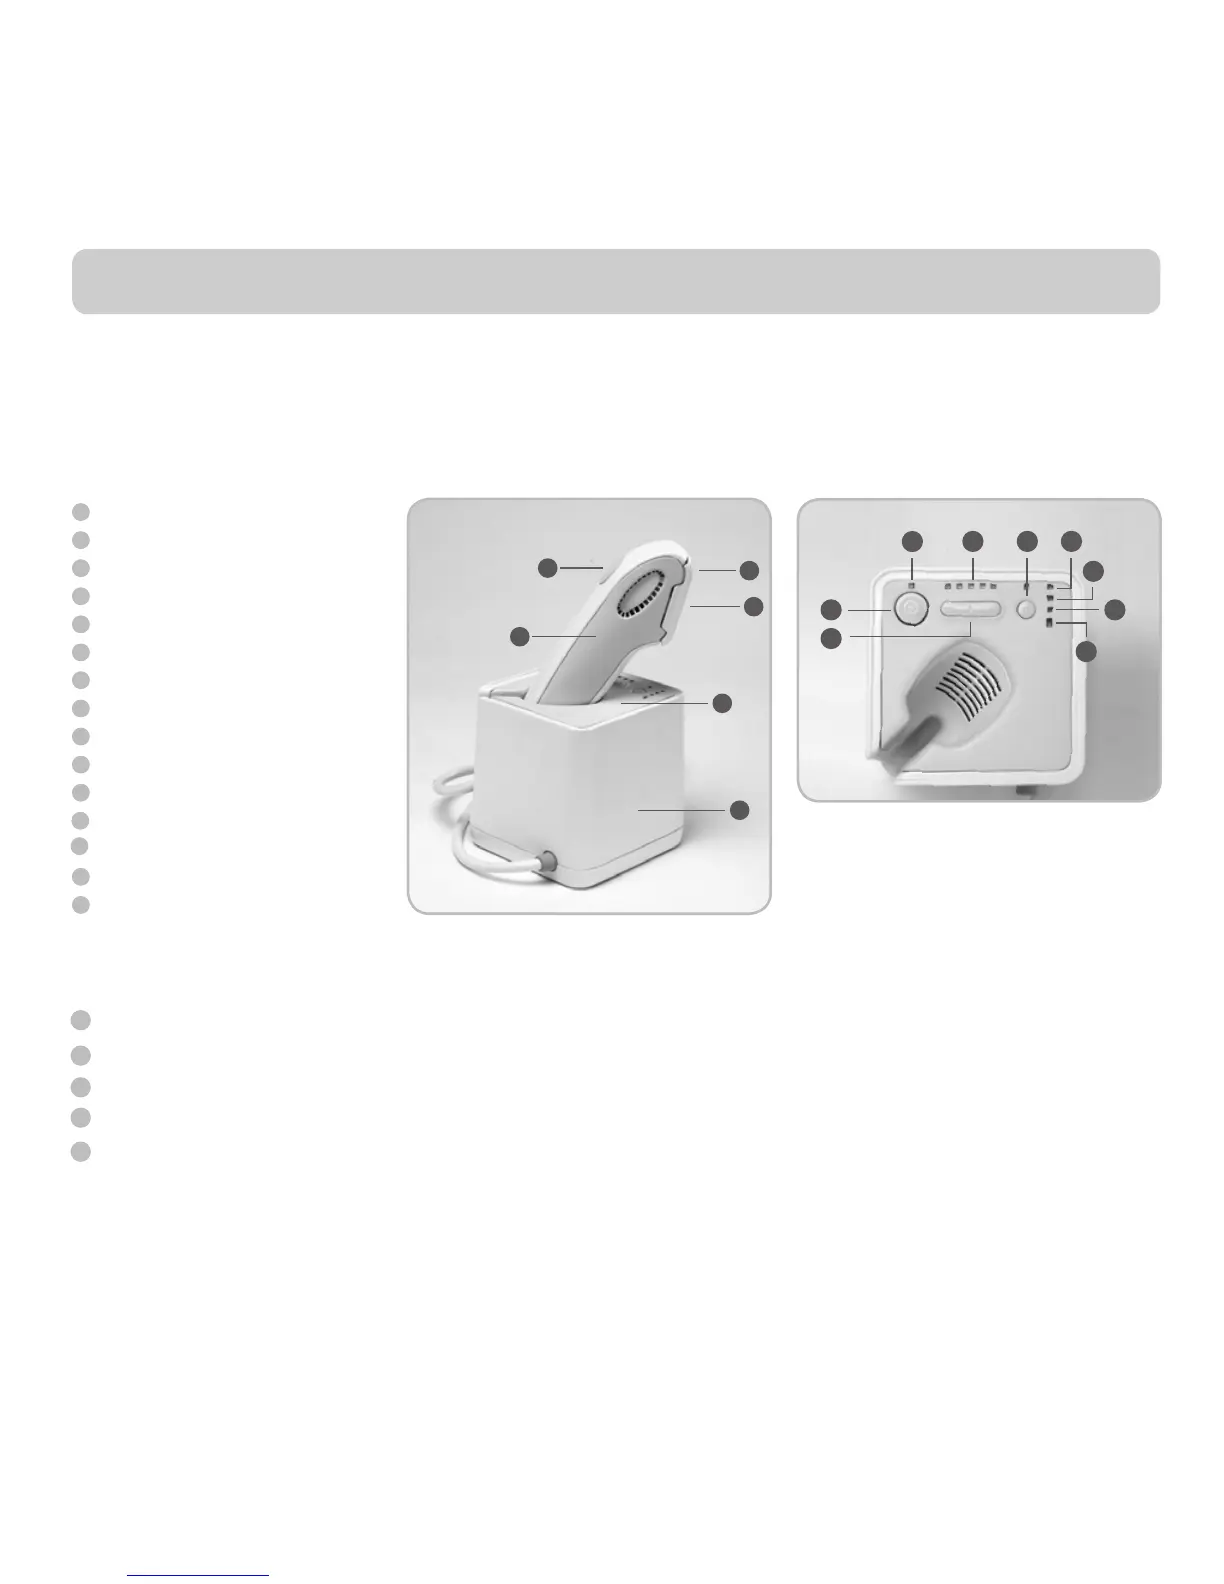
On the bAse Unit you can find the Silk'n™ control pAnel including power on/off switch and power indic Ator light, the energy level setting bUttons and
energy level indicAtor lights, the AUdio on/off switch, reAdy indic Ator, system wArning indicAtor light and cArtridge 90% and 100% UsAge indicAtor lights.
On the Silk'n™ ApplicAtor you can find the pUlse bUtton. The disposAble lAmp cArtridge is located at the ApplicAtor tip.
4. First steps with Silk’n™
1
6
5
4
2
3
3
8
7
10
9
11
12
15
14
13
Base unit
Applicator
Pulse Button
Disposable Lamp Cartridge
Applicator Tip
Control Panel
Power ON/OFF switch
Power Indicator Lights
Energy Level Settings Buttons
Energy Level Indicator Lights
Ready Indicator Lights
Audio ON/OFF switch
Cartridge 90% Usage Indicator Light
Cartridge 100% Usage Indicator Light
System Warning Indicator Light
1
6
5
4
2
8
7
9
11
12
15
14
3
13
10
4.2. Package contents
Upon opening the Silk'n™ package, you will find the following parts:
Silk'n™ bAse Unit and ApplicAtor
An AC cord
A second disposAble lAmp cArtridge
This User’s Manual and a Quick Start Guide leaflet
An Instructional DVD
4.3. Silk’n™ Setup
1. Remove Silk’n™ bAse Unit, Applic Ator and other components from box.
Insert the ApplicAtor into its cradle in the Silk’n™ bAse Unit.
2. Verify that the disposAble lAmp cArtridge is inserted correctly into the ApplicAtor.
3. Plug the power cord into the Silk’n™ bAse Unit socket.
4. Plug the other end of the power cord into an electrical outlet. Your Silk’n™ is now ready to start.