DiscountRamps.com • 1-888-651-3431
Page 4Rev. 091218
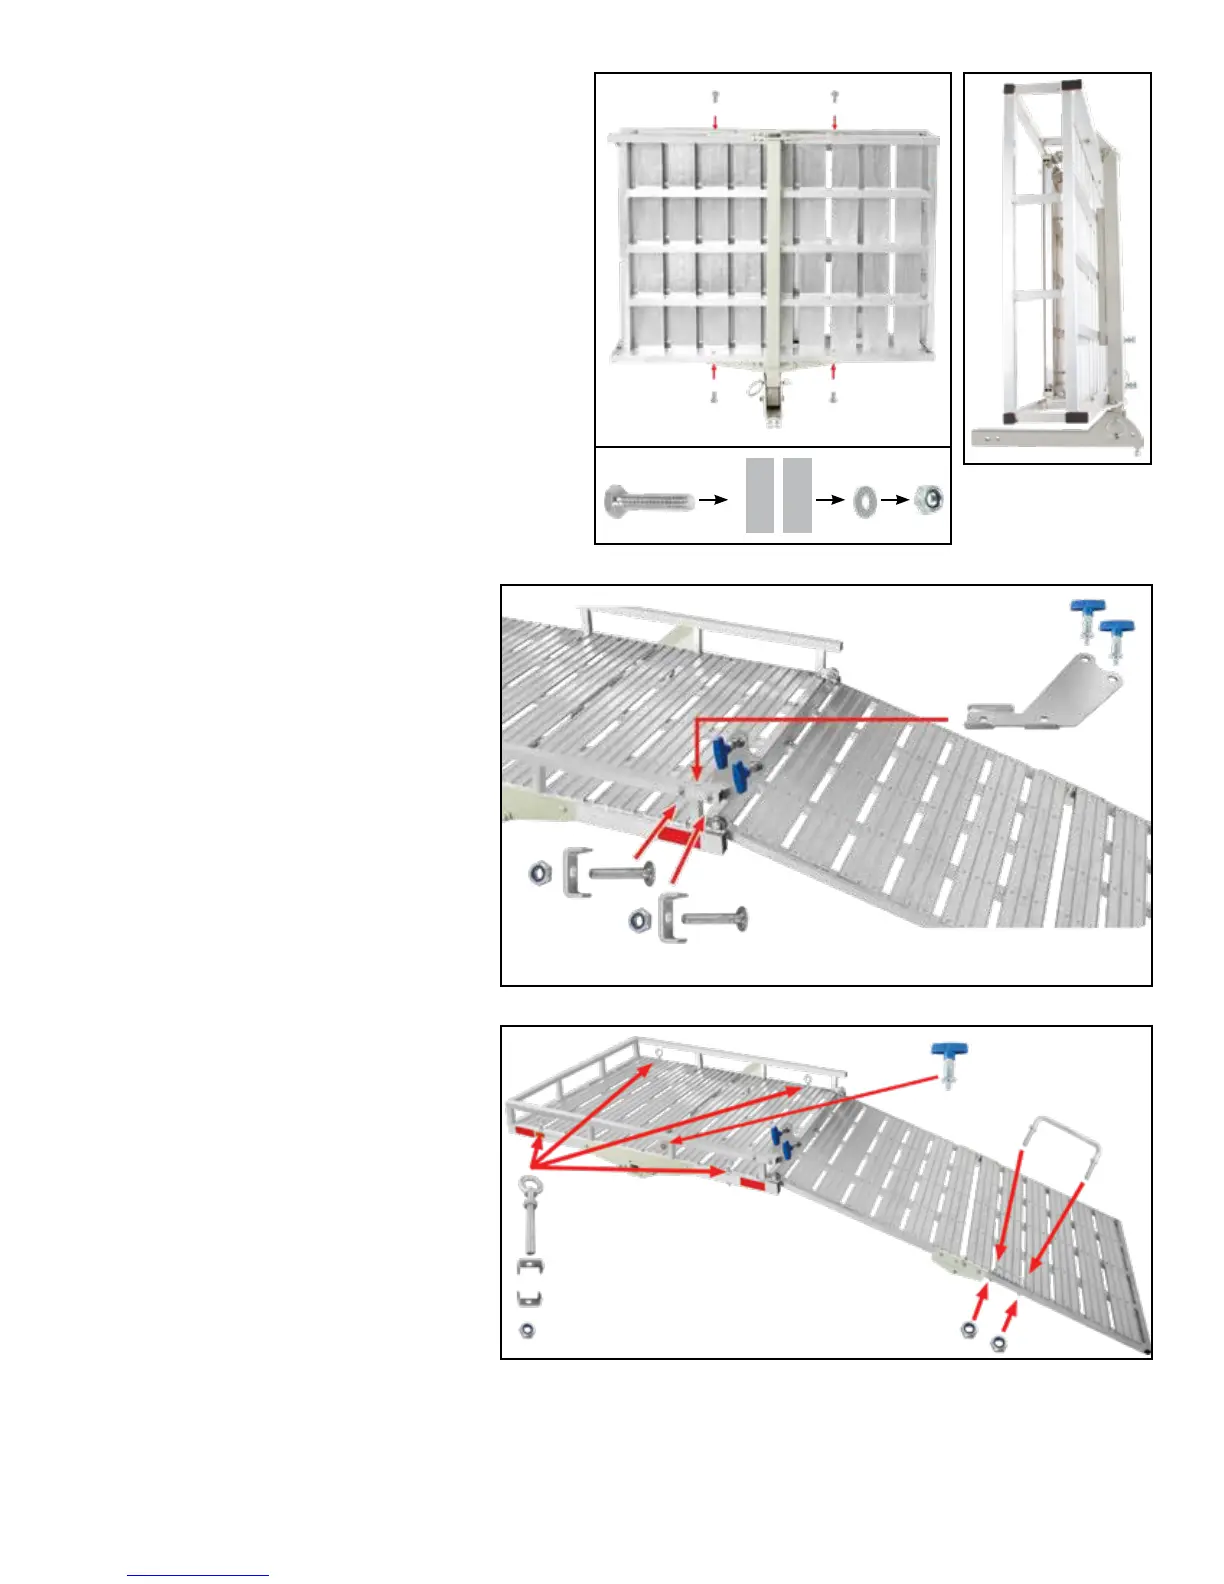
Step 3. Attach the ramp lock plate
(6) and brackets (15) with bolts (13)
and nuts (14) using a 13mm wrench.
Install the spring pull pins (7).
The ramp lock plate is designed to
hold the loading ramp upright when
the carrier is loaded. This plate
wraps around the carrier frame and
bolts together through the frame. Be
sure the bolt heads are on the inside
of the frame, allowing clearance for
the folding ramp.
Step 4. Install the ramp handle
(20) in the holes next to the ramp
hinge. Secure with nuts (21) using
a 13mm wrench. This handle slides
in to be tightened down and allows
the ramp to be easily folded or un-
folded from a single point.
Attach each eye bolt tie-down (16)
in the corners of the carrier using
brackets (18) and nuts (17). Tighten
with a 13mm wrench.
Step 5. The reector stickers (5) can be attached to the front of the carrier. Make sure the surface is
clean and dry before applying.
Step 2. Install the completed support tube as-
sembly to the carrier (1) using the carrier sup-
port bolts (10), washers (11), and nuts (12).
Do not fully tighten bolts during this step. Flip
the carrier over and line up the support tube
with the center. The tube features a raised
section designed to provide additional support
to the carrier platform. Be sure this section is
closest to the carrier platform when aligning the
support tube.
The support brackets must go on the outside of
the carrier and will line up with the frame holes
for bolt attachment. *Note: Once all the bolts
are in, they can be fully tightened.
7
7
13
14
15
6
20
21
18
16
5
5
17
10
4 1
11 12
 Loading...