14 GB/IE/NI/CY
Meaning of the rechargeable
battery control display
The 4 LEDs on the rechargeable battery control dis-
play
2b
show the charge level of the rechargeable
battery
2
.
Display in operation:
- When the rechargeable battery
2
is fully
charged, the LEDs on the rechargeable battery
control display
2b
light up continuously.
- If the LEDs go out during operation, this shows
that the rechargeable battery
2
is gradually
running out of charge.
- The rechargeable battery
2
is almost com-
pletely out of charge when only one LED is
illuminated.
Charge the rechargeable battery
2
immedi-
ately. The main unit
4
automatically switches
off when the level of charge in the rechargea-
ble battery is too low for continued operation.
Display during the charging process:
- The lit LEDs show the charging progress (already
charged proportion).
- Once all the LEDs are continuously lit, the
rechargeable battery
2
is fully charged.
The rechargeable battery control display
2b
goes
out when the charging process is complete and
you remove the mains adapter
8
from the mains
socket or pull the mains cable connector plug
9
out of the charging socket
3
of the rechargeable
battery
2
.
Once the main unit
4
is switched on using the On /
Off button
19
, the LEDs on the rechargeable
battery control display
2b
light up and show the
charge level of the rechargeable battery
2
.
Initial use
Selecting, assembling and
disassembling accessories
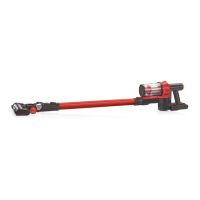
Aluminium suction tube:
The aluminium suction tube
16
serves as an exten-
sion, for example, to access hard-to-reach spots
with the crevice nozzle
13
and as a connection
piece between the electric floor brush
14
and the
main unit
4
.
You can attach all the included accessory parts at
the bottom end of the aluminium suction tube
16
.
Insert the aluminium suction tube
16
from
below into the opening on the main unit
4a
in-
tended for this purpose until it audibly clicks
into place.
Remove the aluminium suction tube
16
from
the main unit
4
by pushing the upper release
button
20
and removing the aluminium suction
tube
16
from the main unit
4
.
16
16a
15
16
20
4a
21
4
 Loading...
