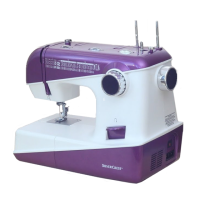
This document describes the SilverCrest SNMD 33 A1 Sewing Machine, a versatile appliance designed for household sewing tasks. It offers a range of functions for both basic and decorative stitching, making it suitable for various fabric types and projects.
Function Description
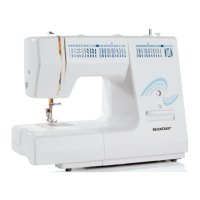
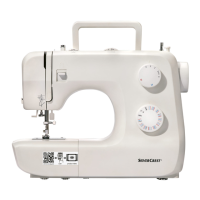
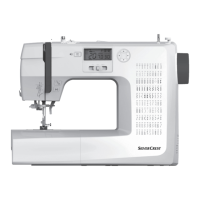
The sewing machine operates by creating stitches using an upper thread and a lower bobbin thread, forming seams on fabric. It features a handwheel for manual control of the needle and thread take-up lever, and a foot pedal for regulating sewing speed. The machine is equipped with a pattern selector dial, stitch width dial, and stitch length dial, allowing users to choose and adjust various stitch types and sizes. A stitch display indicates the selected pattern. For convenience, it includes a bobbin winder for preparing lower threads and a thread cutter for finishing seams. An integrated LED lamp illuminates the sewing area.
Usage Features
The SilverCrest SNMD 33 A1 is designed for ease of use, even for beginners.
Getting Started:
- Power Connection: The machine connects to a power source via a foot pedal, which also controls the sewing speed. The main switch turns the machine and its light on and off.
- Sewing Table: It features a snap-in sewing table that can be removed for sewing on arm beds, and its interior doubles as an accessory box for storing small items.
- Needle Insertion: Needles are inserted by loosening a clamp screw, placing the flat side of the needle shaft towards the back, and pushing it up to the stop. Regular needle changes are recommended to prevent sewing problems.
- Presser Foot Lifter: A two-step presser foot lifter allows for increased clearance when sewing thick fabrics.
- Presser Foot Holder: The presser foot holder is easily attached by lifting the presser bar. Presser feet can be inserted by aligning the groove with a pin and lowering the presser foot bar. Removal is achieved by pressing a lever.
- Thread Spool Pins: The machine has pull-up thread spool pins to hold thread spools, ensuring smooth thread feeding. For threads that tend to wrap, the upper thread can be guided through an eye in the spool pin.
- Bobbin Winding: Bobbins are wound by placing a felt cushion and thread spool on the spool pin, guiding the thread through the thread guide to the bobbin, and then placing the bobbin on the winder spindle. The foot pedal initiates winding, which automatically slows when the bobbin is full.
- Bobbin Insertion: The bobbin is inserted into a bobbin case, ensuring the thread runs clockwise. The bobbin case is then placed into the shuttle race.
- Upper Threading: Threading involves guiding the upper thread through various points, including the upper thread guide, thread tension dial, thread lever, and finally through the needle eye from front to back. A needle threader accessory is provided to assist with this step.
- Thread Tension: The machine has an "AUTO" setting for basic upper thread tension, which can be adjusted with a dial for different fabrics and threads. Lower thread tension is factory-set and generally does not require adjustment.
- Bringing Up Lower Thread: The lower thread is brought up by holding the upper thread, turning the handwheel to raise the needle, and then pulling the upper thread to draw the lower thread through the stitch plate. Both threads are then laid back under the presser foot.
Sewing Operations:
- Starting and Stopping: Sewing begins by lowering the presser foot and pressing the foot pedal.
- Stitching: The machine offers various stitch patterns, including straight stitch, zigzag stitch, and decorative stitches.
- Reverse Sewing: A reverse sewing lever allows for back-tacking at the beginning and end of seams for reinforcement.
- Releasing Material: To release the fabric, the handwheel is turned to raise the thread lever, and the presser foot is lifted.
- Thread Cutting: A thread cutter is conveniently located for trimming threads after sewing.
- Needle, Fabric, and Thread Matching: The manual provides a guide for matching needle size to fabric weight and thread type, crucial for optimal sewing results. Twin needles can be used for decorative work, with specific stitch width settings.
- Pattern Selection: Patterns are selected using the pattern selector dial, stitch width dial, and stitch length dial. Different settings are recommended for straight, zigzag, and decorative stitches, as well as for specific fabric thicknesses.
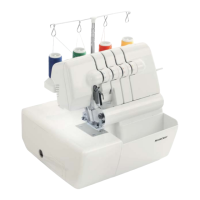
- Specialized Stitches: The machine supports blind stitch, button sewing, buttonholes, overlock stitches, 3-step zig-zag, stretch-stitch, patch work, monogramming, embroidering (with an optional embroidery hoop), applique, and scallop stitching. Each of these functions has specific setup and usage instructions, often requiring different presser feet or accessories.
- Twin Needle Use: When using a twin needle, two felt cushions and spools are used, and both threads are threaded as usual, with one going through each needle.
Maintenance Features
Regular maintenance is essential for the longevity and performance of the sewing machine.
- Cleaning: The machine should be disconnected from the power supply before any cleaning. This includes removing the stitch plate (using an L-screwdriver), cleaning the feed dog area with a brush, and cleaning the catch and shuttle race cover with a soft cloth. Fabric fluff and threads should be removed regularly.
- Lubrication: Specific points in the catch mechanism should be lubricated with 1-2 drops of sewing machine oil. Only good quality sewing machine oil should be used.
- Storage: When not in use, the power plug should be removed, and the machine should be covered with the provided dust cover. It should be stored in a dry location, inaccessible to children, and protected from excessive dust, dirt, or moisture, especially during extended periods of non-use. The original transport packaging can be useful for storage or if the machine needs to be sent for repair.