Do you have a question about the Silvercrest SCNM 100 A1 and is the answer not in the manual?
Describes the intended audience and purpose of the operating and safety instructions.
Defines hazard symbols (DANGER, WARNING, CAUTION) and their safety implications.
Specifies the allowed uses for the sewing machine and activities it should not be used for.
Details all items provided with the sewing machine, including the machine, cord, and manual.
Lists and identifies all included accessories with labels (a-s) for easy recognition.
Mentions where to find information about reordering or purchasing additional optional accessories.
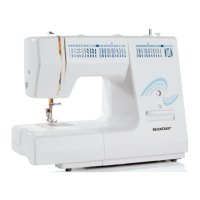
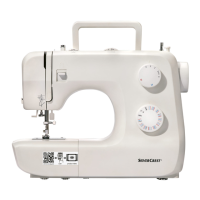
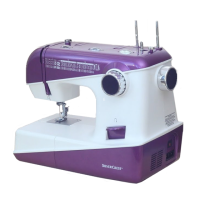
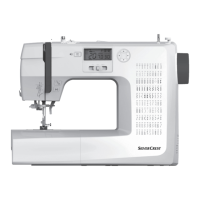
Identifies and labels all external parts of the sewing machine with corresponding numbers.
Explains the various elements displayed on the LCD screen and their meanings.
Describes the function of key buttons like Start/Stop and Reverse sewing/Auto-lock.
Explains how to control the needle's up/down position and switch the buzzer on/off.
Describes cursor and value setting buttons for navigating and adjusting stitch parameters.
Details how to control the sewing speed using the dedicated adjustment slider.
Provides key technical specifications of the sewing machine, such as voltage, power, and dimensions.
Explains the meaning of various graphic symbols used throughout the manual for safety and operation.
Covers fundamental safety rules, handling of documents, and general precautions for machine use.
Details safe operating environment, placement, lighting, and keeping the area clear.
Outlines precautions regarding power cords, voltage, grounding, and avoiding wet conditions.
Advises on user attentiveness, avoiding fatigue, and wearing appropriate clothing.
Covers safe practices for operating, maintaining, and preventing unintentional starts.
Specifies rules for safe maintenance, repairs, and replacement of parts like the LED lamp.
Details safety considerations for various sewing applications and using recommended accessories.
Provides overarching safety rules for all users, including children, and precautions for ventilation.
Emphasizes using only manufacturer-approved accessories for proper functioning and safety.
Recommends checking the power cord and attending introductory courses if unfamiliar with operation.
Lists critical safety points to observe while sewing, such as keeping clear of moving parts.
Advises on safety steps after finishing sewing, including unplugging and before maintenance.
Guides on selecting an appropriate and safe place for the machine, avoiding dust and humidity.
Details how to safely connect the sewing machine to the power supply and turn it on.
Explains how to pull out the snap-in sewing table to utilize the free arm feature.
Step-by-step guide for correctly inserting a new needle into the sewing machine.
Instructions for attaching and detaching the presser foot holder to the machine.
Details how to attach and remove the presser foot using the lever and locking mechanism.
Explains how to insert the edge or quilt guide for specific sewing tasks.
Provides guidance on selecting compatible needles, fabrics, and threads for optimal sewing results.
Explains how to operate the two-step presser foot lever to raise and lower the presser foot.
Details how to raise or lower the feed dog lever for different sewing operations.
Describes how to control the sewing speed using the foot controller or speed adjustment slider.
Step-by-step guide for winding thread onto the bobbin correctly for sewing.
Detailed steps for placing the bobbin into the bobbin case correctly and routing the thread.
Covers setting up the machine, lifting the presser foot, and initial thread guidance.
Explains how to bring the bobbin thread up through the needle plate hole to the top.
Guides on setting and understanding thread tension for straight and decorative stitches.
Displays a comprehensive chart of all available stitch patterns with their corresponding numbers.
Explains how to select a desired stitch pattern using the machine's controls and LCD screen.
Details how to change the length of stitches using the machine's setting buttons.
Explains how to modify the width of stitches using the machine's setting buttons.
Covers setting up the straight stitch, including pattern selection and length adjustment.
Explains how to adjust the needle position for straight stitches by altering stitch width.
Details how to adjust the width for zigzag stitches to achieve desired patterns.
Explains how to change the length for zigzag stitches, including satin stitch.
Guides on preparing the machine and fabric, placing fabric under the presser foot, and starting sewing.
Introduces various techniques for achieving better results in sewing projects.
Provides tips for improving fabric passage when sewing through thick materials.
Covers essential techniques like reverse sewing for securing seams and sewing curves.
Guides on how to sew neat corners by pivoting the fabric with the needle in place.
Offers advice for sewing stretchy materials, recommending basting first.
Provides methods for sewing delicate thin fabrics, suggesting the use of stabilizer material.
Details how to handle heavy fabrics and thick seams, including using a presser foot lock.
Explains the suitability of stretch stitches for creating durable, tear-resistant seams.
Describes using a straight stretch stitch for triple reinforcement of elastic seams.
Covers the zigzag stretch stitch for reinforcing seams on firm fabrics like denim.
Guides on sewing elastic bands to fabric for creating waistbands, cuffs, or other garment features.
Explains how to perform overcasting stitches using the all-purpose presser foot.
Details overcasting using the dedicated overcasting foot for neat edges.
Provides instructions for sewing an invisible blind hem on skirt hems and trouser hems.
Lists different stitch numbers suitable for various fabric types and buttonhole requirements.
Outlines the general process of sewing buttonholes from front to back using the buttonhole foot.
Guides on marking fabric, using the button holder plate, and attaching the buttonhole foot.
Details the steps for sewing buttonholes on non-stretch fabrics, including adjustment of width and density.
Explains how to sew buttonholes on stretch fabrics, including using gimp thread for stability.
Details using the bar tack stitch to reinforce points subject to strain, like pocket corners.
Provides instructions for sewing buttons with 2 or 4 holes using the button sewing foot.
Steps for preparing fabric and zipper for centered insertion, including basting.
Guides on sewing the zipper into the centered opening using the zipper foot.
Steps for preparing fabric for concealed zipper insertion, including folding seam allowances.
Details the process of sewing concealed zippers on one side of the fabric.
Explains how to use the specific concealed zipper foot with its grooves for accurate stitching.
Provides detailed steps for placing and stitching concealed zippers, ensuring proper alignment.
Details how to perform satin stitch sewing for decorative effects using the satin stitch foot.
Explains how to create gathers in fabric by sewing rows of straight stitches and pulling threads.
Guides on applying decorative smocking stitches over parallel baste seams for texture and elasticity.
Explains the process of quilting by joining fabric layers using an edge/quilt guide.
Details how to sew pieces of fabric together with a straight stitch for projects like patchwork.
Guides on sewing fabric pieces together for patchwork, ensuring correct alignment and seams.
Explains how to create and attach applique designs by cutting and sewing fabric shapes.
Details the fagoting stitch, used for decorative open seams, often with thicker thread.
Guides on sewing decorative scallop stitches along fabric edges for embellishment.
Explains how to create a scallop hem by folding, sewing, and trimming the fabric edge.
Instructions for cleaning the exterior of the sewing machine with a damp and dry cloth.
Details how to clean the looper, bobbin case, and feed dog to ensure smooth operation.
Guidelines for storing the sewing machine safely, including using dust covers and dry locations.
Explains different signal tones, their potential causes, and suggested corrections.
Addresses issues related to incorrect threading, thread tension, and needle size.
Covers problems like skipped stitches, needle breaks, and irregular stitch formation.
Details solutions for loud operation, jams, and issues with the feed dog or internal motor.
Instructions for environmentally friendly disposal of electrical devices, avoiding domestic waste.
Guidelines for proper disposal of packaging materials, emphasizing recycling and environmental care.
States the device's compliance with applicable European and national directives.
Outlines the terms, conditions, and scope of the manufacturer's 3-year warranty.
Provides instructions on how to process warranty claims, including required documentation.
Provides contact information, including phone number and email, for the service center.
Lists the manufacturer's address for non-service related inquiries.
| Brand | Silvercrest |
|---|---|
| Model | SCNM 100 A1 |
| Category | Sewing Machine |
| Language | English |