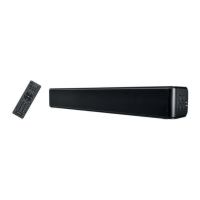
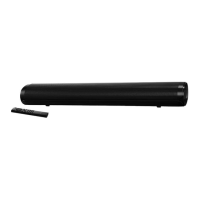
SSB 30 B1
24 - English
8. Before you start
Remove the sound bar and all accessories from the package and remove the plastic films. Verify that you have received all items listed.
8.1 Positioning
The ideal position for your sound bar is centrally under your TV set. You can place the sound bar on a piece of furniture or mount it to the wall.
8.1.1 Wall-mounting (Figure C)
Make sure that you use suitable wall-mounting material.
Tools/mounting material needed (not included in the package):
• Drill (depending on the wall)
• 4 screws and possibly 4 rawlplugs (depending on the wall) to fix to the wall. Please note that the screws must be suitable for the weight of the sound bar. If
the screws and rawlplugs provided are not suitable for your specific circumstances, make sure that the dimensions of the screw head and shaft correspond to
those provided in order to guarantee safe mounting.
• Phillips screwdriver and possibly other screwdrivers, spirit level, pencil
Before drilling, make sure there are no water or gas pipes or electricity cables in the wall. If necessary, get an expert to mount the device on the wall.
• Glue 2 of the device feet supplied to each wall mount. Please see Diagram C for how to position the glue spots.
• Now place the sound bar down onto an even surface onto the device feet glued onto
the wall mounts, so that the two wall mounts are inside the device feet
(6) of the sound bar. In order to achieve maximum stability, ensure the distance between the two wall mounts is as great as possible.
• Now measure the distance between the wall mounts and transfer this to the wall on which you wish to affix the wall mounts.
• Now hold the wall mounts at the height you want
and mark the drill holes.
• Drill 2 holes for each wall mount. If you are using
the rawlplugs supplied, use an 8 mm drill bit.
• Insert the rawlplugs into the drilled holes.
• Secure the wall mounts into place with 2 screws each.
• Connect all the cables you are using to the connections on the sound bar.
• Place the sound bar down onto the wall mounts as you did when measuring the distance.
• Then, check that the sound bar is seated securely on the wall mounts on both sides.
8.2 Fitting the batteries into the remote control
Open the battery compartment (28) on the back of the remote control by sliding the battery compartment cover in the direction of the arrow and removing it.
Insert the batteries (2 AAA-type batteries) with the correct polarity (+ and -). The correct polarity is labelled on the batteries and inside the battery compartment
(28). Re-insert the cover of the battery compartment (28) and slide it in the opposite direction of the arrow until it locks in place. Please also refer to Figure B on
the fold-out cover page.
8.3 Connection options / Operating modes
CAUTION! Make sure that the sound bar and the devices to be connected are switched off when you connect them. Please also read the user
manual for the device to be connected.
The HDMI (ARC) connection only works if all the components connected are ARC-compliant. Use the HDMI (ARC) cable (E) supplied. See also the
user manual for the connected device.
The cable used for playback must not exceed a length of 3 metres.
The SSB 30 B1 sound bar lets you play sound and/or music from various sources:
Playback can be controlled using the buttons on the device or the remote control.
You can use the Source button (5) or the remote control to select the operating mode you want. The operating modes and corresponding display informatio
n
can be found in the table below:
Operating mode /
Source
Input Use Display
HDMI ARC HDMI(ARC) (9)
Connection via HDMI (ARC) cable to the HDMI (ARC) jack, e.g. TV
or DVD player
Hd
USB USB (10)
Connection of USB media, e.g. USB stick to play back audio files
(audio formats supported: MP3 and WAV)
US
AUX AUX (7)
Connection via adapter cable (stereo jack/Cinch), e.g. DVD player
or satellite receiver
AU
BLUETOOTH
®
---- Via wireless connection, e.g. from smartphone
bt
OPTICAL OPTICAL (8)
Connection via Toslink cable, e.g. TV or digital receiver
OP


 To Next Page
 Loading...