5
GB
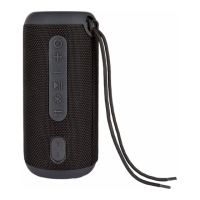
4. Items supplied
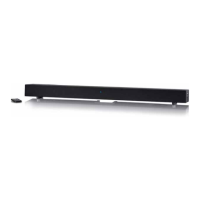
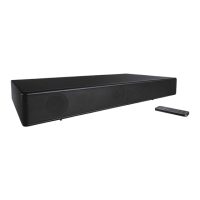
1 soundbar
1power unit|11
1 remote control
1 CR2025 3 V battery (inserted)
1 stereo cinch cable|12
2x4 screws|29 (25 mm / 50 mm)
4 rawlplugs|30
2 wall brackets|13
1 drilling template|
1 copy of the user instructions
• Remove all packing material.
• Check that the device is undamaged.
If the delivery is incomplete or defective, please contact the
responsible service centre of the manufacturer (see “War-
ranty of the HOYER Handel GmbH” on page 10).
Please observe the illustrations on the fold-out page.
5. Before using for the first
time
5.1 Remote control
Initial use
• Remove the transport lock from the battery compart-
ment and remote control.
Changing the battery
DANGER OF EXPLOSION! If the battery is not
correctly replaced. Replace only with the same or
an equivalent type.
1. FIGURE A: remove the battery mount by unlocking it
and pulling it in the direction of the arrow.
2. Replace the old battery with a new one.
WARNING! When inserting the battery, note the
polarity marking on the battery mount.
3. Reinsert the battery mount.
5.2 Setting up / Wall mounting
NOTE: if you connect the device to a television set, place
the device as centrally as possible below the set.
Setting up
1. Place the device on a level surface.
2. Connect the power unit|11 to the device.
Wall mounting
WARNING! Risk of material damage!
~ Please ensure the following when mounting on a wall:
- The fixing material must be matched to the proper-
ties of the wall. If necessary, use fixing material other
than that supplied.
- Make sure that in the installation location there are
no pipes or cables in the wall (e.g. electricity, water,
gas).
- If necessary, have the wall mounting carried out by
an expert.
~ In connection with the wall mounting, use HDMI right
angle plugs so the plugs cannot be damaged by kinks.
1. FIGURE B: drill 2 holes per wall bracket 40 cm apart.
If necessary, use the enclosed drilling template.
2. For the enclosed rawlplugs, use a drill with a diameter
of 5 mm.
3. Insert the rawlplugs|30 into the drill holes.
4. Fasten the wall brackets|13 firmly to the wall using the
screws|29.
5. Insert all of the cables used into the connections (see
“Overview - Connections” on page 6).
6. Connect the power unit|11 to the device.
7. Hook the device into the wall brackets|13. Both wall
brackets|13 must engage safely into the holder on the
rear of the device.
BB72=B6RXQGEDUB%ERRN6HLWH0LWWZRFK$SULO