GB
│
IE
│
43 ■
SSJBE 300 A1
1) Place the sieve tray onto the appliance base so that the three catches
on the appliance base fit into the three slots on the underside of the sieve
tray .
NOTE
► Make sure that the black rubber plug on the bottom of the sieve tray
closes the rear end of the outlet for fruit pulp and vegetable mash and
is inserted. This should only be removed for cleaning!
■ If you want to juice fruit/vegetables:
– Place the removable sieve frame
into the sieve tray . Turn the sieve
frame back and forth to see whether the gear on the inside at the
bottom of the sieve tray turns.
– Place the sieve into the removable sieve frame . The curvature at
the upper edge of the sieve must lie in the corresponding curvature
on the sieve tray .
■ If you want to make sorbets:
– Place the sorbet attachment
into the sieve tray . The curvature at
the upper edge of the sorbet attachment
must lie in the correspond-
ing curvature on the sieve tray . The outlet of the sorbet attachment
is positioned in front of the outlet of the sieve tray
.
2) Place the transport screw
onto the drive shaft , turn it a little and press
it down at the same time so that it clicks into place. Ensure that it is firmly
seated before continuing with the assembly.
3) Place the lid
onto the sieve tray so that the marking on the lid
points to the marking on the sieve tray .
4) Turn the lid
clockwise until the marking points towards the marking
on the sieve tray and clicks firmly into place.
NOTE
►
This appliance has a safety device. The appliance can only be operated
when the lid
is correctly fitted.
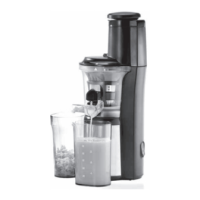
5) Push the container for fruit pulp and vegetable mash
under the outlet for
fruit pulp and vegetable mash (see fig. A).
NOTE
► When using the sorbet attachment
, the container for fruit pulp and
vegetable mash is not required.
6) Push the juice container under the juice outlet (see fig. A).
7) Open the stopper
so that the juice can flow into the juice container .
 Loading...