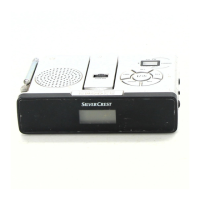
SilverCrest SURQ 4 A1
20 - English
Please note that when using the radio as an alarm, the last frequency set is always played.
• In standby mode, press and hold the [ ] button (5) or [ ] button (6) for approx. 2
seconds in order to adjust the alarm time. The hours of alarm time 1 (33) or alarm time 2 (32)
flash on the display (1).
• You can now use the [ ] (3) and [ ] (9) buttons to adjust the hours of the alarm time. To adopt
the setting, briefly press the [ ] button (11) or the [ ] button (5) or the button
[ ] (6). The minutes of alarm time 1 (33) or alarm time 2 (32) flash on the display (1).
• You can now set the minutes for the alarm time you want using the [ ] (3) and [ ] (9) buttons.
To adopt the setting, briefly press the [ ] button (11) or the [ ] button (5) or the button
[ ] (6). The day of the week of alarm time 1 (33) or alarm time 2 (32) flashes on the display
(1).
• You can now use the [ ] (3) and [ ] (9) buttons to adjust the days on which the alarm should
sound. The following settings are available.
1T (once)
1-7 (Monday through Sunday)
1-5 (Monday through Friday)
6-7 (Saturday and Sunday)
To adopt the setting, briefly press the [ ] button (11) or the [ ] button (5) or the
button [ ] (6). The alarm type of alarm time 1 (33) or alarm time 2 (32) flashes on the
display (1).
• You can now set the type of alarm you want using the [ ] (3) and [ ] (9) buttons. The following
settings are available.
BB (Alarm sound)
DAB (DAB radio)
FM (FM radio)
To adopt the setting, briefly press the [ ] button (11) or the [ ] button (5) or the button
[ ] (6). The volume of alarm time 1 (33) or alarm time 2 (32) flashes on the display (1).
• You can now set the alarm volume you want using the [ ] (3) and [ ] (9) buttons. You can set
it from level “08" (minimum volume) to level “32" (maximum level). To adopt the setting, briefly
press the [ ] button (11) or the [ ] button (5) or the button [ ] (6).
The alarm clock is now programmed and activated. The alarm times set are shown on the display (1)
via the Alarm time 1 (33) and Alarm time 2 (32) indicators.
If the alarm is enabled, the display (1) indicates alarm 1 active (34) or alarm 2 active (31), also
showing the alarm type selected, either [ ] alarm sound or [ ] radio playback.
You can activate or deactivate a pre-set alarm simply by pressing the [ ] button (5) or the
[ ] button (6) one or more times. The alarm type selected is shown in the display:
 Loading...