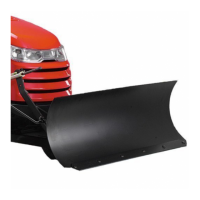
6
Puck Installation
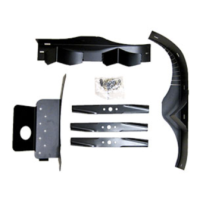
Figure 6. Install Pin and Bracket
A. Lower Chute
B. Locknut, 1/4-20
C. Puck, Metal
D. Capscrews, Thin Head, 5/16-18 x 3/4
E. Locknuts, 5/16-18
F. Bracket
A
C
F
G
D
D
E
Component Installation
BRACKET AND PIN INSTALLATION ON LOWER CHUTE
1. Secure the puck (C, Figure 6) to lower chute (A)
using 5/16-18 x 3/4 capscrew (D) and 5/16-18 locknut
(E).
3. Install bracket (F) to lower chute (A) using 5/16-18 x
3/4 capscrews (D) and 5/16-18 locknuts (E).
Figure 7. Install Latch & Hinge to Cover Assembly
A. Cover Assembly
B. Latch
C. Locknuts, ESNA, #10-24
D. Screws, #10-24 x 5/8
E. Hinge
F. Locknuts, 1/4-20
G. Screw, Slotted, 1/4-20 x 1/2
A
D
C
B
F
E
F
G
INSTALL LATCH AND HINGE TO COVER ASSEMBLY
1. Install the latch (B, Figure 7) to the cover assembly
(A) securing with #10-24 x 5/8 screws (D) and #10-24
locknuts (C) as shown.
2. Install the hinge (E) to cover assembly securing with
1/4-20 x 1/2 screws (G) and 1/4-20 locknuts (F).