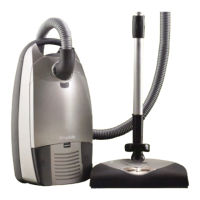
II� Full Size Canister Troubleshooting Guide07�03�07
9
D� Step 1.
1� Swap original power nozzle, wand and hose assembly with those of a functional test canister - testing one original component
at a time�
2� If all original components are working properly with the test canister go to Step 2�
3� Replace defective component as necessary and re-test�
4� If the power nozzle works re-assemble the canister and re-test�
5� If the power nozzle does NOT work continue to Step 2.
D� Step 2.
1� Dis-assemble cover� (See page 5, A. Cover Dis-assembly Instructions Steps 1-3)
2� Make sure both the black and white two wire connectors and wires are secure in their sockets on the PC connector board�
(Connectors are located under the foot pedal switch cover�) (See Figure A. Main Parts Assembly, )�
3� Re-test the canister�
4� If the power nozzle works re-assemble the canister and re-test�
5� If the power nozzle does NOT work continue to Step 3.
D� Step 3.
1. Remove top cover held in place by six (6) screws located in deep pockets (one under HEPA lter, one under switch pedal, and
four under bag lid�)
2� Lift off top cover in order to see PC board�
3� Verify all electrical connections are secure, including hose�
4� Ensure that the eight (8) wires are secure in the 9-pin connector�
5� Check for blinking LED light at the lower side of the main PC board next to the cord reel�
6� If the LED is blinking slowly (2 second intervals), re-test the canister�
•If power nozzle works re-assemble�
•If power nozzle still does not work continue to Step 4.
7� If the LED is blinking fast (0�5 second intervals), the PC board is not communicating with the hose - lights in the handle should
not be “ON” continue to Step 4.
D� Step 4.
1� Replace main PC board with known working PC board�
2� Re-test canister�
3� If the power nozzle works, re-assemble the canister and re-test�
4� If the power nozzle does NOT work, continue to Step 5.
D� Step 5.
1� Remove cord reel pedal� (Do not lose pedal spring)
2� Remove 8 (eight) screws from the rear compartment bracket and remove the bracket from the top cover�
3� Replace PC connection board with known working PC connection board and re-test the canister�
4� If the power nozzle works, re-assemble the canister and re-test�
5� If the power nozzle does NOT work, continue to Step 6.
D� Step 6.
1� Remove dust cover assembly� (See page 5, A. Cover Dis-assembly Instructions�)
2� Inspect wiring and connectors between PC connection board and the hose cuff socket for damage or improper assembly�
3� Replace the PC connection board/ wiring harness and re-test�
D. Canister Runs - Power Nozzle Does Not Run
 Loading...
