buttons
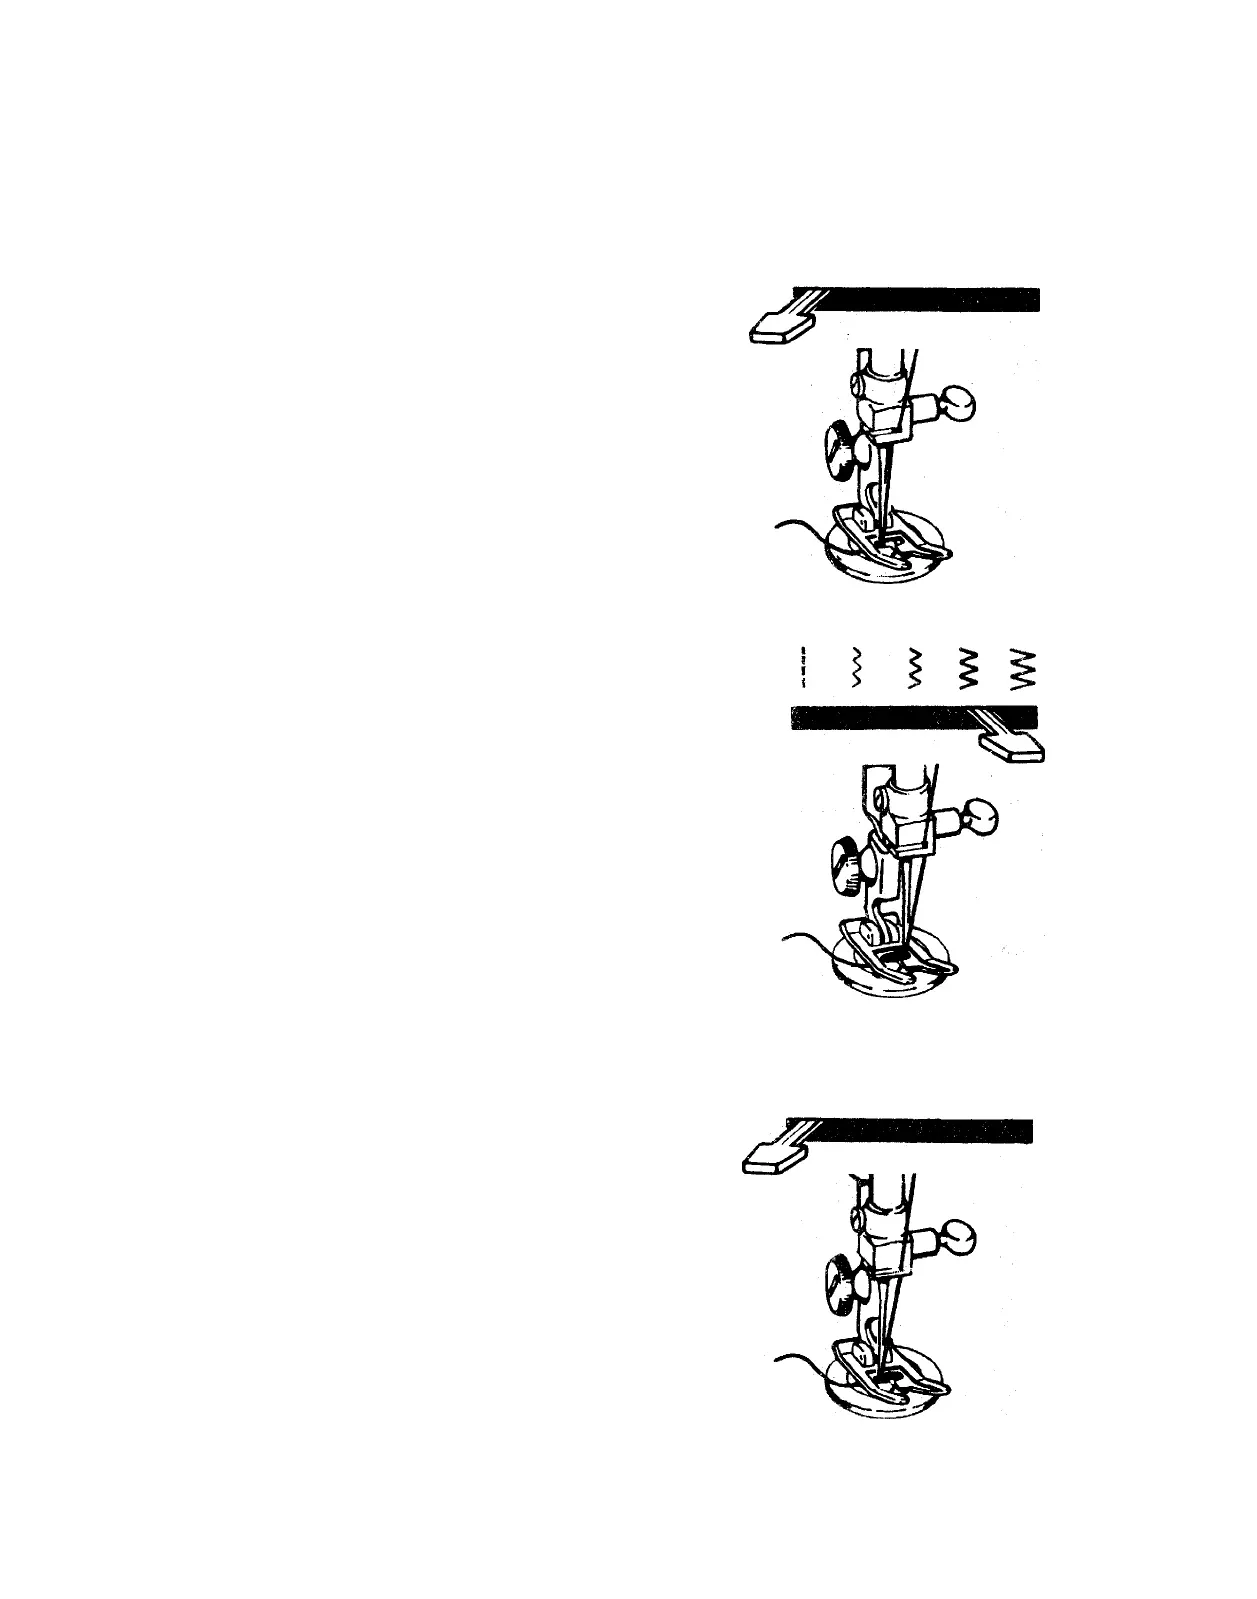
Needl-e Position:
(left)
• General Purpose Presser Foot
• Feed Cover Plate
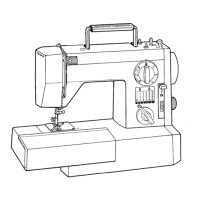
Flat buttons can be sewn on quickly and
easily using the plain zig-zag stitch. The
space between the holes in the button
determines stitch width settings. For
buttons vyith standard hole spacing, use
settings I and | as shown. For buttons
with unusual hole spacing, use setting j
and increase or decrease the width ( |')
as necessary.
1. Attach feed-cover needle plate (see
page 7).
2. Set stitch width at i and needle
position at (left). Position button
under foot and lower needle into
center of left hole by turning hand
wheel toward you. Lower foot. Turn
hand wheel toward you until needle
rises out of button and is just above
the foot
3. Set stitch width at medium-wide zig
zag ( I ) setting. Check stitch width
by turning hand wheel slowly toward
you; the needle should enter the right
hole of the button. Take six or more
zig-zag stitches to attach button. End
on leftside.
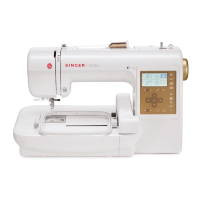
4. To fasten stitching, return to stitch
width ! and take three or four stitches.
Remove feed-cover plate from the
general-purpose needle plate when
work is completed.
27
Instrukcje obsługi maszyn do szycia firm Polskich jak i zagranicznych np. Singer Toyota Pfaff Gritzner Łucznik Arka
maszynykrawieckie.shophurt.pl