^PffONlNG
THE
LOOPER
AN
EQUAL
DISTANCE
(FRONT
AND
REAR)
FROMNEEDLE
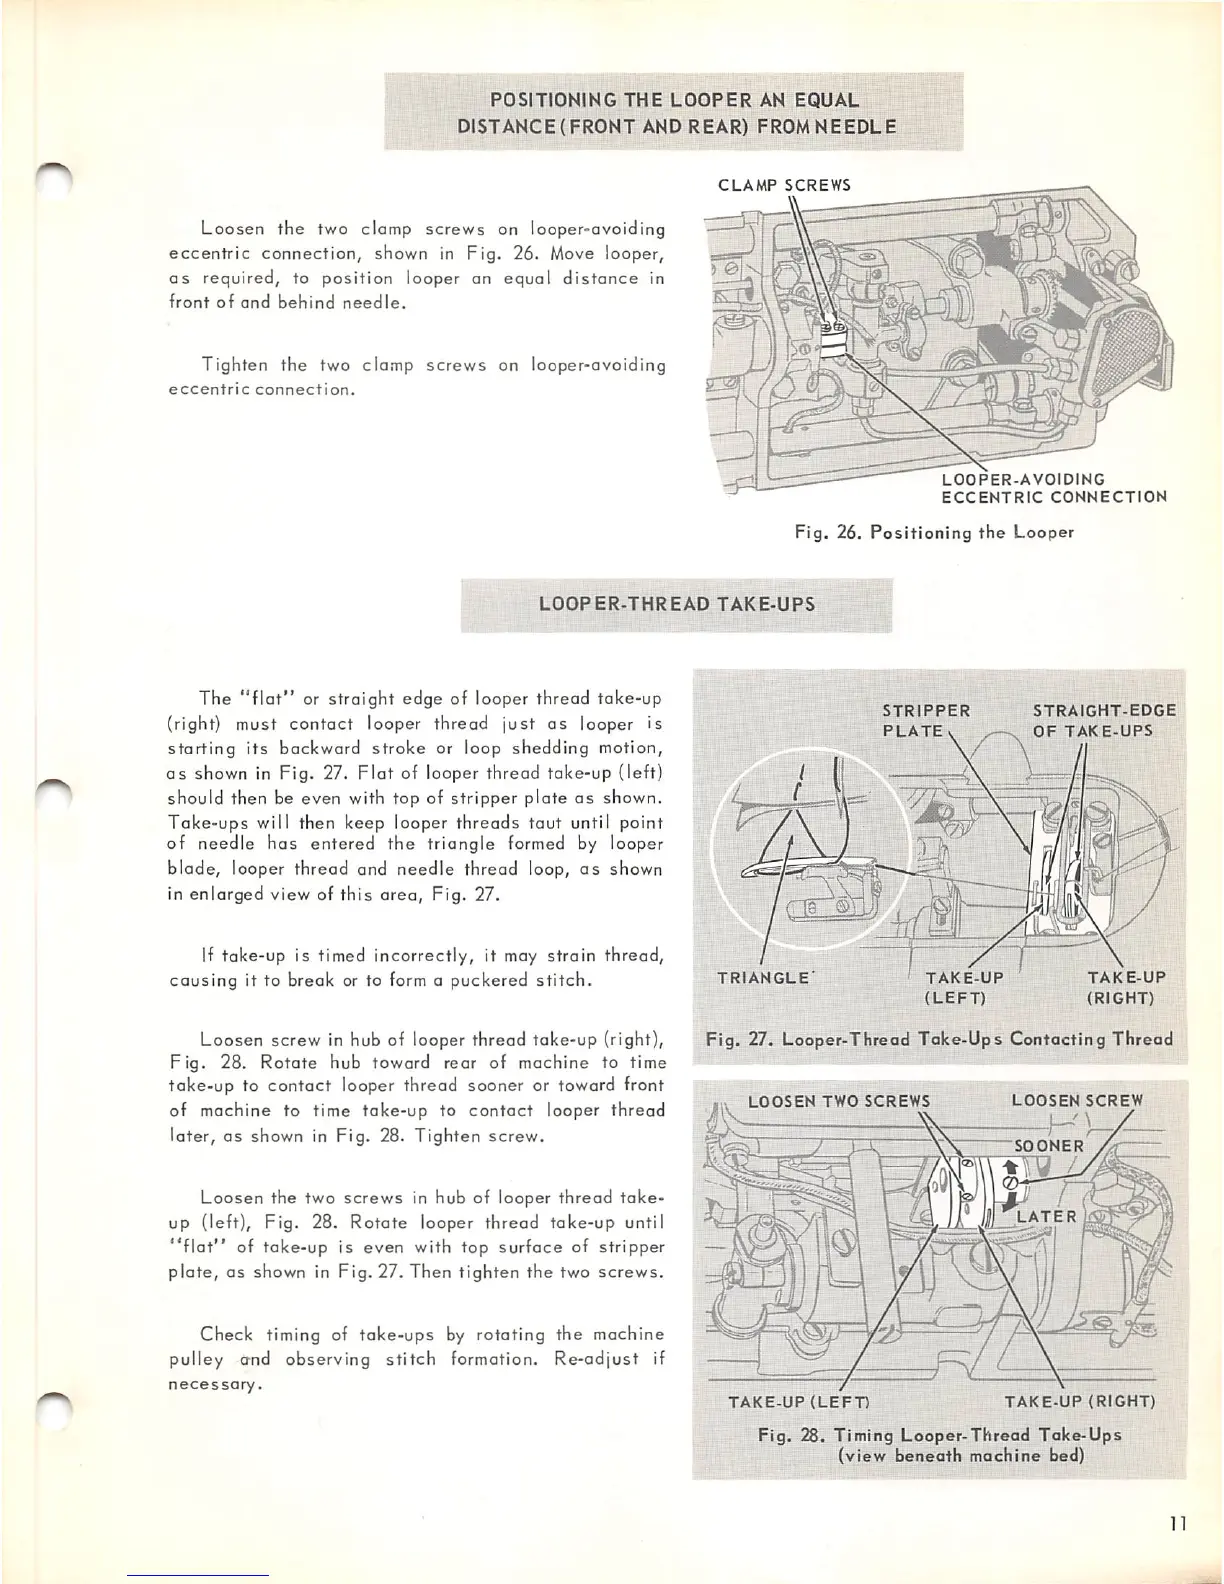
Loosen
the
two clamp
screws
on looper-avoiding
eccentric
connection, shown in Fig. 26. Move looper,
as
required, to
position
looper an
equal
distance
in
front
of
and
behind
needle.
Tighten
the
two clamp
screws
on looper-ovoiding
eccentric
connection.
CLAMP
SCREWS
)
©K
LOOPER.AVOIDING
ECCENTRIC
CONNECTION
Fig.
26.
Positioning
the
Looper
LODPER-THREAD
TAKE-UPS
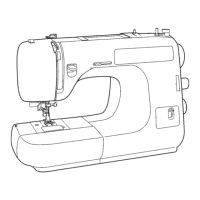
The
"flat"
or
straight
edge of looper thread take-up
(right) must
contact
looper thread
just
as
looper is
starting
its
backward
stroke
or loop shedding motion,
as
shown in Fig. 27.
Flat
of looper thread take-up (left)
should then be
even
with top of
stripper
plate
as
shown.
Take-ups
will then keep looper
threads
taut
until point
of
needle
has
entered
the
triangle
formed by looper
blade, looper thread and
needle
thread loop,
as
shown
in enlarged view of this area. Fig. 27.
If take-up is timed incorrectly, it may strain thread,
causing
it to
break
or to form a
puckered
stitch.
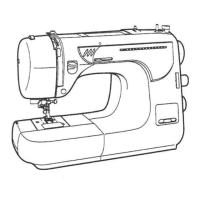
Loosen screw in hub of looper thread take-up (right),
Fig.
28.
Rotate
hub toward rear of machine to time
take-up
to
contact
looper thread sooner or toward front
of machine to time take-up to
contact
looper
thread
later,
as shown in Fig. 28. Tighten screw.
Loosen
the
two
screws
in hub of looper
thread
take-
up (left), Fig. 28.
Rotate
looper thread take-up until
"flat"
of take-up Is even with top
surface
of stripper
plate,
as shown in
Fig.
27. Then
tighten
the
two
screws.
Check timing of take-ups by rotating the machine
pulley and observing
stitch
formation. Re-odjust if
necessary.
TRIANGLE
STRIPPER
STRAIGHT-EDGE
PLATE
V
OF
TAKE-UPS
TAKE-UP
(LEFT)
TAKE-UP
(RIGHT)
Fig. 27. Looper-Threod
Take-Ups
Contacting
Thread
LOOSEN
TWO
SCREWS
TAKE-UP
(LEFT)
LOOSEN
SCREW
SOONER
/
LATER
tX)
TAKE-UP
(RIGHT)
Fig.
28. Timing
Looper-Thread
Take-Ups
(view
beneath
machine
bed)
11