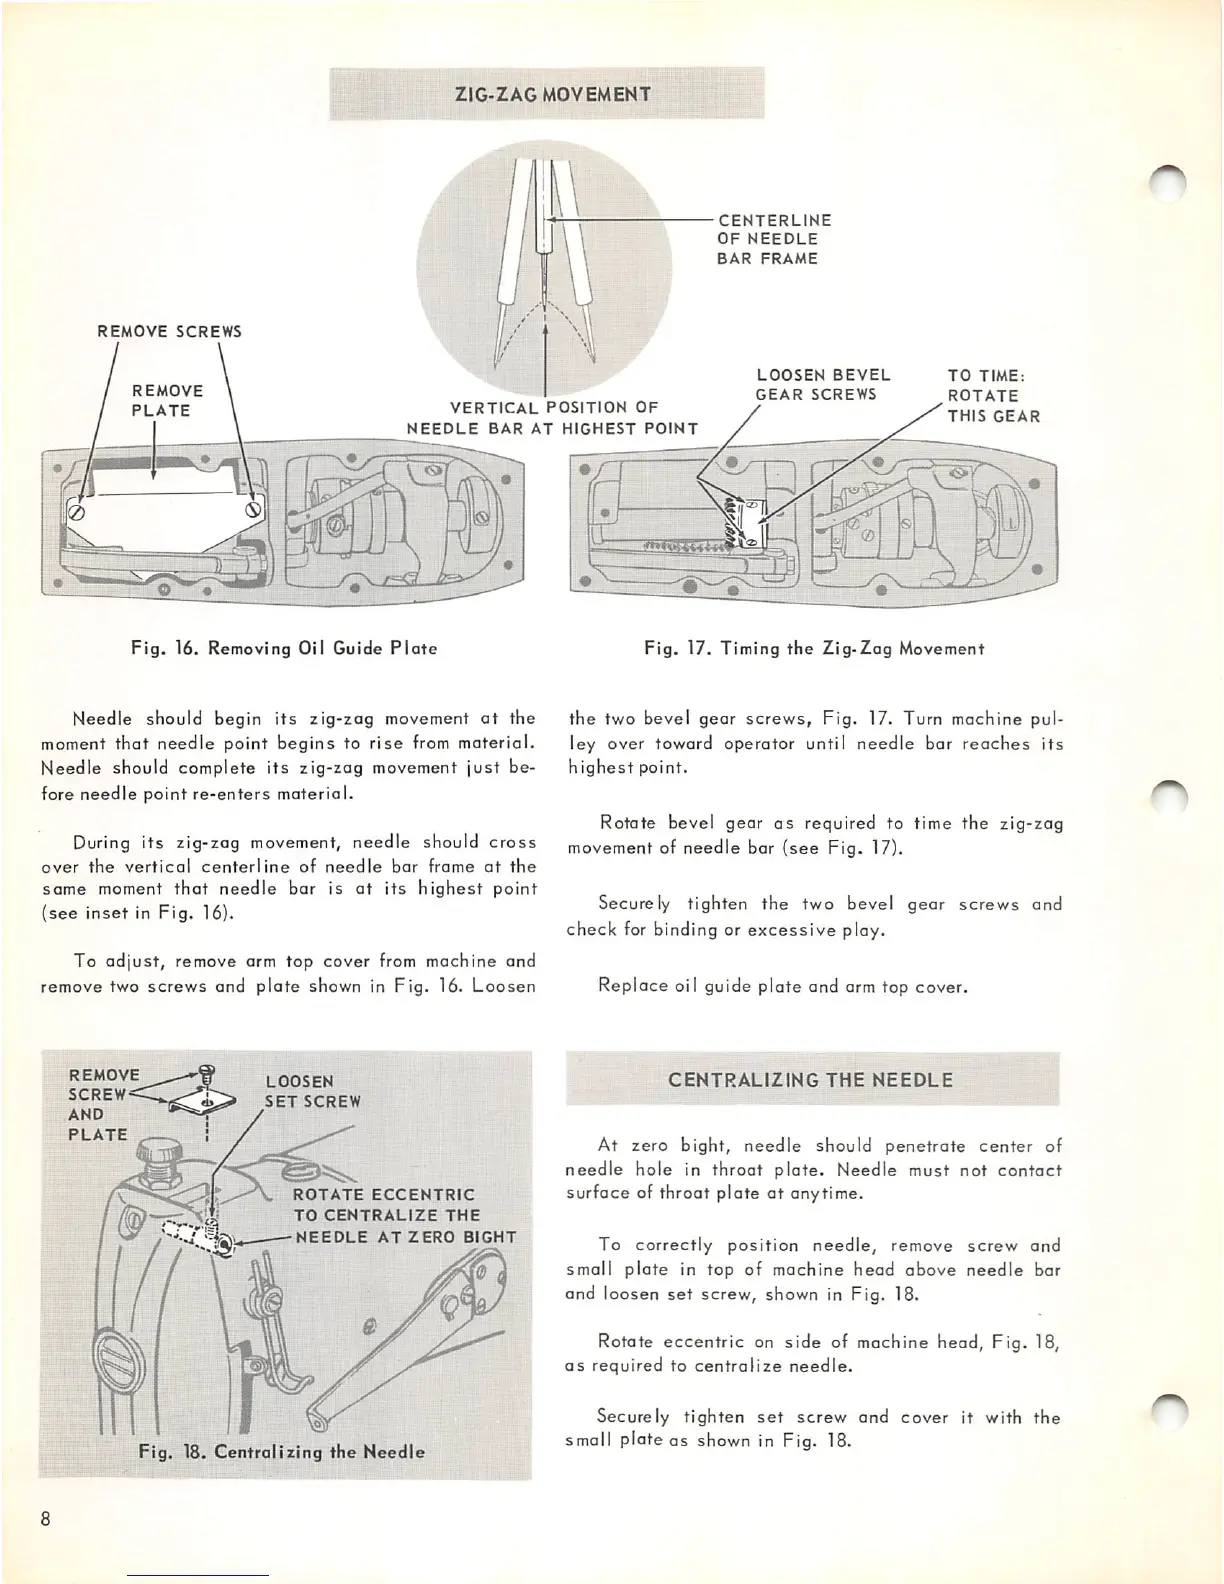
ZIG-ZAG
MOVEMENT
REMOVE
SCREWS
REMOVE
PLATE
//
CENTERLINE
OF
NEEDLE
BAR
FRAME
VERTICAL
POSITION
OF
NEEDLE
BAR
AT
HIGHEST
POINT
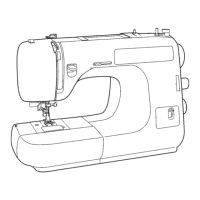
LOOSEN
BEVEL
GEAR
SCREWS
TO
TIME:
ROTATE
THIS
GEAR
Fig.
16. Removing Oil Guide
Plate
Needle should begin
its
zig-zag movement
at
the
moment
that
needle
point
begins
to
rise
from material.
Needle should complete
its
zig-zag movement
just
be
fore
needle
point
re-enters
material.
During
its
zig-zag movement,
needle
should
cross
over
the
vertical
centerline
of
needle
bar
frame
at
the
same
moment
that
needle
bar
is
at
its
highest
point
{see
inset
in
Fig.
16).
To
adjust,
remove arm top cover from machine and
remove two
screws
and
plate
shown in
Fig.
16.
Loosen
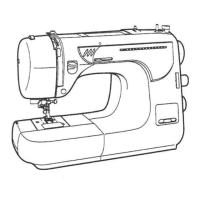
REMOVE
SCREW
AND
PLATE
LOOSEN
SET
SCREW
ROTATE
ECCENTRIC
TO
CENTRALIZE
THE
NEEDLE
AT
ZERO
BIGHT
Fig. 18.
Centralizing
the
Needle
Fig,
17. Timing
the
Zig-Zag
Movement
the
two bevel
gear
screws,
Fig. 17. Turn machine pul
ley over toward operator until
needle
bar
reaches
its
highest
point.
Rotate bevel gear
as
required to time the zig-zag
movement of
needle
bar
(see
Fig. 17).
Securely tighten
the
two bevel
gear
screws
and
check
for binding or
excessive
play.
Replace oil guide plate and arm top cover.
CENTRALIZING
THE
NEEDLE
At zero
bight,
needle
should
penetrate
center
of
needle
hole
in
throat
plate.
Needle
must
not
contact
surface
of throat
plate
at
anytime.
To
correctly
position
needle,
remove
screw
and
small
plate
in top of machine
head
above
needle
bar
and loosen
set
screw, shown in Fig. 18.
Rotate eccentric on side of machine head, Fig. 18,
as
required
to
centralize
needle.
Securely tighten
set
screw
and
cover
it with
the
small
platens
shown in Fig. 18.
n