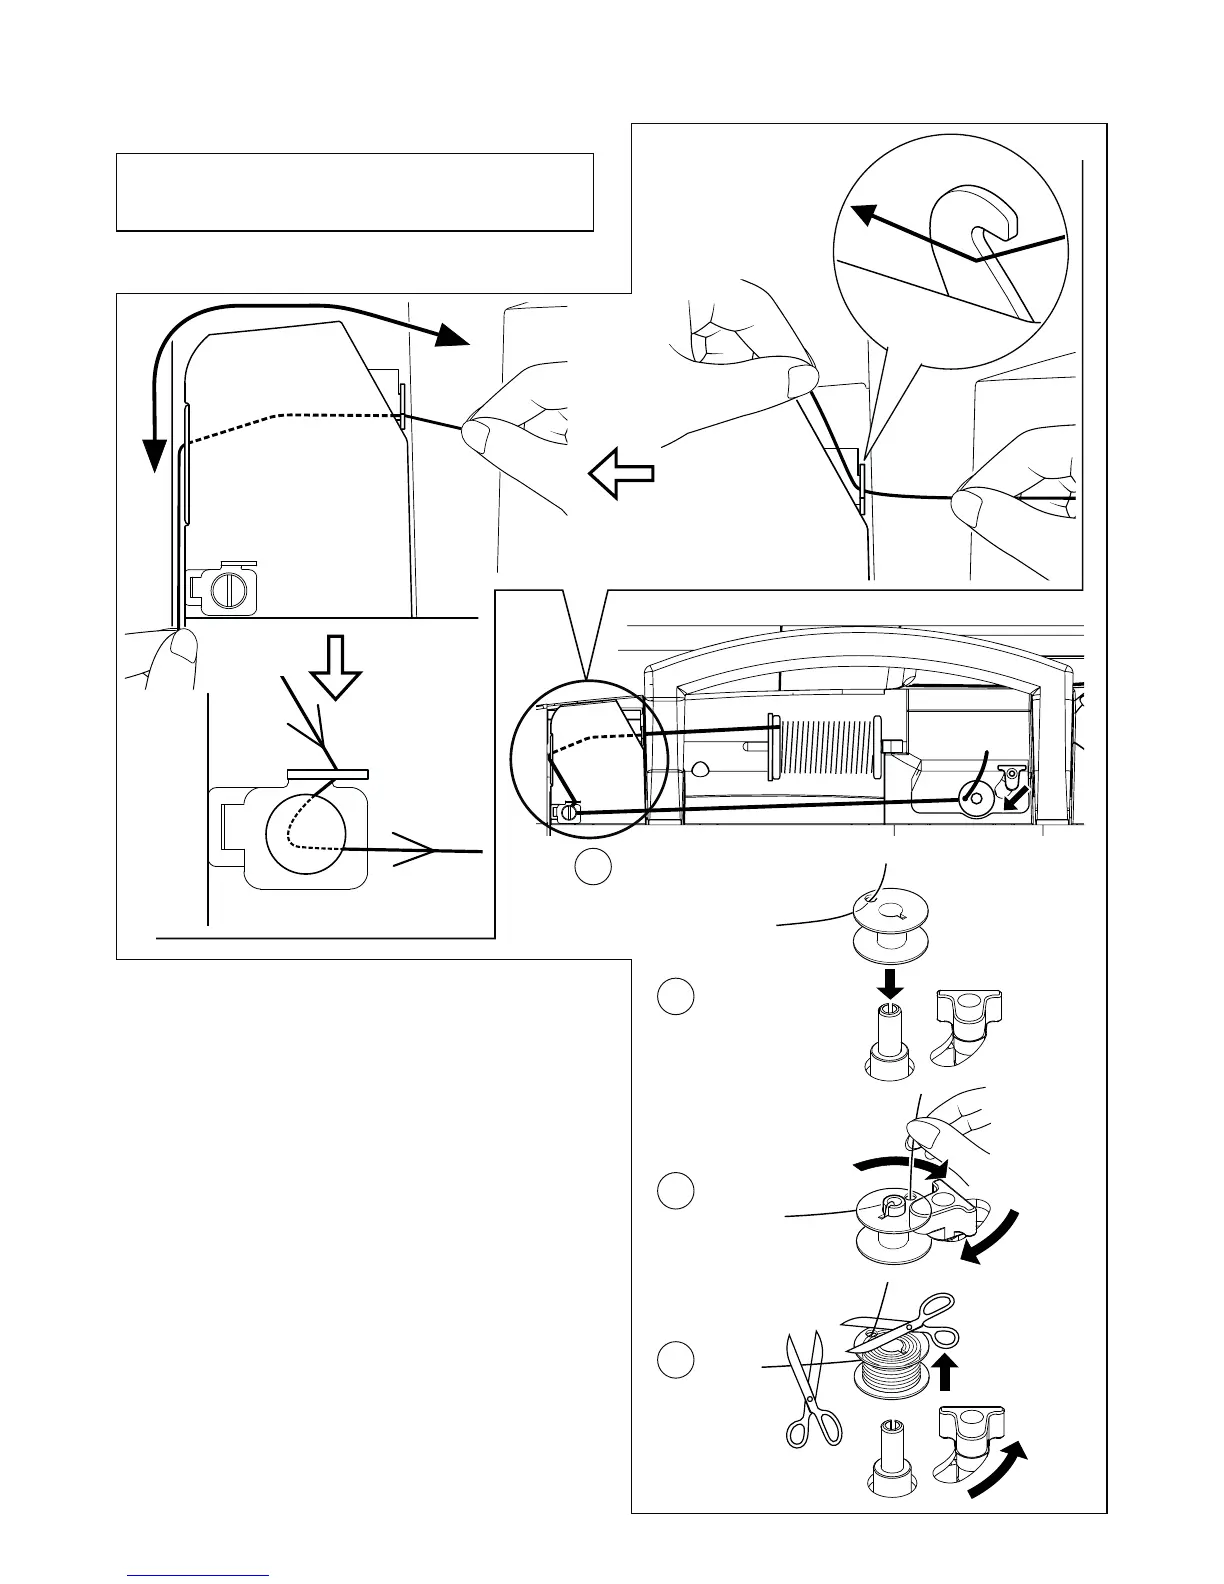
EasyManuals Logo

Singer 8500Q User Manual

Singer 8500Q
92 pages
To Next Page IconTo Next Page
To Previous Page IconTo Previous Page
Page #14 background imageLoading...
Page #14 background image
12
WINDING BOBBIN
1. Place a spool of thread on the spool pin, and secure it with
the spool pin cap. Pull the thread out from the spool and
place it through thread guides as shown in illustration.
2. Put end of thread through the hole in bobbin as shown.
Place bobbin onto the bobbin winder spindle as far as it
can go.
3. Holding onto the end of the thread, push the bobbin winder
latch against the bobbin until it clicks and bobbin starts to
rotate.
4. Bobbin will disengage automatically and the winding
mechanism will stop when the bobbin is full. Remove the
wound bobbin and cut the thread tail.
Be sure to use only SINGER Class 15J bobbins
(not standard Class 15 bobbins) in this
machine.
1
2
3
4

Table of Contents

Questions and Answers:

Question and Answer IconNeed help?

Do you have a question about the Singer 8500Q and is the answer not in the manual?

Singer 8500Q Specifications

General IconGeneral
TypeElectronic
Built-In Stitches215
Needle Positions13
Maximum Stitch Width7mm
Maximum Stitch Length5mm
LCD ScreenYes
Automatic Needle ThreaderYes
Drop-in BobbinYes
Drop FeedYes
Speed ControlYes
Extension TableYes
Speed850 stitches per minute

Related product manuals