14
AB
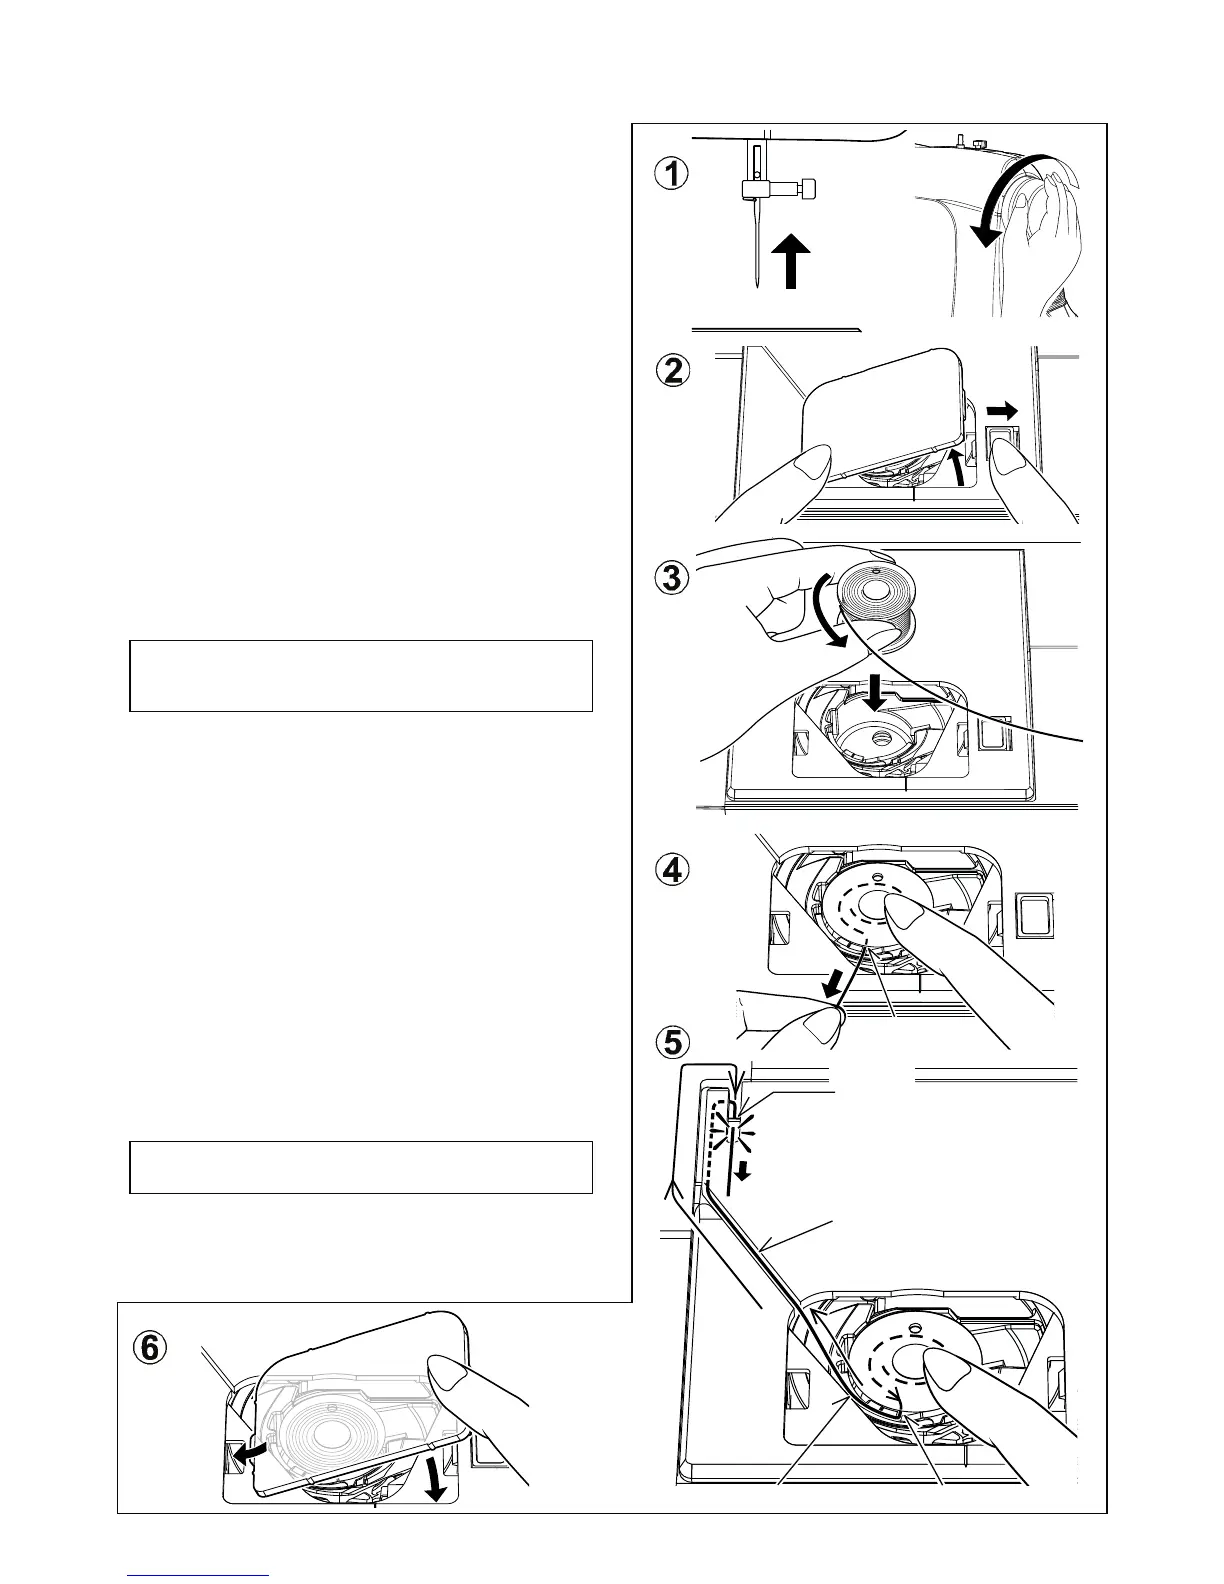
THREADING THE BOBBIN THREAD
1. Raise the needle to its highest position by rotating the hand
wheel counter clockwise (toward you).
2. Remove the bobbin cover plate by pushing the release
EXWWRQWRWKHULJKW%REELQFRYHUZLOOSRSXSVXI¿FLHQWO\WR
allow you to remove the cover.
3. Insert the bobbin making sure the bobbin rotates counter-
clockwise when you pull the thread.
4. Pull thread through the slot (A) and then to the left.
5. With a finger held gently on top of the bobbin, pull the
thread until it stops in the slot (B). Then pull the thread
along the groove on the needle plate until it is snipped with
cutter on the top left.
6. Replace the clear bobbin cover plate onto the needle plate.
NOTE: Sewing can be started without having to pull
up the bobbin thread.
NOTE: This is a very important step. The bobbin
must rotate counterclockwise when thread is pulled.
A
Groove
Cannelure
Surco
Cutter
Coupe Fil
Cortador