Do you have a question about the Singer 9133 and is the answer not in the manual?
Information about the polarized plug for North American territories to prevent electric shock.
Essential safety rules for appliance use, child supervision, and maintenance.
Critical safety notices detailing electrical hazards, fire risks, and personal injury prevention.
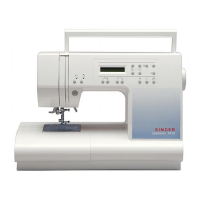
Illustration showing the main components of the sewing machine with numbered parts.
Detailed list and explanation of the sewing machine's principal parts and their functions.
Visual guide to common sewing machine accessories, including their names and uses.
Step-by-step instructions for connecting the sewing machine to the power supply and outlet.
Instructions on how to turn the machine on/off and operate it using the speed controller.
Guidance on selecting and properly inserting sewing machine needles for optimal results.
Explanation of how to convert the machine to free arm sewing for hard-to-reach areas.
Instructions for safely removing and attaching various presser feet to the machine.
Procedure for replacing presser feet that have built-in shanks.
How to attach the feed cover, used for button sewing, free motion, and darning.
Detailed steps for winding thread onto a bobbin before threading the machine.
Instructions for using the machine's easy threading system to avoid sewing problems.
Steps for guiding thread through the machine's channels and tension discs.
How to test for proper threading by checking thread tension difference.
Step-by-step guide to inserting the bobbin and threading the bobbin case correctly.
How to bring the bobbin thread up to the needle area to form a loop.
How to select stitch patterns using the pattern selector dial on the machine.
Instructions for attaching the optional straight stitch needle plate and presser foot.
How to adjust the stitch length lever for different fabric types and stitch densities.
Method for adjusting thread tension to achieve balanced stitches on fabric.
Guidance on sewing seams accurately, including basting and placing fabric.
How to use the reverse lever to reinforce seams at the beginning or end.
Tips for keeping seams straight using needle plate guidelines and crosslines.
Technique for turning square corners using crosslines on the slide plate.
Advice for sewing curved seams, including basting and using short stitches.
Instructions for attaching and using the optional seam guide for consistent seam allowances.
Steps for installing a zipper using the appropriate zipper foot.
How to adjust the stitch width lever to control pattern width.
How to adjust stitch length for different stitch patterns and densities.
Note on adjusting thread tension for special stitch patterns.
How to adjust stitch balance to correct stitch appearance for special patterns.
Chart illustrating the capabilities and graphics of various built-in stitch patterns.
Instructions for using the zig-zag stitch for seams, appliquéing, monogramming, and decorating.
Using the zig-zag stitch to finish raw fabric edges to prevent unraveling.
Instructions for sewing hems and seams, or attaching lace and elastic with blindstitch.
Step-by-step guide to performing a blindstitch hem using the machine.
How to use the adjustable blindhem foot for creating neat hems.
Instructions for attaching and using the even feed foot for difficult fabrics.
How to use the overedge foot for finishing stretch fabric edges and preventing fraying.
How to use the rolled hemmer foot for finishing edges of skirts, blouses, and handkerchiefs.
Using the multi-stitch zig-zag for mending, overcasting, joining, and reinforcing.
Applications for stretch seams and decorative stitching using M-Stitch and Sandcastle Stitch.
Ideal stitches for borders, edges, smocking, and embroidery.
Decorative stitches for seams, pleats, pockets, and border designs.
Used for appliquéing, patchwork, and decorative hems on linens.
Stitching and finishing seams, hems, and facings requiring stretch in one step.
Heavy-duty stretch stitch for seams, and topstitching.
Open, lacy stitches used for joining fabrics, embroidery, and strengthening seams.
Used for smocking, mending, and sewing stretch fabrics.
Stitches for finishing seams, edging, and appliquéing.
Steps for preparing the fabric and machine for buttonhole creation.
Detailed steps for creating a four-step buttonhole using the machine.
How to adjust the stitch balance ring to ensure equal buttonhole sides.
Instructions for sewing flat buttons using the zig-zag stitch.
How to attach and use the optional button sewing foot.
Creating satin-like finishes with closely spaced zig-zag stitches for monograms and appliques.
Techniques for free motion embroidery using the machine without a presser foot.
Creating simple monograms using the plain zig-zag stitch.
Attaching motifs to fabric by stitching along the outline for an overedged finish.
Step-by-step guide to safely remove and reinsert the bobbin case.
Instructions for safely removing and replacing the sewing machine's light bulb.
Routine maintenance procedures for cleaning the sewing machine using a lint brush and cloth.
Steps to take before storing the sewing machine safely and properly.
A guide to identify and correct common sewing difficulties such as needle issues or skipped stitches.
A practical guide for selecting appropriate needles and threads based on fabric type.
Descriptions and uses of various optional accessories available for the sewing machine.
| Sewing Speed | 750 stitches per minute |
|---|---|
| Voltage | 110V |
| LCD Screen | Yes |
| Embroidery area | No |
| Warranty | 25-Year Limited Warranty |