Do you have a question about the Singer 9985 and is the answer not in the manual?
Warning about electrical hazards and unattended operation.
Comprehensive safety precautions for operating the sewing machine.
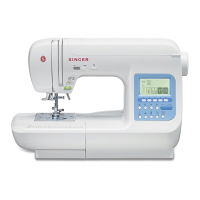
Introduction to the sewing machine and manual.
Information on radio and television interference suppression.
Instructions for covering the machine when not in use.
Steps for detaching the extension table from the machine.
Steps for opening the accessory storage drawer.
Warning to turn off power before changing the presser foot.
Step-by-step guide on how to replace the presser foot.
Instructions for removing the presser foot holder.
Guide matching fabric types with appropriate thread and needle sizes.
Safety warning regarding needle removal and power.
Warning about electric shock hazards during connection.
Safety warnings for connecting and operating the machine.
Information on polarized plugs for specific regions.
How to connect and use the foot controller for sewing.
Operation of the start/stop button and monitor lamp indicators.
How to use the reverse stitch button for reinforcing seams.
Functionality of the needle position and slow speed button.
How to adjust sewing speed using the control lever.
Operation of the lever to raise and lower the presser foot.
How to use the button to automatically cut threads.
Function of the drop feed lever for controlling feed dogs.
Manual thread cutter operation.
Adjusting presser foot pressure for different fabrics.
How to open the top cover of the machine.
Manual operation of the hand wheel to control needle movement.
Warning about touching the screen gently and with fingers only.
Describes the main screen and its buttons: Utility, Decorative, Letter, Setting, Help.
Explains the location and content of the pattern chart.
Steps for removing the bobbin from the machine.
How to place the thread spool onto the spool pin.
Step-by-step instructions for winding a bobbin.
How to insert the wound bobbin into the bobbin holder.
Steps to prepare the machine before threading the upper thread.
How to place the thread spool on the spool pin.
Detailed steps for threading the upper thread through the machine.
Instructions for using the needle threader.
How to draw up the bobbin thread for starting sewing.
Details about stitch shape, number, tension, recommended foot, and tack button.
How to adjust stitch elongation for patterns.
How to adjust stitch width and needle position.
How to adjust stitch length for patterns.
Function of the home button to return to the home screen.
Function of the return button to go back to the previous mode.
Description of preset thread tension and stitch appearance.
How increasing tension affects thread appearance on fabric.
How decreasing tension affects thread appearance on fabric.
Recommended tension for decorative stitches.
Tips for troubleshooting thread tension issues.
Safety warning about needle care during sewing.
Instructions for starting, sewing, and ending a seam.
Explanation of the upper thread sensor function.
How to perform reverse stitching for reinforcing seams.
How to use the automatic tack stitch function at seam ends.
How to turn corners while sewing using the needle as a pivot.
Techniques for sewing thick or heavy fabrics smoothly.
Guidance for sewing over areas with fabric overlaps.
How to use guide lines for consistent seam allowances.
Instructions for basic straight stitch sewing.
How to use straight stitches with automatic locking.
Steps to attach the darning/embroidery foot.
How to perform basting stitches using the machine.
Safety warning about needle hitting pins during basting.
How to join fabric pieces using straight stitch for quilting.
How to sew a hand-look quilting stitch.
Warning about changing needle position during quilting.
Explanation of zigzag stitches and their uses.
How to sew a satin stitch using the Satin Foot.
How to access and use the free arm for sewing difficult areas.
Used for sewing on elastic and overcast stitching.
Sewing with elastic using multi-stitch zigzag.
Using multi-stitch zigzag for overcast stitching.
Instructions for using the overcasting foot for seam finishing.
Using the general purpose foot for overcasting.
Warning about using the overcasting foot with specific patterns only.
How to perform blind hemming on stretch fabrics.
How to perform blind hemming on non-stretch fabrics.
Instructions for using the blind hem foot and guide.
Creating surface embellishment with decorative stitches over seams.
Using decorative stitches for crazy patch.
How to sew applique designs onto fabric.
Specifies feet for applique.
Using the open toe foot for applique.
Warning about stitch width limits for applique.
How to insert zippers using straight stitch and zipper foot.
Specific foot for zipper insertion.
Safety warning about using zipper foot with specific stitches.
How to insert lapped zippers using straight stitch and zipper foot.
Specific foot for zipper insertion.
Safety warning about using zipper foot with specific stitches.
Instructions and notes for sewing buttonholes.
How to create a professional bound buttonhole.
Specific foot used for bound buttonholes.
Using the eyelet stitch pattern for belts and other applications.
How to use the Satin Foot for eyelet sewing.
How to sew automatic bar-tacks for reinforcement.
How to perform automatic darning for mending.
Specific foot used for bar-tack and darning.
Instructions for sewing on buttons using stitch pattern 13.
Specific foot designed for sewing buttons.
How to create a thread shank for buttons on coats and jackets.
How to sew a narrow hem using straight stitch.
Specific foot for creating rolled hems.
How to sew single cording using zigzag stitch.
How to sew triple cording using multi zigzag stitch.
Specific foot for sewing cording.
Specifies even-feed foot types for various stitches.
How to attach and use the even-feed foot.
Steps for attaching the even-feed foot.
How to sew with the even-feed foot.
Using decorative stitch patterns continuously.
Specific foot for decorative and satin stitches.
Tips for sewing lightweight fabrics with decorative stitches.
Specifies needle position for darning and embroidery.
Specific foot for darning and embroidery tasks.
Steps to attach the darning/embroidery foot.
How to perform darning stitches on fabric.
How to perform free-hand embroidery on fabric.
Procedure after completing darning or embroidery.
Specifies feet for twin needle sewing.
Safety warnings related to twin needles.
How to select decorative and letter stitches from the LCD.
How to move the cursor to select and sequence patterns.
How to view selected patterns on the screen.
How to insert a new pattern into a sequence.
How to delete selected patterns from a sequence.
How to change stitch settings like mirror, reverse, and length.
How to apply mirror, reverse, or mirror/reverse effects to stitches.
How to adjust the length of selected stitch patterns.
How to adjust stitch width and length parameters.
How to adjust thread tension for selected stitch patterns.
How to memorize, recall, and delete stitch patterns.
How to sew selected patterns in single or repeat sequences.
How to restart sewing from the beginning or an interrupted point.
How to recall saved patterns for sewing.
How to adjust stitch balance for decorative patterns.
How to adjust stitch balance for letter patterns.
Electric shock risk warning before maintenance.
Instructions for cleaning the hook, feed dog, and bobbin holder.
| Buttonhole Styles | 13 |
|---|---|
| Stitch Width | 7 mm |
| Stitch Length | 5 mm |
| Sewing Speed | 850 Stitches Per Minute |
| Screen | LCD Touch Screen |
| Automatic Needle Threader | Yes |
| Drop Feed | Yes |
| Free Arm | Yes |
| Type | Computerized |
| Bobbin System | Top Drop-in |
| Speed Control | Yes |
| Start/Stop Button | Yes |
| Presser Feet | 13 |
| Weight | 20 lbs |
| Included Accessories | needles, bobbins, seam ripper/lint brush, auxiliary spool pin, spool pin felt |