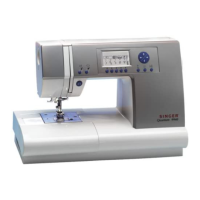
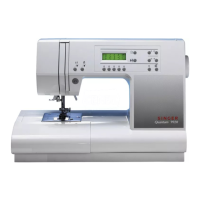
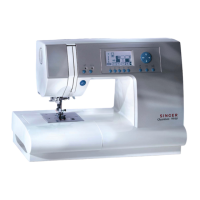
Do you have a question about the Singer 99K Series and is the answer not in the manual?
Expert, dependable Singer service for adjustments and repairs available at Singer Sewing Centres.
Singer Sewing Centres offer sewing supplies, notions, lessons, and guidance for all sewing needs.
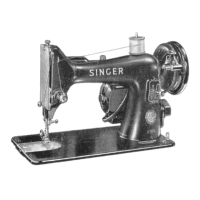
Details on motor operation for AC/DC current, including voltage and cycle requirements.
Instructions for connecting the three-pin safety plug to the machine and power supply.
Explanation of how machine speed is regulated by the foot or knee controller.
Important safety reminder to always disconnect the plug after sewing.
Instructions for operating the light switch to turn the sewing machine light on or off.
Guide on how to safely remove and replace the sewing machine light bulb.
Detailed steps for removing the light bulb by unlocking the pin and turning the bulb.
Instructions for inserting a new bulb into the socket and securing it.
Steps to start sewing with an electric machine, including material placement and controller use.
Instructions on how to engage the hand wheel and prepare the machine for manual operation.
Guidance on how to work the machine manually, including material handling.
Steps to get accustomed to treadle movement and begin sewing with material.
Explanation of the belt shifter's function for throwing the belt on and off the machine.
Advice on cleaning and oiling to prevent rust damage to the machine during periods of non-use.
Instructions on where to apply oil to the machine for continuous, moderate, or occasional use.
Steps for removing the face plate and oiling specific points, and oiling the slide.
Guidance on oiling parts underneath the machine bed and the stand components.
Emphasis on using Singer oil to prevent clogs and ensure efficient operation.
Chart correlating fabric types, thread, needle sizes, and recommended machine stitches per inch.
Guidance on choosing correct thread and needle size for perfect stitching based on fabric type.
Step-by-step instructions for correctly inserting and tightening the needle in the needle clamp.
Detailed instructions for guiding thread through the machine's upper threading path, including guides and levers.
Steps to remove the bobbin, including raising the needle and opening the slide plate.
Instructions on how to wind thread onto an empty bobbin using the bobbin winder.
Detailed path for leading thread for bobbin winding, including specific guides and notches.
How to adjust the thread guide for even bobbin winding, correcting high or low winding.
Procedure to adjust bobbin winder pulley pressure for effective winding.
Instructions for placing bobbin in case and drawing thread through slot and tension spring.
Final steps for threading bobbin case, drawing thread, and preparing for under-threading.
Steps to draw up bobbin thread using needle thread after initial threading.
Guidance on laying threads under presser foot to hold them securely.
Instructions on placing material, lowering presser foot, and starting to sew with hand wheel.
Information on using stitch length 6 for basting and easy removal by clipping every sixth stitch.
Advice using short stitch for bias/curved seams to enhance elasticity and prevent failure.
Steps to properly remove stitched fabric from machine, including thread cutting.
Caution to raise presser foot when machine is not in use to prevent damage.
Instructions to adjust stitch length using indicator and thumb nut for desired settings.
How to use lever to stitch in reverse for fastening seam ends.
Guidance on adjusting pressure for different materials, ensuring material doesn't rise with needle.
Explanation of balanced needle/bobbin thread tensions for a firm stitch.
Visual guides to identify and diagnose incorrect thread tensions based on stitch appearance.
How to use numbered dial and thumb nut to set correct needle thread tension.
Instructions on adjusting screw on bobbin case for correct bobbin thread tension.
Procedure for setting initial needle thread tension using numbered dial and thumb nut.
How to adjust tension on thread take-up spring for proper thread slack.
Steps for fine-tuning bobbin tension by setting needle tension and adjusting bobbin tension.
Instructions on removing bobbin case to clean lint and debris from machine.
Detailed steps for carefully removing bobbin case from sewing hook mechanism.
Procedure for raising bobbin case latch to disengage it from sewing hook.
How to hold bobbin case and tilt to disengage from sewing hook for removal.
Steps to correctly insert bobbin case into sewing hook and engage latch.
Advice on correct belt tension for treadle machines to prevent slipping.
List of common reasons for needles breaking: size, bending, or striking parts.
Common causes for needle thread breaking: knots, tension issues, or improper threading.
Common causes for bobbin thread breaking: improper threading or incorrect bobbin tension.
Reasons for skipped stitches: needle position, bending, or incorrect size relative to thread.
Overview of available attachments and their purpose in expanding sewing capabilities.
Details on how foot hemmer forms perfect hems without basting or pressing, for various applications.
Instructions for creating plain hems and preparing fabric for the hemmer.
Guidance on stitching slowly and ensuring even feeding for successful hemming with the foot hemmer.
Instructions for creating hemmed seams using foot hemmer, often as an alternative to French seams.
How to apply lace edging and insertion using foot hemmer for decorative finishes.
Techniques for applying lace over or under hem for different aesthetic effects.
Explanation of binder's use for applying commercial or self-fabric bias binding to unfinished edges.
Steps for inserting pre-folded or self-fabric bias binding into binder scroll for stitching.
Instructions on adjusting binder's scroll and guiding fabric edge for proper binding application.
Techniques for binding inside and outside curves, including fabric handling and reinforcement.
Details on how gathering foot places single or multiple rows of shirring quickly and evenly.
Guidance on shirring fabric, controlling fullness with stitch length and tension, and using foot for decorative effects.
Explanation of adjusting points for gathers, pleats, and adjusting finger/screw for fullness and spacing.
Steps for preparing ruffler, attaching it, and setting for gathering, including stitch length.
Instructions for setting ruffler for pleats, adjusting fullness, and using stitch length for spacing.
How to form and attach ruffles to fabric in one operation, including fabric placement.
Details on seam guide's use for precise stitching at any distance from fabric edge, for stay stitching and top stitching.
Instructions for attaching and adjusting seam guide for straight and curved edges, including pinned seams.
Explanation of zipper foot's design for accurate stitch placement near raised edges, for zipper insertions and corded seams.
Steps for attaching zipper foot, adjusting position relative to needle, and checking clearance.
Instructions for positioning zipper foot for skirt zipper installation, including basting and positioning zipper.
Steps for top stitching seam allowance to zipper tape and finishing zipper insertion.
Instructions for preparing corded welting by covering cable cord with fabric and sewing strips together.
Guidance on stitching corded welting into seams, adjusting zipper foot, and using appropriate stitch length.
Techniques for applying corded welting to single seam edges and attaching second seam edge for a corded seam.
Description of blind stitcher attachment for invisible hemming, its ease of use and speed.
Instructions for using bias gauge for cutting bias strips of various widths and marking for binding or cording.
Details on how edge stitcher provides slotted guides for precise stitching relative to fabric edges.
How to use edge stitcher to join lace and insertion for decorative lingerie details.
Instructions for creating fine French seams using edge stitcher, especially for sheer fabrics.
Guidance on using edge stitcher to create dainty tucks of various widths and spacing.
Description of quilter attachment for stitching lightly padded materials, with adjustable space guides.
Instructions for attaching and using adjustable hemmer to create hems from 3/16 to 15/16 inches wide.
Steps for adjusting hemmer and folding fabric to create wide hems of over 1 inch.
Explanation of tucker's function for making tucks up to one inch wide, using adjustable scales for width and spacing.
Recommendations for using feed cover plate for darning/embroidery, and advice on not changing feed dog adjustment.
Instructions for attaching feed cover plate and properly leading needle thread through it.
Advice on using Singer needles for best stitching results and how to identify them.
Emphasis on using Singer's specially prepared machine oil for optimal machine performance.
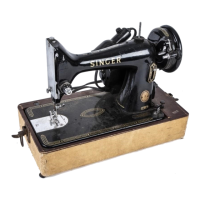
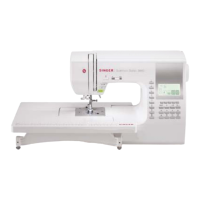
| Bed Type | Flatbed |
|---|---|
| Bobbin Type | Class 66 |
| Material | Metal |
| Stitch Length | Adjustable |
| Built-in Stitches | Straight Stitch |
| Needle Positions | Center |