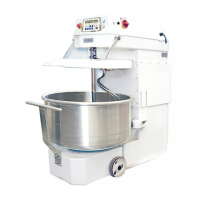
This document provides an operation manual for a spiral mixer, specifically the SM-200a and SM-120a models, including their 'S' variants. These mixers are designed for big production and feature a removable bowl.
Function Description:
The spiral mixer is used for mixing dough. Its primary function involves a spiral hook and a rotating bowl to efficiently combine ingredients. The head of the mixer can be moved up and down hydraulically to facilitate bowl removal and insertion. The machine offers both automatic and manual operation modes, with adjustable mixing times and speeds.
Important Technical Specifications:
The manual provides detailed specifications for four models: SM-120a, SM-120a-S, SM-200a, and SM-200a-S.
| Model |
Flour Capacity (kg) |
Dough Capacity (kg) |
Power (Kw) For Spiral |
Power (Kw) For Bowl |
Net Weight (kg) |
Bowl (mm) (diameter×depth) |
Dimension (mm) (Length×Width×Height) |
| SM-120a |
75 |
120 |
9 |
0.75 |
1300 |
Φ775×419 |
1600×780×1230 |
| SM-120a-S |
75 |
120 |
9 |
0.75 |
1300 |
Φ775×419 |
1590×1010×1300 |
| SM-200a |
125 |
200 |
12 |
1.5 |
1350 |
Φ960×517 |
1720×980×1430 |
| SM-200a-S |
125 |
200 |
12 |
1.5 |
1350 |
Φ960×517 |
1780×1020×1330 |
The SM-120a and SM-200a models have their operation panel and electric box on top, while the SM-120a-S and SM-200a-S models feature a separate stand for the operation panel and electric box for easier access. All models utilize a friction wheel drive.
The hydraulic system includes an oil tank, motor, oil pump, connector, hand valve, pressure gauge, pressure valve, magnetic valve, throttle valve, hydraulic cylinder, check valve, filter, oil collector, air cleaner, and dipstick. The pressure display for the hydraulic system indicates 0 Kg/cm² for UP and TOP movements, 40 Kg/cm² for DOWN movement, and 200 Kg/cm² for BOTTOM movement.
Usage Features:
The mixer's operation involves several steps:
- Installation: Requires a horizontal and plain floor. The machine's bottom plate should be parallel with the floor, adjustable via leveling screws. Plate washers and washer bolts are used to firmly fix the machine to the ground. Electrical connection requires a circuit breaker approximately 2m high. After connection, the bowl and hook rotation must be checked to ensure clockwise movement from a top view; if incorrect, two power cables need to be exchanged.
- Bowl Management: The mixer head moves up to its top position automatically when the "UP" button is pressed. Adjustment screws for the bowl position can be loosened to facilitate smooth removal and insertion of the bowl. The bowl should be pushed in and pulled out easily; if not, adjustment of the bowl guide rod screws is necessary.
- Operation Panel: The panel includes two timers: Timer I for slow speed and Timer II for fast speed. Each timer displays minutes and 10-second increments (e.g., 0.1 for 10 seconds, 0.5 for 50 seconds). Time is set using function keys, with a maximum of 20 minutes.
- Indication Lamps:
- AUTO/MANUAL: Indicates the current operation mode.
- Bowl direction: Shows if the bowl is moving FORWARD or REVERSE.
- Speed Condition: "I" for slow speed, "II" for fast speed.
- INCH: Indicates inching condition (bowl runs only while pressed).
- ON: Machine is ON.
- STOP: Lights up when the safety cover is raised.
- O-L (Over-LOAD): Indicates an overload, voltage drop, or loose cable connection.
- Function Keys: AUTO/MANUAL selection, speed selection, bowl direction selection (Forward/Reverse), Start (ON), Stop (OFF), and Inching (INCH).
- Automatic Operation: Set desired slow speed time, then fast speed time. Press the AUTO key until the AUTO lamp lights up. Select bowl direction. Press ON to start. The mixer runs at slow speed until Timer I reaches 0, then switches to fast speed until Timer II reaches 0, then stops automatically. Lifting the safety cover during AUTO operation pauses the timer; pressing ON resumes it. Pressing OFF resets the timer to the original set time.
- Manual Operation: Press the MANU key until the MANU lamp lights up. Select desired speed and bowl direction. Press ON to start. Press OFF to stop. The timer does not function in manual mode. The bowl cannot be reversed at fast speed. The mixer always starts at slow speed, and can be switched to fast speed using the speed selection key.
- Dough Preparation: Pull out the bowl, add ingredients, push the bowl into the machine, and press "DOWN" to move the head to the mixing position. Set mixing time and start. The mixer stops automatically after the cycle. Press "UP" to raise the head, pull out the bowl, and insert another.
- Safety Instructions:
- Do not overload the mixer; reduce flour and dough capacity if water content is less than 58%.
- Read the manual carefully before operation or maintenance.
- All safety covers and side panels must be closed during operation.
- Ensure the trolley is well-located before operation; the indication lamp will confirm this.
- Check that power cables of the head are not stuck.
- The machine stops when the safety guard is opened.
- Operators must comply with safety rules regarding clothing and wearing.
- Operators should not lean on the machine.
- Maintenance should be performed by professional technicians.
- Turn power off before maintenance and after daily use.
- Ensure the machine has good earthing.
- Move the machine head up and down at least once daily before use.
- Do not operate if the bowl is not properly located.
- Do not move the bowl while the head is moving up or down.
- Push the bowl steadily into the mixer. If difficult, adjust the track.
Maintenance Features:
- Cleaning: Clean the machine with a wet cloth after use; do not wash directly with water. Thoroughly clean splashed flour from the clamping block, safety cover, etc. Clear dust from the top cover frequently.
- Regular Checks:
- Turn off power after daily use.
- Check all components for good status periodically.
- Check convection belt tension monthly.
- Troubleshooting: The manual provides a detailed troubleshooting guide for common issues:
- Bowl and beater rotate in reverse direction: Exchange any two power cables.
- Machine shakes during operation: Install on a horizontal and plain ground, or readjust foot pads for stability.
- Bowl rotates after safety cover is opened: Microswitch is wrong, or the adjust wheel with the microswitch is wrong. Change the microswitch or tighten/change the adjust wheel.
- Guide roller doesn't work: Bearing is damaged (change microswitch), or the gap is too long (readjust gap).
- Main shaft cannot work: Check power, main switch, motor, magnetic valve, overload protection, "ON/OFF" button, and trolley location. These issues require professional electricians.
- Main shaft cannot stop continuously: Check for damage to the emergency button, short circuit on contactor, or abnormal motor. Requires professional electricians.
- Electric leakage: Check for cable damage, moisture in the electrical box, or malfunction on the transformer. Requires professional electricians.
- Main shaft stops unexpectedly: Check for trip, changed current value, or abnormal motor.
- Strange noise from motor: Water in dough is not enough.
- Hydraulic System Maintenance:
- Head movement issues: Check oil level in the tank, open throttle valve, check pressure gauge, magnetic valve, motor, and motor pump. If problems persist, clean the pressure valve with diesel oil or gasoline.
- Head moves too fast or too slowly: Open oil gauge to show pressure. With one person pressing "UP" then "DOWN," another person adjusts the throttle valve until the pressure gauge shows approximately 40 Kg/cm².
- Machine frame shakes when mixing: This indicates pressure drop in the cylinder. Check for oil leakage in the cylinder, connectors, gaps between valves, check valve, and oil O-ring of the cylinder. Solutions include replacing O-rings, oil tubes, or adjusting the throttle valve to maintain 200 Kg/cm² pressure, ensuring it doesn't drop below 170 Kg/cm² within half an hour to confirm check valve functionality.