+
/'\
..
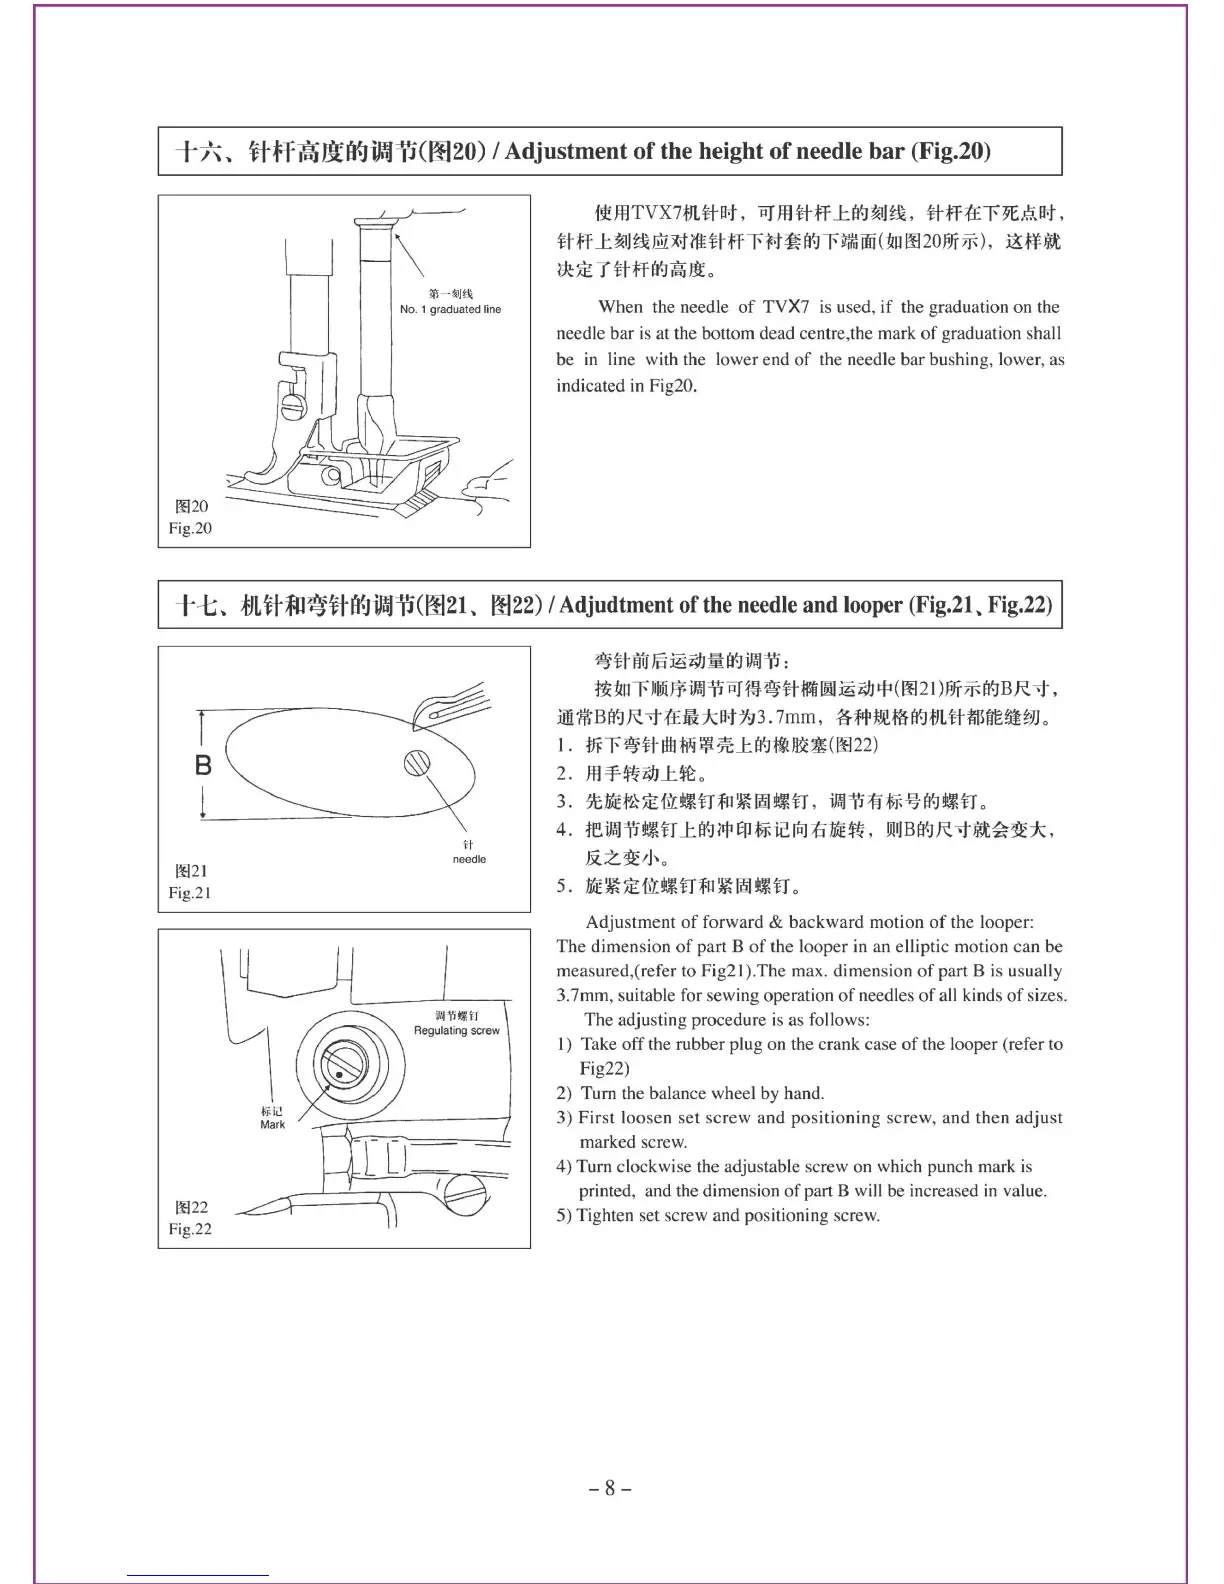
ftfffi6ltB9iJJTi(l!l20)
I Adjustment
of
the height
of
needle bar (Fig.20)
0020
Fig.20
ftJtiTVX7;t;JL*Bof,
PJffl*ff
J:ff.J~Ijt&,
*ff:f±r~-~Bof,
ttff
J:~Jt&Mx.tilttffrM~I¥1r~oo(~noo2orJT7F),
j!f'fJM:
{jt~
T*ffff.J~}jto
When the needle
of
TVX7 is used,
if
the graduation on the
needle bar
is
at the bottom dead centre,the mark
of
graduation shall
be
in
line with the lower end
of
the needle bar bushing, lower, as
indicated
in
Fig20.
+-1::
..
lJLltf;JJ~ltl'f.JifnJi1(0021..
0022)
I
Adjudtment
of
the
needle
and
looper
(Fig.21,.
Fig.22)
8
l
0021
Fig.21
0022
Fig.22
tt
needle
~ *
ffrJ
J§
~
l;IJ:fll¥1
00
i'i :
~~llrllllJi}'fiffiJi'iPJ1~~*Wffml~l;IJt:f:t(0021
)fi]f7FI¥JBR
>t,
im1tBI¥JR>t:f±Mi*.B1793.
7mm,
~;fttlm!~ff.J;t;JL*:mttE:~~lJJo
1.
tfir~ttDtlm'lJ~J:I¥11t~*(0022)
2.
Jtl=f~z.;J)J:$&:0
3.
~~~~~~n~~~~n.OOi'i~~%1¥J~Uo
4.
ffiiffili'i~UJ:I¥1~~~~~~~~.
~Bff.JR-.J-8~~*·
OCZ~Ij'\0
s.
~~~~~'-Ufo~~~'-n
0
Adjustment
of
forward & backward motion
of
the looper:
The dimension
of
part B
of
the looper in an elliptic motion can be
measured,( refer to Fig21
).
The max. dimension
of
part B
is
usually
3.7mm, suitable for sewing operation
of
needles
of
all kinds
of
sizes.
The adjusting procedure
is
as follows:
1)
Take off the rubber plug on the crank case
of
the looper (refer to
Fig22)
2) Turn the balance wheel by hand.
3) First loosen set screw and positioning screw, and then adjust
marked screw.
4) Turn clockwise the adjustable screw on which punch mark
is
printed, and the dimension
of
part B will be increased in value.
5) Tighten set screw and positioning screw.
-8-
 Loading...