EasyManua.ls Logo

Siterwell GS519 - User Manual

Siterwell GS519
7 pages
Print Icon
To Next Page IconTo Next Page
Loading...
Document NO.:RD-519-39-001 Version: A 2018.04.20
- 1 -
Smoke Alarm User Manual
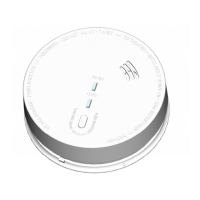
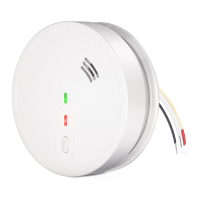
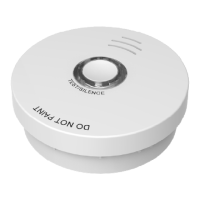
Model number: GS519 RefST519
Thank you for purchasing our smoke alarm. Please take a
few minutes to read the users manual thoroughly and
familiarize yourself and your family with its operation. And
save it for future reference.
Product Specifications:
POWER: 220-240V~/50Hz with 9V battery backup.
ALARM VOLUME: > 85dB(A) at 3 meters.
ALARM SENSITIVITY: 0.12~0.160dB/m
SAME PUSH TEST BUTTON TO ACTIVATE
SILENCE (HUSH) CONTROL
HUSH TIME: approx 8 minutes
INTERCONNECTION: up to 40 detectors
ALARM BATTERY LIFE: above one year
OPERATION CURRENT:<100mA
BASE: built-in DC3V(CR123A) Lithium battery
(battery not replaceable)
BASE BATTERY LIFE: above ten year
WIRELES FREQUENCY:433.42MHz
WIRELESS INTERCONNECTION: up to 40 detectors
WIRELESS DISTANCE : >100 meters in free field/
30m indoors
COMPLY WITH: AS3786:2014,
AS/NZS 4268
SOUND PATTERN:ISO8201(BI 0.5s - pause 0.5s - BI
0.5s - pause 0.5s - BI 0.5s - pause 1.5s, with the RED
LED flash, repeat this alarm pattern)
NOTE: The total number of wired interconnections and
wireless interconnections cannot exceed 40.
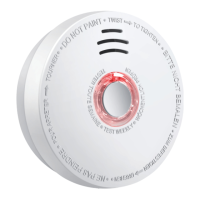
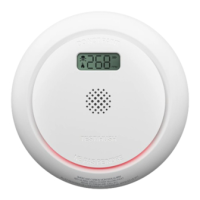
Description:
The unit is a photoelectric 220-240V~ with 9V DC battery
backup smoke alarm and the base built-in DC3V(CR123A)
Lithium battery. With the photoelectric technology, it is more
sensitive to detect slowly smoldering fires which general
thick, black smoke, low heat and may smolder for hours
before burst into flames. The smoke alarm does not contain
the radioactive material which is harmless to the
environment.
The smoke alarm should be installed in every room (except
the bathroom) and make sure the people in home be able to
hear and respond to the alarm sound. For maximum
protection you should fit an alarm in hallway between living
areas and sleeping areas. Place the unit as near to the living
areas as possible and ensure the alarm is audible when the
bedrooms are occupied.
Typical single storey dwelling with recommended:
Install a smoke alarm on the ceiling inside each bedroom and
in the hallway outside each separate sleeping area. If a
bedroom area hallway more than 30 feet long, install a smoke
alarm at each end. If there’s a basement: install a smoke
alarm on the basement ceiling at the bottom of the stairwell.
Typical multi-storey dwelling with recommended protection.
Install a smoke alarm on the ceiling inside each bedroom and
in the hallway outside each separate sleeping area. If a
bedroom area hallway more than 30 feet long, install a smoke
alarm at each end and install a smoke alarm at the top of first
to- second floor stairwell.
Important Safety Information:
1. The test button accurately tests smoke alarm functions. Do
not use any other test method. Test smoke alarm weekly to
ensure proper operation.
2. When the smoke alarm is alarming, if you sure it isn't a
really alarm, open windows or fan the air around smoke
alarm to silence it.
3. The apparatus shall not be exposed to dripping or
splashing and that no objects filled with liquids, such as
vases, shall be placed on the apparatus.
4. A non-pure sinusoidal power sources is not suitable for
this smoke alarm (e.g. derived from square-wave
invertors).
5. This smoke alarm is powered by 220-240V~. The source
power is danger to human body. The smoke alarm should
be installed only by a licensed, qualified electrician.
Observe and follow all local and national electrical and
building codes for installation.
6. This smoke alarm is designed to be used inside a single
family only. In multifamily buildings, each individual
living unit should have its own smoke alarms. Do not
install in non-residential buildings. And this smoke alarm
is not a substitute for a complete alarm system.
7. Install a smoke alarm in every room and on every level of
the home. Smoke may not reach the smoke alarm for many

Questions and Answers

Summary

Product Specifications

Description

Important Safety Information

Battery Specification

Do Not Install Smoke Alarms in the Following Places

Operation

Testing

Test the unit to ensure proper operation by pressing the Test button for at least 5 seconds.

LED indicators

Explains the meaning of Green LED (AC power) and Red LED (operation modes, flashing patterns).

Alarm silence (hush mode)

Allows temporary silencing of the alarm for about 8 minutes during nuisance alarms like cooking smoke.

Wireless function description

Trouble shooting

Maintenance and Cleaning

Develop and Practice a Plan of Escape

What to do when the alarm sounds

Recommended Locations for Alarms

Wiring Instructions

Mounting Instructions

Service and Warranty

Overview

This document describes a photoelectric smoke alarm designed for residential use. It operates on 220-240V~ AC power with a 9V DC battery backup and features a built-in DC3V (CR123A) Lithium battery in its base. The photoelectric technology makes it particularly effective at detecting slow-smoldering fires that produce thick, black smoke and low heat, which can smolder for hours before igniting into flames. The device does not contain radioactive material, making it environmentally friendly.

Function Description:

The primary function of this smoke alarm is to detect smoke or combustion particles in the air and provide an audible warning of a developing fire. It does not sense heat, flame, or gas. The alarm is designed to alert household members to potential danger, with an alarm volume exceeding 85dB(A) at 3 meters.

For optimal protection, smoke alarms should be installed in every room (excluding bathrooms) and on every level of the home to ensure that the alarm sound is audible to all occupants. In single-story dwellings, it is recommended to install a smoke alarm on the ceiling inside each bedroom and in the hallway outside each separate sleeping area. If a hallway is longer than 30 feet, an alarm should be placed at each end. For basements, an alarm should be installed on the basement ceiling at the bottom of the stairwell. In multi-story dwellings, alarms should be placed on the ceiling inside each bedroom, in the hallway outside each separate sleeping area, at each end of hallways longer than 30 feet, and at the top of first-to-second floor stairwells.

The device features a "Hush mode" or alarm silence function, activated by pressing the test button for at least 5 seconds. This mode temporarily disables smoke detection for approximately 8 minutes to minimize false alarms, such as those caused by cooking. The alarm will automatically reset after 8 minutes and will sound again if combustible particles are still present. This mode can be repeated until the air is clear. It is crucial to identify the smoke source and confirm a safe condition before using the hush mode. If the alarm sounds and is not being tested, it indicates the presence of smoke, requiring immediate attention and action.

The smoke alarm also supports wireless interconnection, allowing up to 40 detectors to communicate with each other. This means that if one interconnected alarm detects smoke, all other interconnected alarms will sound, providing comprehensive coverage throughout the home. The wireless connection operates on a frequency of 433.42MHz and has a range of over 100 meters in free field or 30 meters indoors. Wireless bases use coded RF signals and must be paired before use.

Usage Features:

The smoke alarm is designed for ease of use and installation, though AC power wiring should only be performed by a licensed electrician.

  • Testing: The unit should be tested weekly by pressing the test button for at least 5 seconds. This verifies that the electronic circuitry, horn, and battery are functioning correctly. During a test, the alarm will emit 3 short beeps followed by a 1.5-second pause, repeating until the test button is released. The red LED will flash once per second during an alarm or test.
  • LED Indicators:
    • A green LED indicates that the alarm is receiving AC power.
    • A red LED flashing every 32 seconds signifies proper operation in standby mode.
    • During an alarm or test, the red LED flashes once per second.
    • In Hush mode, the red LED flashes every 8 seconds.
  • Wireless Interconnection Setup:
    1. Take one unit and press its wireless test button 3 times within 2 seconds to enter "Learning mode." The red LED will light for 2 minutes, indicating success. All products must be studied with the same product.
    2. While the first unit's base LED is on, press the wireless test button on the other units' wireless bases 3 times within 2 seconds. The LED will flash 3 times to confirm successful interconnection.
    3. Repeat for all other units.
    4. Wait approximately 2 minutes for the first unit's base LED to turn off, or press the base button 3 times in 2 seconds to exit "Learning mode."
    5. After all units are paired, press and hold the Test/Hush button for at least 10 seconds on one unit to verify that all interconnected units receive the RF signal and sound the alarm.
  • Mixed Interconnection Setup: For installations combining both wired and wireless interconnection, first complete the wired installation for each group of wired units. Install only one GS519 wireless base per group of wired interconnected units. Then, follow the wireless interconnection setup for all GS519 wireless bases. Finally, select one smoke alarm from each wired group and press and hold the TEST/HUSH button for more than 10 seconds to confirm that all wired and wireless interconnected units sound the alarm.
  • Installation Locations:
    • Mount on the ceiling, at a minimum of 30cm from side walls.
    • In rooms with ceiling slopes greater than 1m in 8m horizontally, locate on the high side of the room, between 500mm and 1500mm from the highest point of the ceiling.
    • Avoid installation in garages (due to combustion products from automobiles), less than 50cm from the peak of an "A" frame ceiling, areas where temperatures fall below 5°C or rise above 45°C (e.g., unfinished attics), dusty areas, high humidity areas (greater than 93% R.H.), insect-infested areas, within 3 ft (0.9m) of kitchen doors, bathroom doors, forced air supply ducts, ventilating fans, or other high airflow areas.
    • Kitchens are prone to false alarms from normal cooking; if a kitchen alarm is desired, it should have a silence feature and be a photoelectric type.
    • Avoid near fluorescent lights, as electronic "noise" can cause false alarms.
    • Do not use with detector guards unless the combination has been evaluated as suitable.
  • Escape Plan: Develop and practice a fire escape plan with all household members, including identifying two escape routes from each room, a designated outdoor meeting place, and familiarization with the alarm sound. Practice fire drills at least every six months, including at night.

Maintenance Features:

Regular maintenance is essential to ensure the smoke alarm functions correctly.

  • Cleaning: Clean the smoke alarm at least once a month to remove dust, dirt, and debris. Always turn off the AC power before cleaning. Use a vacuum cleaner with a soft brush to clean all sides and covers, ensuring vents are clear. A damp cloth can be used to clean the alarm's cover. Do not attempt to remove the cover to clean inside, as this will affect the warranty.
  • Battery Replacement: The 9V DC battery backup should last at least one year under normal operating conditions. The alarm has a low battery monitor that will cause it to "chirp" and the red LED to flash approximately every 32 seconds for a minimum of thirty days when the battery is low. Replace the battery when this condition occurs. The base's built-in DC3V Lithium battery is not replaceable and has a low battery monitor that causes the base LED to flash every 10 seconds for a minimum of thirty days when low. If the base battery is low, the base should be replaced.
    • To replace the 9V battery:
      1. Remove the alarm from its base using a screwdriver.
      2. Open the battery cover and replace with a new battery.
      3. Close the battery cover and fit the alarm body back onto the base.
      4. Turn on the AC power (green LED should light up) and test the smoke alarm.
    • WARNING: Always turn off AC power when replacing the battery, as AC power is dangerous.
  • Troubleshooting: The manual provides a troubleshooting guide for common issues such as the green LED not lighting, the alarm not sounding during a test, chirping every 32 seconds (low battery), base flashing every 10 seconds (low base battery), chirping every 32 seconds (fault mode), unwanted alarming, or abnormal alarm sounds. Solutions include checking connections, cleaning the alarm, replacing batteries, or replacing the unit if under warranty or if the problem persists.

Siterwell GS519 Specifications

General IconGeneral
Alarm Volume≥85dB at 3 meters
Test ButtonYes
Battery Life1 year
Wireless InterconnectNo
TypePhotoelectric
Sensor TypePhotoelectric
LED IndicatorYes (red)
Operating Humidity10% to 95% (non-condensing)
StandardsEN 14604

Related product manuals