EasyManua.ls Logo

Siterwell GS559A User Manual

Siterwell GS559A
7 pages
To Next Page IconTo Next Page
Page #1 background imageLoading...
Page #1 background image
Document NO.: GS559A-39-001 Version: F
-
1
-
EN14604:2005/AC:2008
Smoke Alarm User Manual
Model number: GS559A
Thank you for purchasing our smoke alarm with wireless and
heat detection. Please take a few minutes to read the users
manual thoroughly and familiarize yourself and your family
with its operation. And save it for future reference.
Product Specifications:
Power : DC2*1.5V Alkaline AA battery
(Gold Peak Group: GP 15A LR6 or Energizer: E91 or
Raymax: LR6 )
Operation current : 6uA (Standby)
75mA (Alarm)
Alarm volume : >85dB(A) at 3 meters.
Smoke sensitivity : 0.115-0.168dB/m
Heat sensitivity: 54-70
Local smoke alarm pattern:
BI 0.5s - pause 0.5s – BI 0.5s – pause 0.5s – BI 0.5s –
pause 1.5s- BI 0.5s - pause 0.5s – BI 0.5s – pause 0.5s
BI 0.5s pause 4.5s, with the red LED flashing
every 1 second, repeat this alarm pattern.
Local heat alarm pattern:
BI 0.2s - pause0.1s- BI 0.2s - pause 0.1s, with the red
LED flashing every 1.0s, keep this alarm pattern for
8.5 seconds, then pause 4.5s,repeat this alarm pattern.
Wireless alarm pattern:
Bi 0.2s - pause 0.1s - Bi 0.2s - pause 1.2s, with the
red LED flashing every 1.0 second, repeat this alarm
pattern.
Description:
This unit is a photoelectric 3V DC smoke alarm. It is
operated by 3v AA Alkaline battery. With the photoelectric
technology, it is more sensitive in detecting slow smoldering
fires which generate light smoke, little heat and may smolder
for hours before bursting into flames. This smoke alarm does
not contain any radioactive material. Smoke alarms should be
installed in every room (except the bathroom and kitchen),
finished attics and basements, making sure the people in the
home will be able to hear and respond to the alarm sound.
For minimum protection, you should install an alarm on
every level of the home particularly outside sleeping rooms.
Each alarm should be placed in the middle of the ceiling of
each room to be protected. Typical single storey dwelling
installation recommendations: Install a smoke alarm on the
ceiling inside each bedroom and in the hallway outside each
separate sleeping area. If a bedroom area hallway is more
than 30 feet long, install a smoke alarm at each end. If there
is a basement: install a smoke alarm on the basement ceiling
at the bottom of the stairwell. Typical multi-storey dwelling
installation recommendations: Install a minimum of one
smoke alarm on each occupiable level of the home. Install a
smoke alarm on the ceiling or wall inside each bedroom and
in the hallway outside each separate sleeping area. If a
bedroom area hallway is more than 30 feet long, install a
smoke alarm at each end install a smoke alarm at the top of a
first – to- second floor stairwell.
Important Safety Information:
1:The test button accurately tests smoke alarm functions. Do
not use any other test method. Test smoke alarm weekly to
ensure proper operation.
2:If you're sure it isn't a really alarm, open windows or fan
the air around smoke alarm to reset and silence it.
3:User to install this product needs to comply with all local
and national electrical installation and building codes.
4:This smoke alarm is designed to be used inside a single
family home only. In multifamily buildings, each individual
living unit should have its own smoke alarms. Do not
install in non-residential buildings as this smoke alarm is
not a substitute for a complete alarm system.
5:Install a smoke alarm in every room and on every level of
the home. Smoke may not reach the smoke alarm for many
reasons. For example, if a fire starts in a remote part of the
home, on another level, in a chimney, wall, roof, or on the
17
Question and Answer IconNeed help?

Do you have a question about the Siterwell GS559A and is the answer not in the manual?

Siterwell GS559A Specifications

General IconGeneral
BrandSiterwell
ModelGS559A
CategorySmoke Alarm
LanguageEnglish

Summary

Description

Product Specifications

Specifications Details

Details on power, current, volume, smoke/heat sensitivity, and alarm patterns.

Important Safety Information

Test Button Functionality

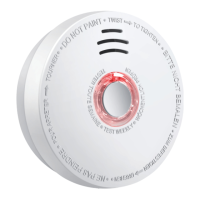
Accurately tests smoke alarm functions using the test button for proper operation.

Alarm Reset and Silence

Open windows or use a fan to reset and silence a non-fire alarm.

Installation Compliance

User must comply with local and national electrical installation and building codes.

Usage Context

Designed for single-family homes; multifamily buildings need individual alarms.

Fire Detection Limitations

Smoke may not reach the alarm quickly; alarms are not a substitute for fire safety.

Do Not Install Smoke Alarms in the Following Places

Avoid Combustion Areas

Avoid kitchens or areas with normal combustion like furnaces to prevent false alarms.

Avoid High Humidity

Keep away from bathrooms or areas near dishwashers/washing machines.

Avoid Air Vents

Install at least 3 feet away from air returns or heating/cooling supply vents.

Avoid Extreme Conditions

Avoid areas below 0°C or above 40°C, or humidity higher than 93%.

Avoid Dusty/Insect Areas

Avoid areas with dust or insects that can interfere with sensor operation.

Battery Specification

Replace Battery

Operation

Weekly Testing

Test the unit weekly by pressing the test button to ensure proper operation.

LED Indicators

Standby Condition

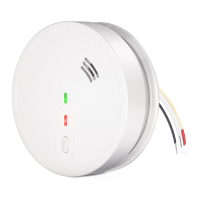
Red LED flashes every 50 seconds to indicate proper operation.

Alarm Condition

Red LED flashes rapidly (one flash per second) when smoke is detected.

Silence Condition

Red LED flashes every 16 seconds when the alarm is in Hush mode.

Low Battery Indication

Intermittent chirp with red LED flashing every 50 seconds signals low battery.

Fault Indication

Chirp occurs between red LED flashes, indicating a fault condition.

Smoke Sensing Chamber Fault

Chirp occurs between LED flashes if smoke sensing chamber components fail.

Alarm Silence (Hush Mode)

Wireless Function Description

Wireless Frequency and Distance

Operates on 868MHz with a wireless distance of over 100 meters outdoors.

Multiple Alarm Networking

Instructions on how to pair multiple same alarms for interconnected alarming.

Connecting to Host Network

Steps to connect the alarm to a host controller for networking.

Inter-Alarm Connectivity

How to connect this product with other SiterWell alarms like vibration or flash alarms.

Clear Pairing Code

Procedure to clear existing network codes and reset the alarm.

Maintenance and Cleaning

Repair

Troubleshooting

No Sound During Test

Check cleaning, warranty, or replace if the unit does not sound when tested.

Beeps with Flashing LED

Low battery indicated by beeps and red LED flashing; replace the battery.

Fault Mode Chirp

Chirping every 50 seconds indicates a fault; clean or replace the alarm.

Unwanted Intermittent Alarms

Silence, clean, or relocate the alarm if it sounds without cause (e.g., cooking).

Alarm Sounds Differently

Clean the unit, check warranty, or replace if the alarm sounds unusually.

Develop and Practice a Plan of Escape

Recommended Locations for Alarms

Placement Guidelines

Recommendations for placing alarms in bedrooms, hallways, floors, and near appliances.

Installation

Installation Steps

Guide covering battery insertion, bracket mounting, alarm attachment, and testing.

Service and Warranty

Warranty Information

Details the 3-year limited warranty against defects in material and workmanship.

Contact and Service Details

Provides company address, phone, fax, and email for service and inquiries.

Related product manuals