13
Customizing Recording Preferences
Once the camera is powered on, initiate the recording settings by holding down the M
button for a span of 2 seconds (refer to Figure 1). This action smoothly transitions you into
the settings interface. Confirm your entry into this interface by pressing the OK button (as
shown in Figure 3).
To tailor your preferences, browse through the available menus by utilizing the up or down
keys. Upon selecting your desired menu, confirm your choice by pressing the OK button.
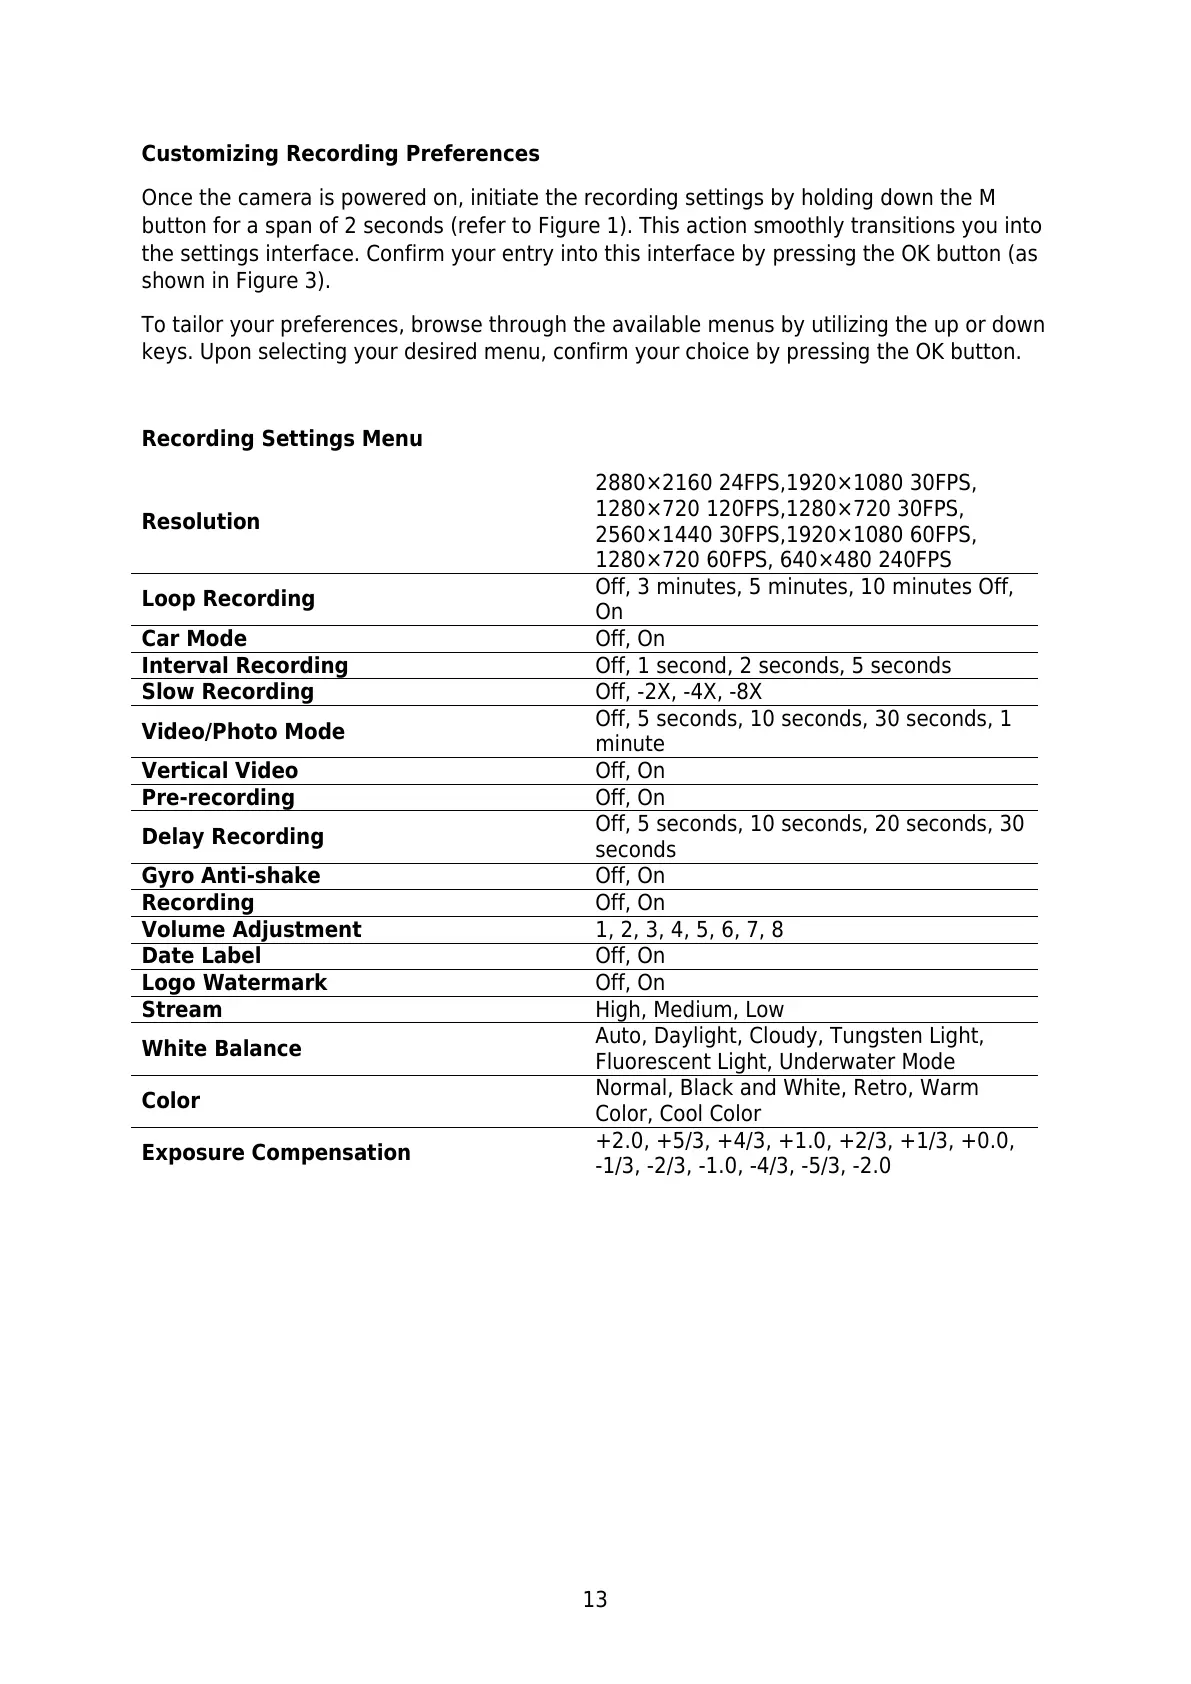
Recording Settings Menu
2880×2160 24FPS,1920×1080 30FPS,
1280×720 120FPS,1280×720 30FPS,
2560×1440 30FPS,1920×1080 60FPS,
1280×720 60FPS, 640×480 240FPS
Off, 3 minutes, 5 minutes, 10 minutes Off,
On
Off, 1 second, 2 seconds, 5 seconds
Off, 5 seconds, 10 seconds, 30 seconds, 1
minute
Off, 5 seconds, 10 seconds, 20 seconds, 30
seconds
Auto, Daylight, Cloudy, Tungsten Light,
Fluorescent Light, Underwater Mode
Normal, Black and White, Retro, Warm
Color, Cool Color
+2.0, +5/3, +4/3, +1.0, +2/3, +1/3, +0.0,
-1/3, -2/3, -1.0, -4/3, -5/3, -2.0
 Loading...