Hold the mop at a 45 angle as
illustrated in
fig.ld, and add water
in the tank up to the
MAX
level
by
using the measuring
cup. Do not overfill.
The maximum
tank capacity
is
450m|.
ReplaceWater
Turn
water tank cap clockwise
approximately
90 to the
'
CLOSE
"
position
untilthe
cap is tightened securely.
The Hand-Held Steamer
is
an
ideal
pi:rtable
cleaner.
lt is there for
you
to detach
and use
on work
surfaces kitchen, countertops,
sinks, bathrooms,
windows, minors,
tiles and
spot cleaning on
floor carpets and rugs. Use
it with an attachment
-
Jet Nozzle or
Nylon
brush
to spray away dirt,
grease,
mold and more.
Make sure that the unit
is
unplugged
1. Remove the
power
supply
cord from the upper
cord wrap and cord
holder, tum the lower cord
wrap to release the cord and
remove the
power
supply cord
ftom its channel. As illustrated
in Fig. 1a & 1 b.
2. Unlock the button
on the extension hose,
And take
out the hand-held
steamer.
As illustrated
in Fig.2.
Fig. 1a
Fig. 1b
I
Fig.
1c
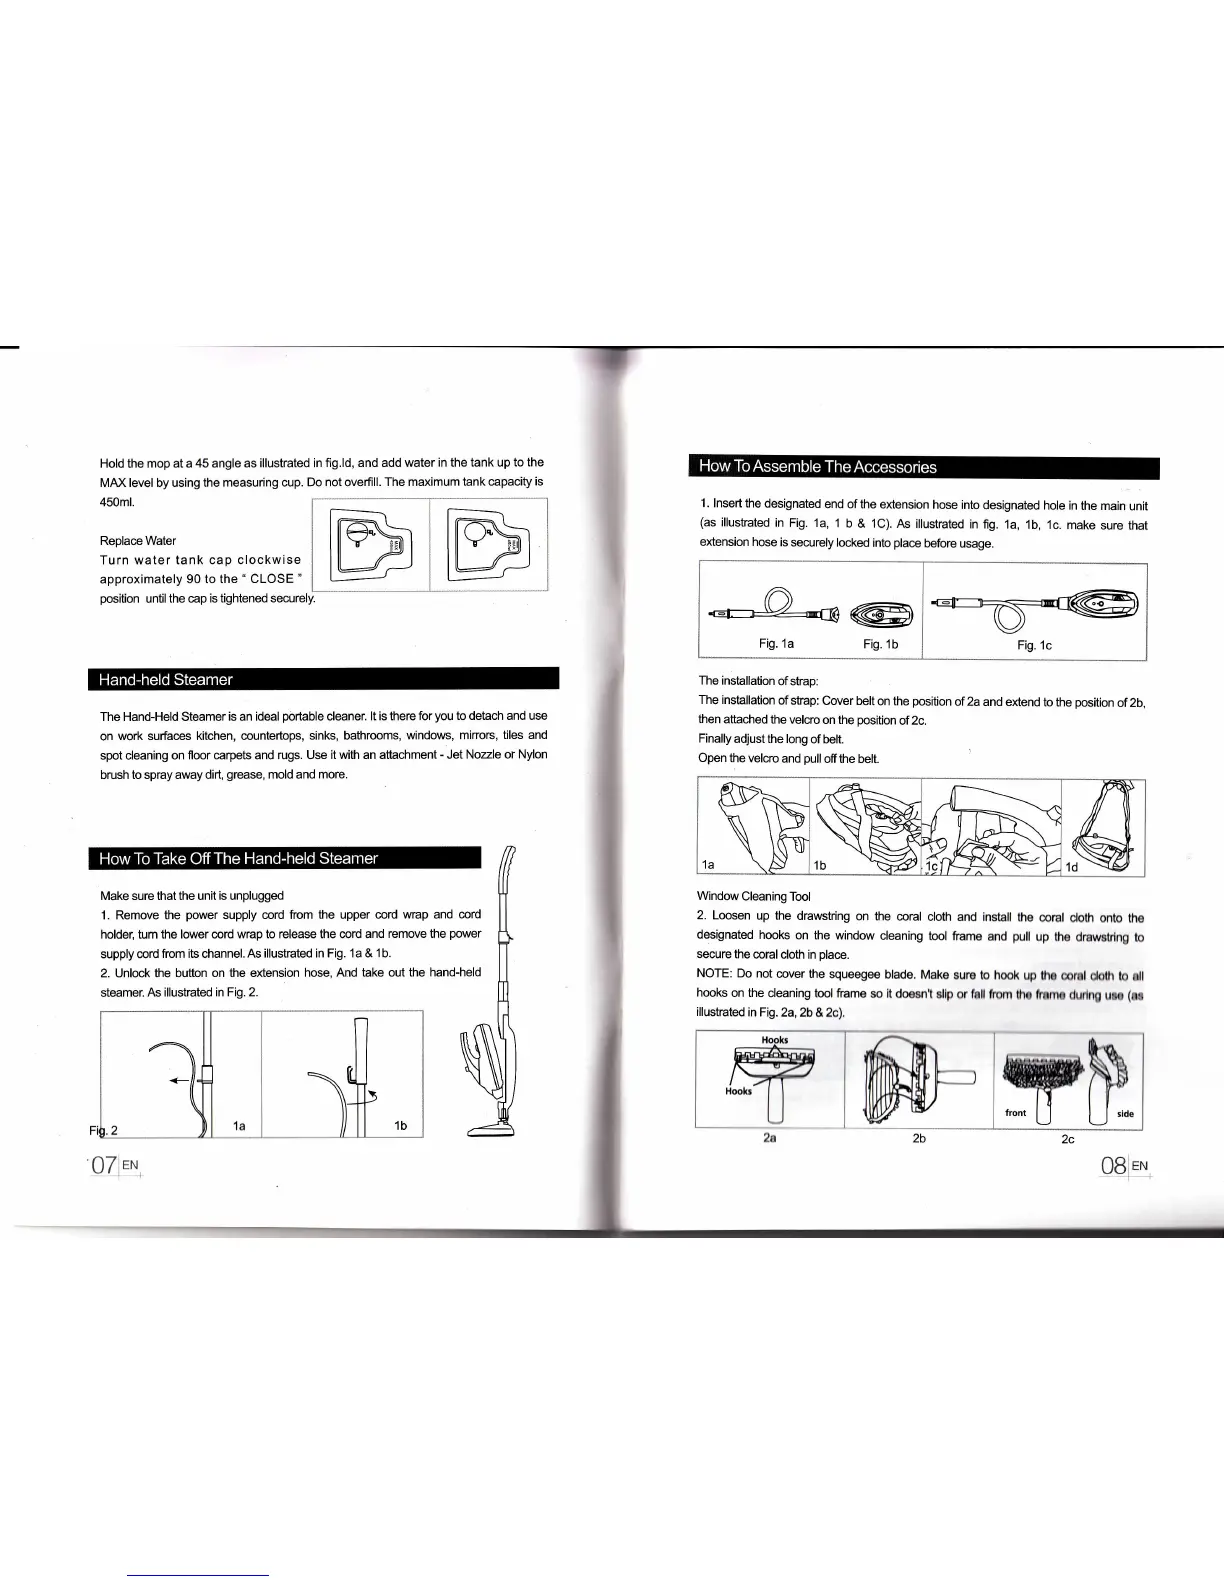
1 . lnsert
the designated
end of
the extension
hose into
designated
hole in
the main
unit
(as
illustrated
in Fig. 1a,
1
b & 1C).
As illustrated
in fig. 1a,
1b, 1c.
make
sure that
extension hose
is
securely locked
into
place
before usage.
The installation
of strap:
The
installation
of strap:
cover belt
on the
position
of 2a and
extend to
the
position
of 2b,
then attached
the velcro
on the
position
of 2c.
Finally
adjust the long
of
belt.
Open
the velcro
and
pull
ofithe belt.
Window
Cleaning
Tool
2. Loosen
up
the drawstring
on the
coral
cloth and
inetall the
coral
cloth onto
he
designated
hooks
on the
window
cleaning
tool
frame
and
pull
up trre
drawrtrlng
b
secure the
coral cloth
in
place.
NorE: Do
not
@ver the
squeegee
blade.
Make
surc to hook
up ha
eill olofrr
b
rll
hooks
on the
cleaning
tool frame
eo lt do€ent
rllp or
hll lhom
tlr
fnmr durlng
ur
(m
illustrated
in Fig. 2a,
2b &2c),
07ler'r