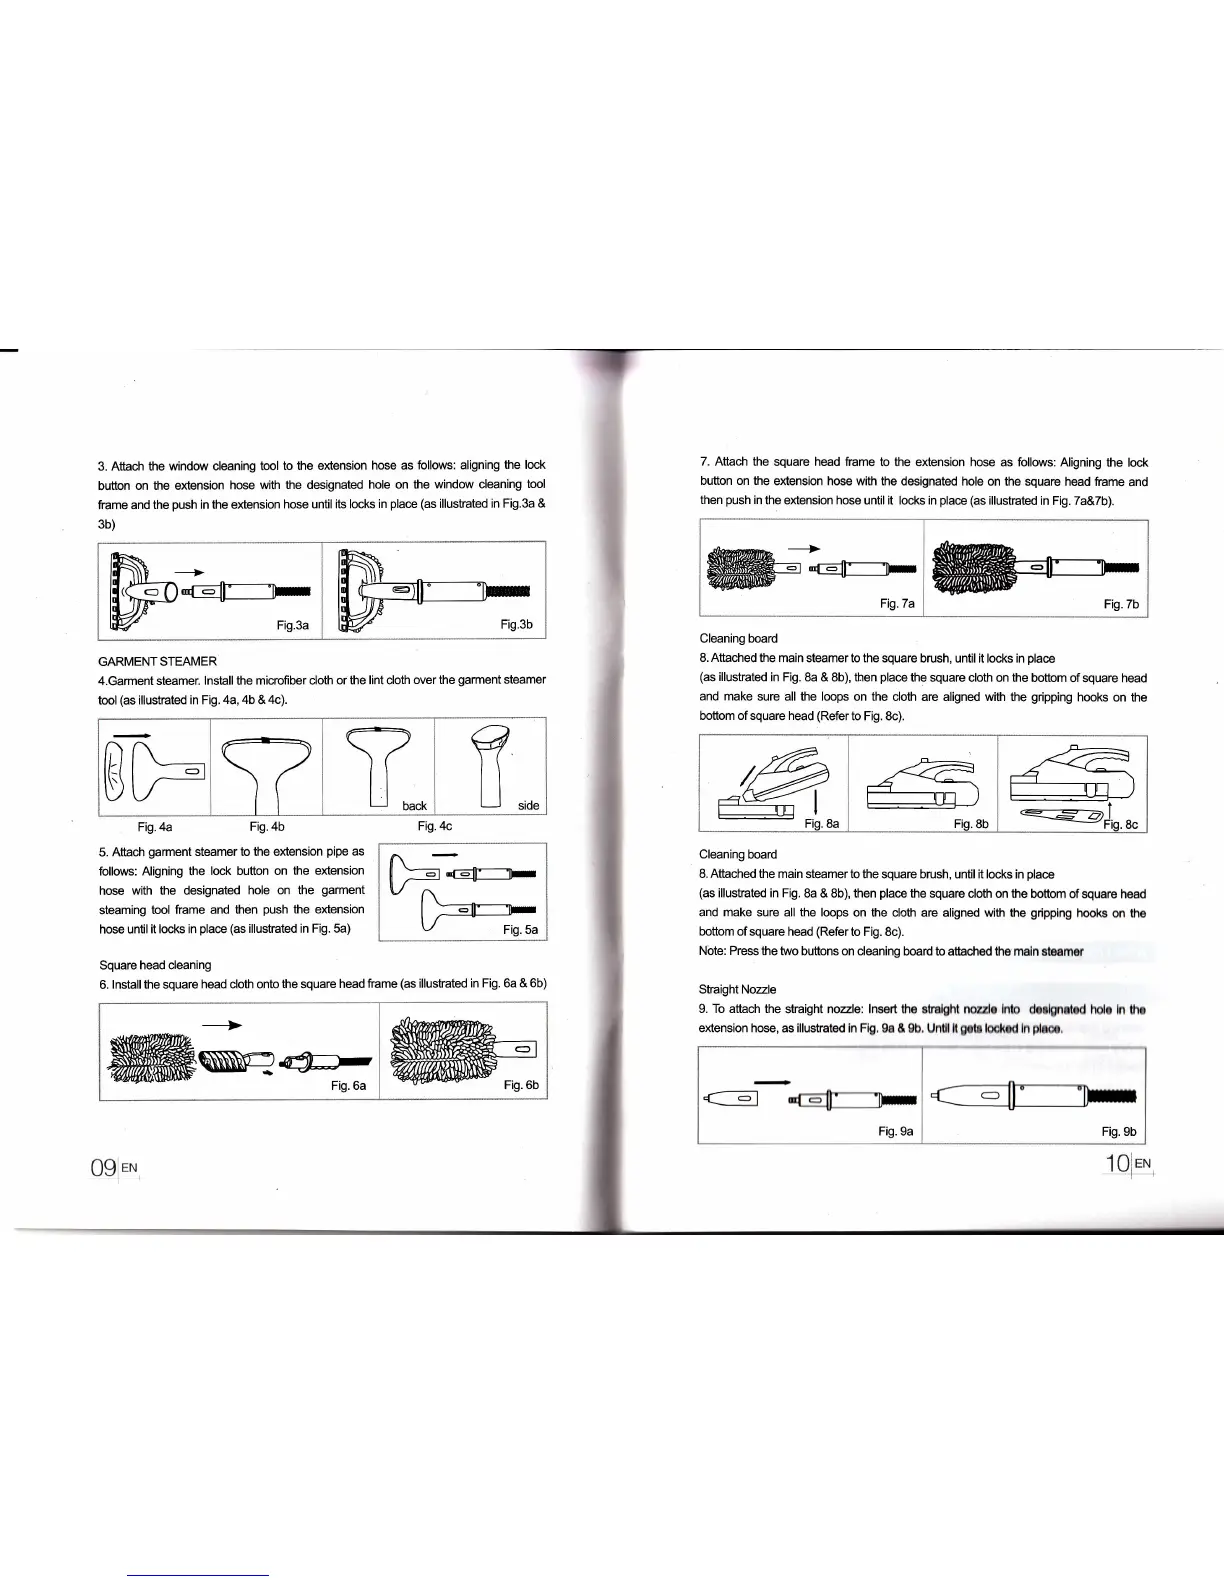
3. Attrach the window deaning
tool
to the extension
hose as follows:
aligning the
lock
button
on the extension
hose with
the designated
hole on the window
cleaning
tool
ftame and
the
push
in the extension
hose
until its locks in
place (as
illustrated
in Fig.3a &
3b)
GARMENTSTEAMER
4.Garment
steamer.
lnstall the microfiber cloth or
the lint cloth over
the
garment
steamer
tool
(as
illustrated
in Fig.4a,4b &
4c).
Fig.4a
Fig.4b
Fig.4c
r=ll----lr
-
Square
head cleaning
6.
lnstall the square
head cloth onto the square
head ftame
(as
illustrated in
Fig.
6a
& 6b)
ffi
Fig.7b
5.
Attach
garment
steamer
to the eXension
pipe
as
follows: Aligning the
lock button on the extension
hose
with the designated
hole on the
garment
steaming
tool frame and
then
push
the extension
hose until
it locks in
place (as
illustrated in Fig. 5a)
7. Attach the
square head ftame
to the extension hose as follows:
Aligning the lock
button on the
extension hose
with he designated hole on the
square head frame
and
then
push
in the extension hose
until it
locks
in
place (as
illustrated
in Fig. 7a&7b).
Cleaning board
8. Attached
the main steamer to the
square brush, until it locks in
place
(as
illustrated
in Fig. 8a
& 8b),
then
place
the square
cloth on the bottom of
square head
and make sure all the loops
on the cloth are aligned with
the
gripping
hooks
on the
bottom of
square
head
(Referto
Fig.8c).
Cleaning board
8. Attached the main
steamerto the square brush,
until
it
locks in
place
(as
illustrated in Fig.
8a & 8b), then
place
the
square cloth on the
bottrrm of square
head
and make sure
all
the loops
on the cloth are aligned
with the
gripping
hooks
on the
bottom ofsquare head
(Referto
Fig. 8c).
Note: Press
the two buttons on cleaning
board to attached
h6 maln
lbtmar
Straight Nozzle
9. To attach the
straight nozzle: lnsert
hc rfdght
no*dr lnb drdgndad
holr ln hr
extension hose,
as illustrated ln
Flg. 9r & 9b,
Un{l
lt
gol
bdcd ln
pho,
----->
ffiN-%
Fig.9a
I
Fig.9b
.10ie*
-
l---r
B}:
fl",,.
09]eru