6
INTRODUCTION
● This tool is intended for hammer drilling in concrete, brick
and stone; for drilling in wood, metal and plastic as well
as for screwdriving specific accessories should be used
● The hammering system in this tool outperforms any
traditional ratcheting drill when drilling in concrete
● This tool is designed for use in combination with all
standard SDS+ accessories
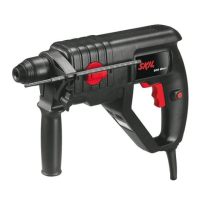
TECHNICAL SPECIFICATIONS 1
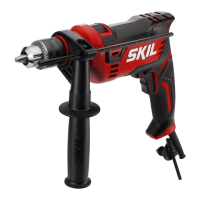
OPERATING CONTROLS 2
A Switch for on/off and speed control
B Button for switch locking
C Lever for changing direction of rotation
D Switch for selecting drilling function
E Dust cap
F Locking sleeve
G Auxiliary handle
H Wing nut for adjusting auxiliary handle
SAFETY
● Read and save this instruction manual (pay special
attention to the safety instructions at the back)
● Avoid damage that can be caused by screws, nails and
other elements in your workpiece; remove them before
you start working
● Always keep the cord away from moving parts of the tool
● When you put away the tool, switch off the motor and
ensure that all moving parts have come to a complete
standstill
● Use completely unrolled and safe extension cords with a
capacity of 16 Amps (UK 13 Amps)
● In case of electrical or mechanical malfunction,
immediately switch off the tool and disconnect the plug
● SKIL can assure flawless functioning of the tool only
when original accessories are used
● Before using accessories always compare the maximum
allowed r.p.m. of that specific accessory with the r.p.m.
of the tool
● This tool should not be used by people under the age of
16 years
● Be careful not to drill or drive into areas where electrical
wires may be contacted; always use auxiliary
handle G 2
● The noise level when working can exceed 85 dB(A);
wear ear protection
● If the cord is damaged or cut through while working, do
not touch the cord, but immediately disconnect the plug
● Never use tool when cord is damaged; have it replaced
by a qualified person
● Always check that the supply voltage is the same as the
voltage indicated on the nameplate of the tool (tools with
a rating of 230V or 240V can also be connected to a
220V supply)
● Be aware of the forces that occur as a result of jamming
(especially when drilling metals); always use auxiliary
handle G 2 and take a secure stance
● Always disconnect plug from power source before
making any adjustment or changing any accessory
WHEN CONNECTING NEW 3-PIN PLUG (U.K. ONLY):
● Do not connect the blue (= neutral) or brown (= live) wire
in the cord of this tool to the earth terminal of the plug
● If for any reason the old plug is cut off the cord of this
tool, it must be disposed of safely and not left unattended
USE
● On/Off 3
● Switch locking for continuous use 4
● Speed control for smooth starting 5
● Changing direction of rotation 6
- when not properly set in left/right position, switch A
cannot be activated
! change direction of rotation only when tool is at a
complete standstill
● Normal drilling/screwdriving versus hammer drilling 7
! select drilling function only when tool is switched
off
- for drilling in wood, metal and plastic as well as for
screwdriving the ring gear chuck and the corresponding
adapter should be used (see: Application Advice)
- the hammer mechanism is activated by applying a
slight pressure on the tool when the drill bit is in
contact with the workpiece
- best hammer drilling results can be obtained by only
a slight pressure on the tool needed to keep the
automatic clutch engaged; drilling performance will
not improve by applying more pressure on the tool:
SKIL LETS THE TOOL WORK FOR YOU
● Changing bits 8
- clean and lightly lubricate accessory before insertion
- insert accessory in SDS+ chuck while turning and
push it until it engages (avoid damaging dust cap E);
the accessory locks in position automatically
- pull accessory to check that it is locked correctly
- remove accessory by pushing back locking sleeve F
! the SDS+ accessory requires freedom of
movement which causes eccentricity when tool is
off-load; however, the accessory automatically
centres itself during operation without affecting
drilling precision
! do not use bits with a damaged shank
● Safety clutch
If the accessory gets jammed, the drive to the spindle is
interrupted (causing a rattling noise)
- immediately switch off tool
- remove the jammed accessory
- switch on tool again
● Adjusting drilling depth 9
● Holding and guiding the tool 0
! always use auxiliary handle G 2 (can be adjusted
with wing nut H)
- keep the ventilation slots uncovered
- do not apply too much pressure on the tool; let the
tool do the work for you
XP SKIL 1745/1750 27-03-2003 14:14 Pagina 6
 Loading...