Do you have a question about the Skil 3601 and is the answer not in the manual?
Guidelines for maintaining a safe workspace, including lighting, clutter, and keeping others away.
Precautions for using power tools safely, focusing on voltage compatibility, grounding, and avoiding wet conditions.
Advice on appropriate attire, alertness, and avoiding accidental starting to prevent injury.
Proper techniques for using tools, including securing workpieces and using safety equipment.
Guidelines for tool maintenance and repair, emphasizing qualified personnel and genuine replacement parts.
Specific safety rules for flooring saws, including power disconnection and material cutting restrictions.
Safe practices for making crosscuts, including workpiece support, hand positioning, and avoiding freehand cuts.
Understanding kickback and methods to avoid it, such as proper workpiece feeding and using safety devices.
Essential protective measures for the operator, including clothing, eye, and hearing protection during operation.
Importance of sharp tools, proper maintenance, and using recommended accessories for safe operation.
Guidelines for selecting appropriate saw blades and accessories based on size and specifications.
Details on voltage, amperage, no-load speed, and table size of the flooring saw.
Explanation of double insulation design and its safety implications for power tools.
Recommendations for selecting appropriate extension cords based on tool requirements and length.
Explanation of various safety alert symbols (DANGER, WARNING, CAUTION) and their meanings for hazard identification.
Information on messages that prevent equipment or property damage if instructions are not followed.
A table defining various symbols used on the tool, including electrical, measurement, and recycling symbols.
Symbols indicating the need to read the manual and wear eye protection during operation.
Symbols indicating listing or recognition by UL, CSA, Intertek, and NOM for safety standards.
Definitions for terms like workpiece, arbor, kerf, kickback, and anti-kickback pawls.
Definitions for operational terms such as crosscut, freehand, push stick, and ripping.
Lists all components included with the flooring saw and their quantities for verification.
Lists the tools required for assembling the flooring saw.
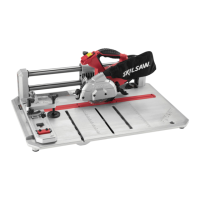
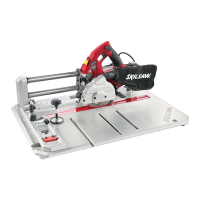
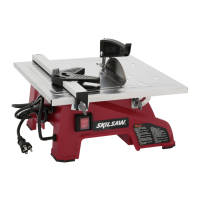
Identifies and labels all parts of the flooring saw using a diagram and numbered list.
Step-by-step instructions for aligning the rip fence parallel to the saw blade for accurate cuts.
Procedure for adjusting the rip fence pointer to set precise cutting dimensions on the scale.
Guidelines for selecting appropriate saw blades based on dimensions, kerf width, and plate thickness.
Detailed instructions on safely removing and installing saw blades, including precautions for carbide tips.
Instructions for aligning the riving knife with the saw blade to prevent kickback.
Instructions for securely fastening the saw to a workbench or stand for stability and dust management.
Alternative method for mounting the saw to a plywood board for enhanced stability and to prevent tipping.
Emphasizes cleaning sawdust and wood chips from the floor after cutting operations.
Information about the sawdust port for connecting a dust collection system or bag.
How to use the saw assembly lock and operate the power switch with a lockout key for safety.
Steps to set up the saw for miter cuts, including fence positioning and safety device checks.
Guidance on maintaining proper body posture and hand placement for safe miter cutting.
Methods for supporting workpieces, including using the vice clamp and supporting long workpieces.
Step-by-step instructions for performing a miter cut using the saw assembly and adjusting the angle.
Techniques for cutting bowed or irregular shaped materials safely and effectively.
Detailed safety advice for rip cutting, emphasizing kickback avoidance, hand placement, and using push sticks.
Proper techniques for feeding and managing workpieces during rip cuts, including handling warped pieces.
Steps to prepare the saw for rip cutting, including positioning the saw assembly and fence.
Instructions for performing a rip cut, ensuring fence parallelism and using a push stick for safety.
Procedures for cleaning, lubrication, and checking anti-kickback pawls for optimal performance.
Guidance on using recommended accessories and precautions for carbide-tipped blades.
Common problems and solutions for the saw failing to start, such as power cord issues or switch problems.
Troubleshooting steps for issues related to the saw not reaching operational speed, like extension cord or voltage problems.
Causes and remedies for excessive vibration, including blade balance, mounting security, and bolt tightness.
Details the warranty period, registration requirements, exclusions, and limitations for SKIL power tools.
Explains the user's legal rights regarding implied warranties and consequential damages.
| Type | Circular Saw |
|---|---|
| Power | 120V |
| Motor | Brushed |
| Bevel Capacity | 45° |
| Cutting Depth at 45° | 1-3/4 inches |
| Amperage | 13A |
| Arbor Size | 5/8 inches |
| Blade Diameter | 7-1/4 in |