11
OPERATING INSTRUCTIONS
Tool-Free Blade Installation
WARNING
To prevent personal injury,
always disconnect the plug
from the power source before assembling
parts, making adjustment, or changing blades.
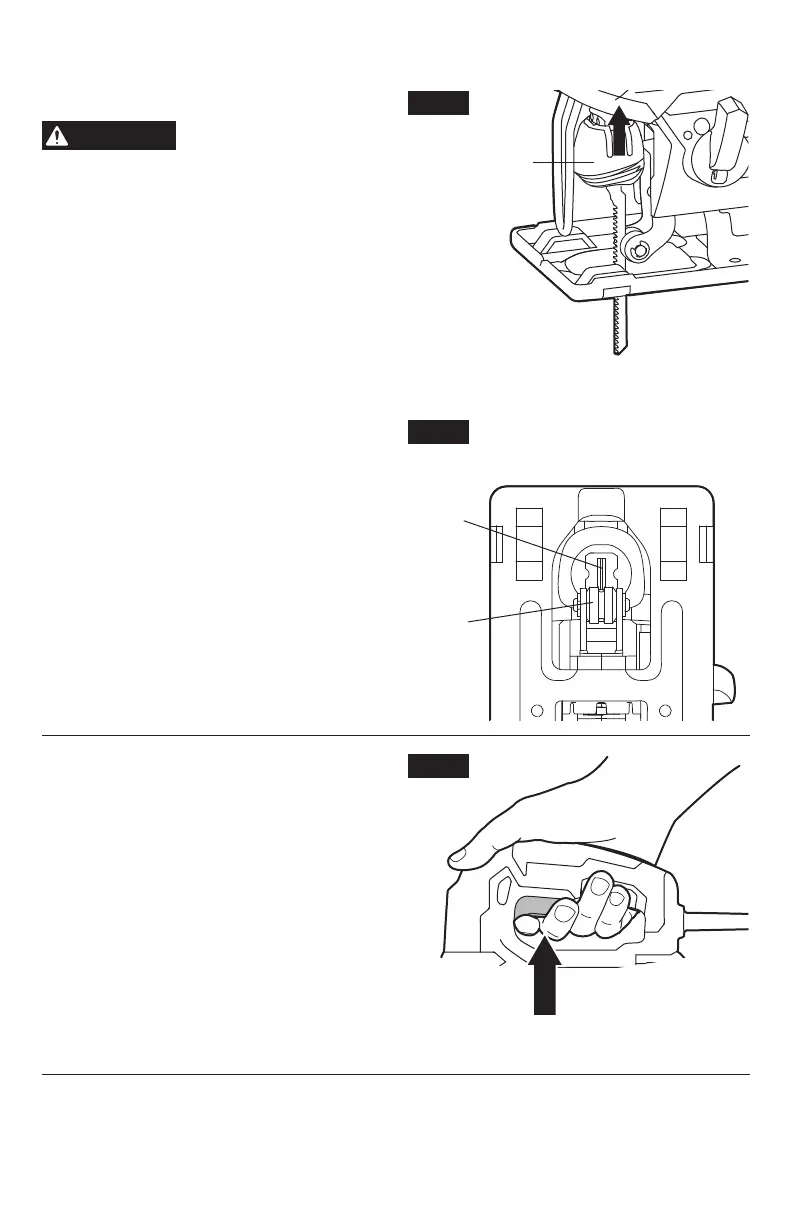
1. Lift the tool-free blade change cover up and
insert the blade (teeth facing the cutting
direction) into the slot of the tool-free blade
change holder (Fig. 2).
2. Release the tool-free blade change cover to
lock the blade in place.
3. Pull down on the blade to verify that the
blade is securely locked in place.
NOTICE:
When inserting the saw blade, the
back of the blade must rest in the groove of the
guide roller (Fig. 3).
NOTICE:
The tool accepts most commonly
available T-shank and U-shank blades.
4. To remove the blade, lift the tool-less blade
change cover up and carefully remove the
blade.
Trigger Switch
The tool can be turned “ON” or “OFF” by
squeezing or releasing the trigger (Fig. 4).
Fig. 3
Blade
Roller
Guide
Fig. 4
Fig. 2
Tool-Free Blade
Change Cover