4
PART I : SETTING UP THE AZGTi MOUNT
1.1 Setting Up on a Skywatcher Tripod
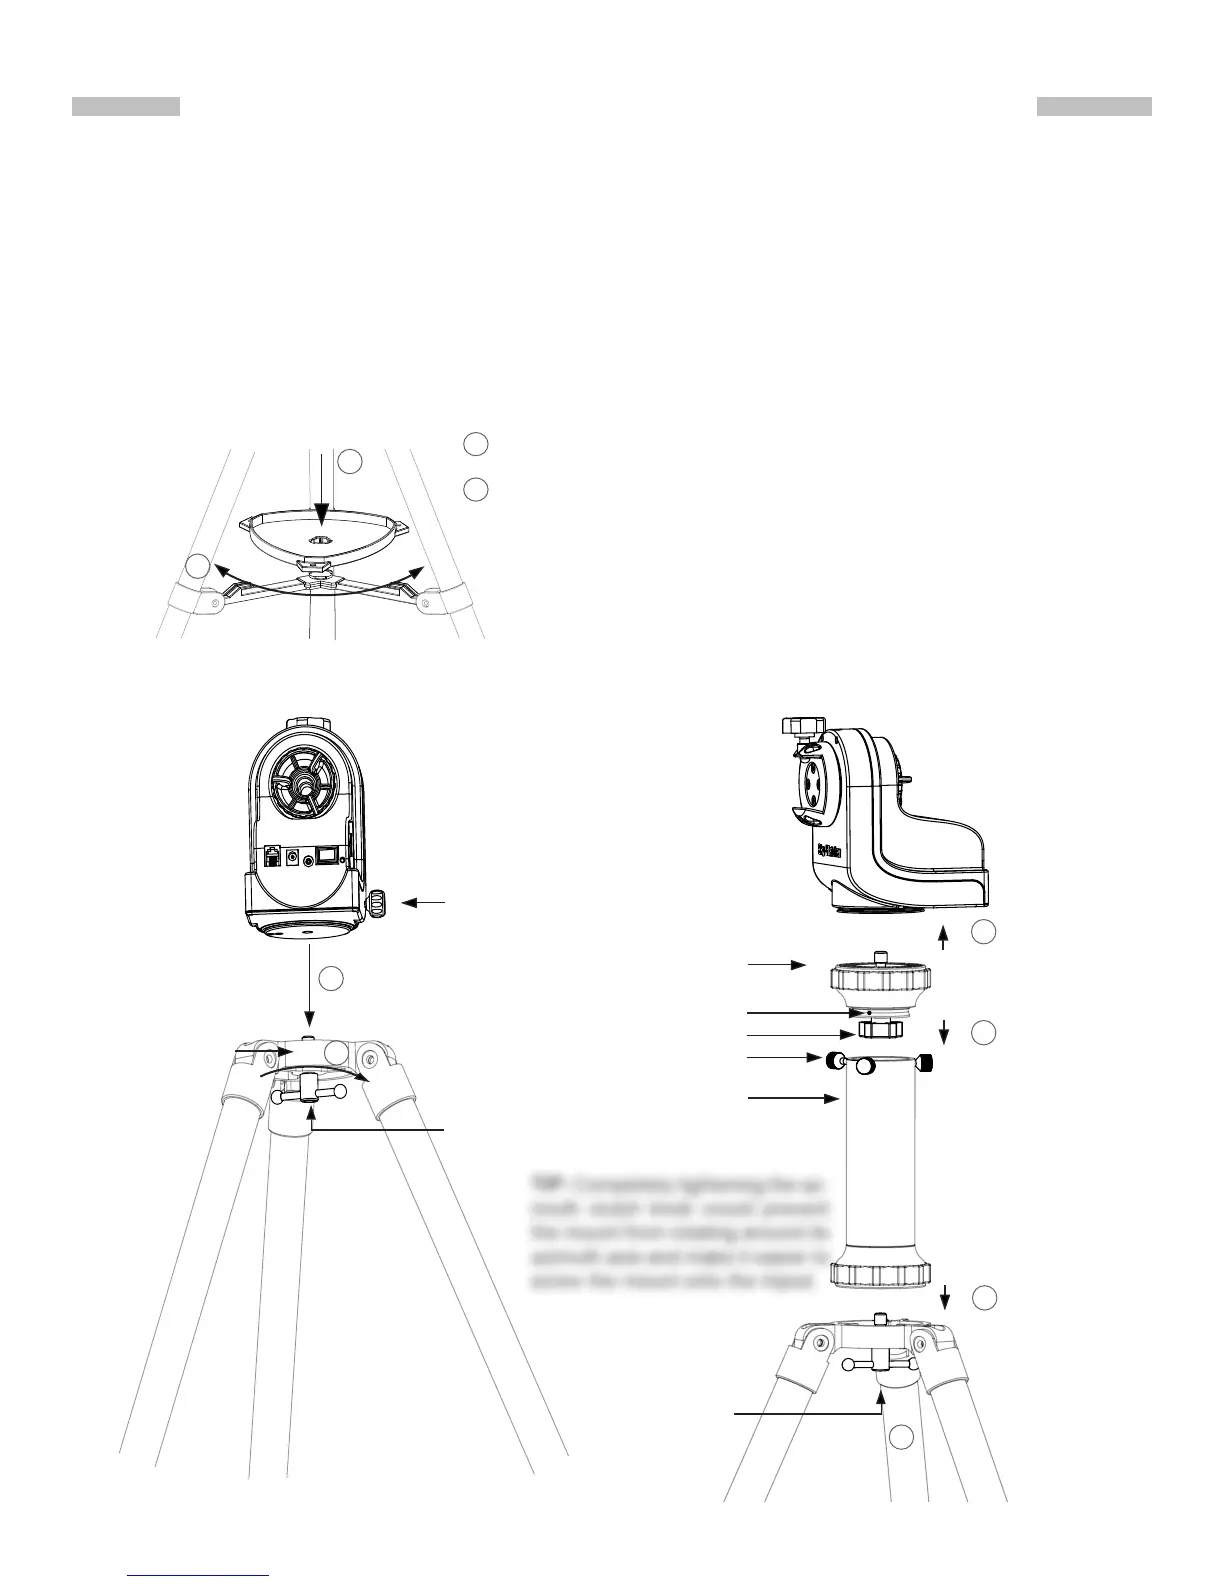
1. Fully expand the three legs of the tripod on level ground.
2. Install the accessory tray on the tripod as shown in Fig. 1.1a.
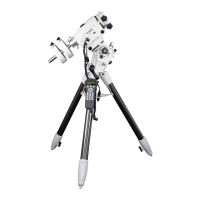
3. If using a short tube telescope, which does not hit the tripod legs when it points high up,
with the AZGTi mount, the mount can be installed onto the tripod directly. Align the 3/8”
socket at the base of the mount with the locking bolt on the tripod head. Lock the mount on
the tripod by tightening the bolt (Fig. 1.1b).
TIP: Completely tightening the az-
imuth clutch knob would prevent
the mount from rotating around its
azimuth axis and make it easier to
screw the mount onto the tripod.
WARNING: The accessory tray of a Skywatcher tripod ensures that
the tripod legs are rmly expanded, which prevents the tripod from
accidentally tipping over. When using the AZGTi mount on a Sky-
watcher tripod, an accessory tray should always be used to ensure
stability.
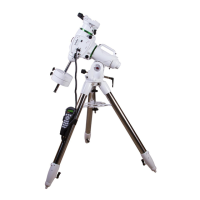
Fig. 1.1c
Locking Bolt
2
Locking Screws
Extension Pier
Locking Knob
Azimuth Clutch Knob
Locking Bolt
Fig. 1.1b
1
2
1
2
Align the accessory tray and push down on it while holding onto the
bottom supports.
1
2
Fig. 1.1a
Rotate the tray to lock it into place.
Pier Head
1
2
3
Tripod Head
Notch