8
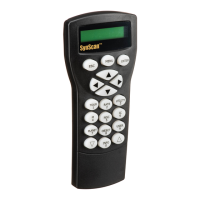
INSERTING DIAGONAL AND EYEPIECE (Fig.7)
1) Loosen the thumbscrew on the end
of the focus tube.
2) Insert a diagonal into the focus tube and
re-tighten the thumbscrew to hold the
diagonal in place.
3) Loosen the thumbscrews on the diagonal.
4) Insert the desired eyepiece into the diagonal
and secure by re-tightening the thumbscrews.
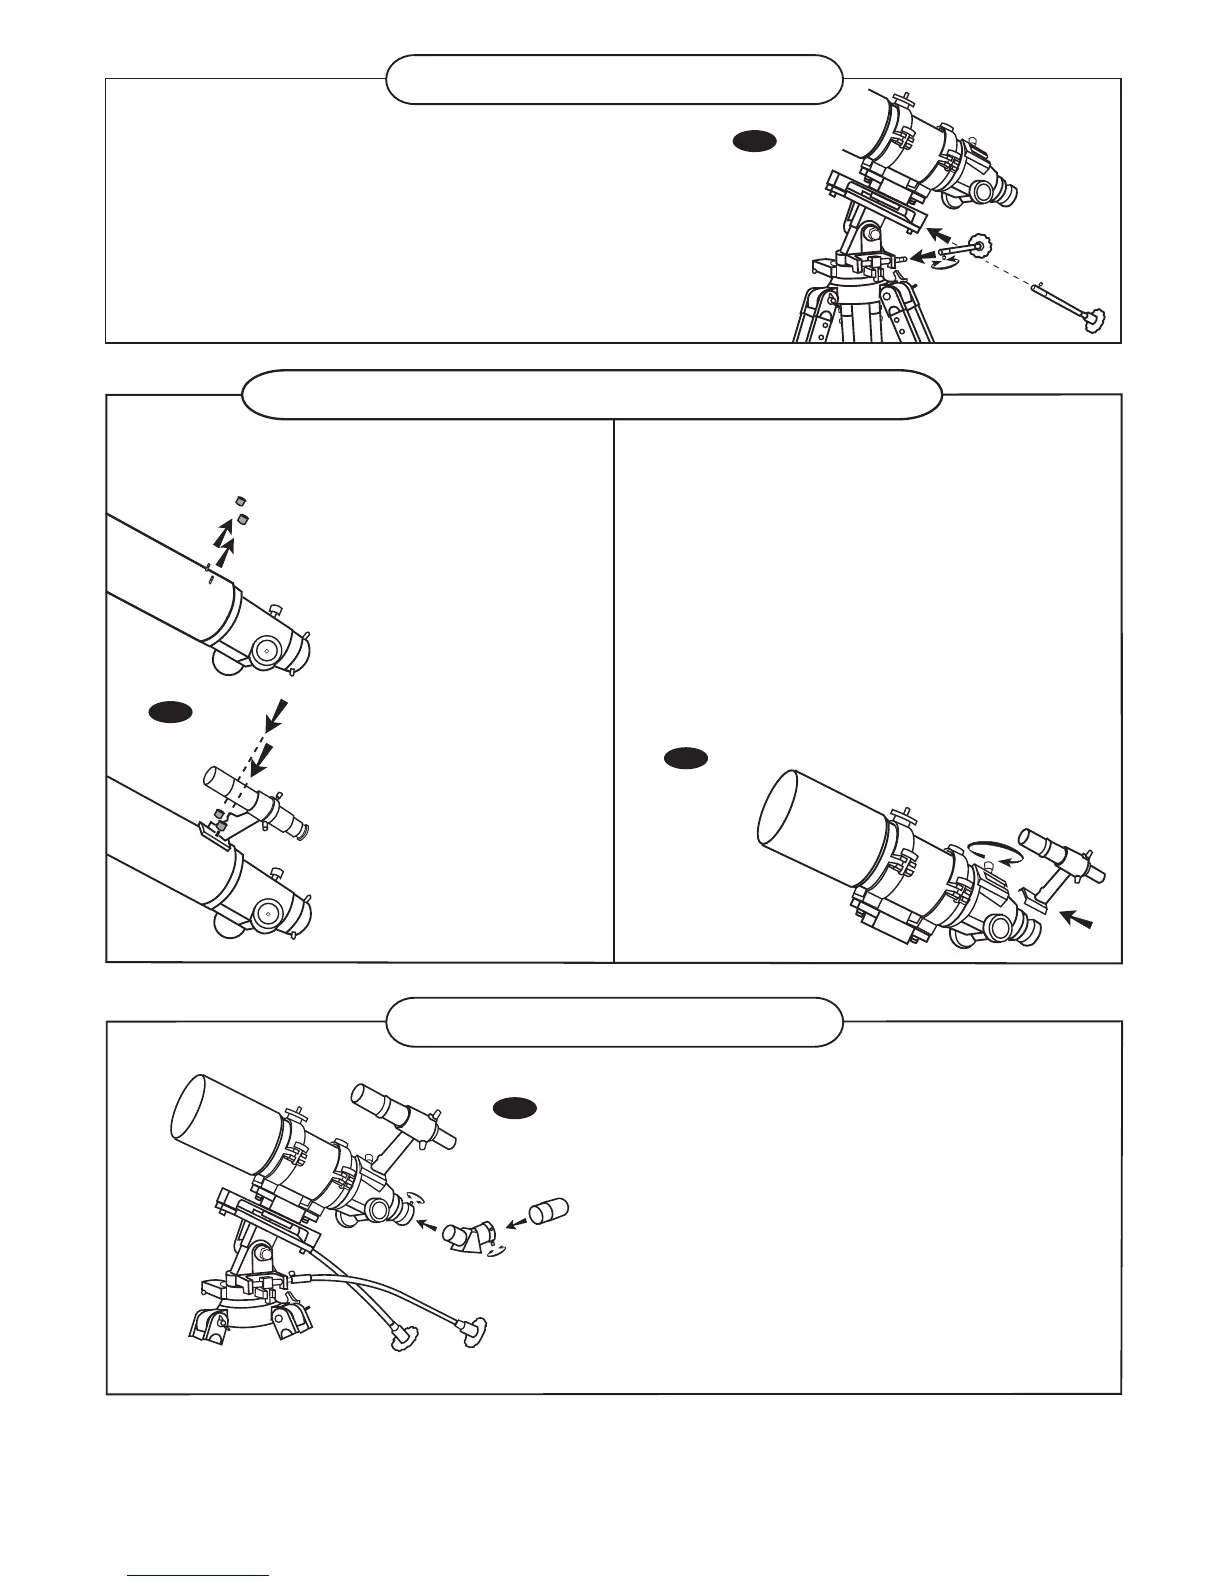
INSTALLING CONTROL CABLES (Fig.5)
1) Slide the sleeve end of the cable over the nipple
on the end of the worm gear. Secure the cable by tightening
the set screw against the at surface on the nipple.
Large finderscope / Red dot finder
Small finderscope
ATTACHING THE FINDERSCOPE
BRACKET / RED DOT FINDER (Fig.6)
1) (For nderscope only): Locate the nderscope
bracket and carefully remove the rubber-o-ring
from it. Position the o-ring into groove on the
nderscope tube.
2) Slide nderscope assembly/ red dot nder into the
rectangular slot and tighten the thumbscrew to
hold the bracket in place.
ATTACHING THE FINDER-
SCOPE (Fig.6)
1) Locate nderscope optical
assembly.
2) Remove the two knurled
thumbscrews near the end
of the telescope main body.
3) Position the nderscope
bracket over the screws in
the telescope main body.
4) Secure the nderscope
bracket with the two knurled
thumbscrews.
FINDERSCOPE/RED DOT FINDER ASSEMBLY
EYEPIECE ASSEMBLY
TELESCOPE ASSEMBLY
Fig.5
Fig.6
Fig.6
Fig.7