Insert the power supply cable through the wiring
slot found on the bottom of the mounted wall
plate (or through the breakaway tab on the rear
of the wall plate). Secure the power cable into the
top, center plug.
Push each valve wire firmly into a designated zone
position (1-8) and pull back gently to verify that
each wire is secure. The “C” positions are for
common wire(s). To remove a valve wire, depress its
corresponding button and pull the wire out.
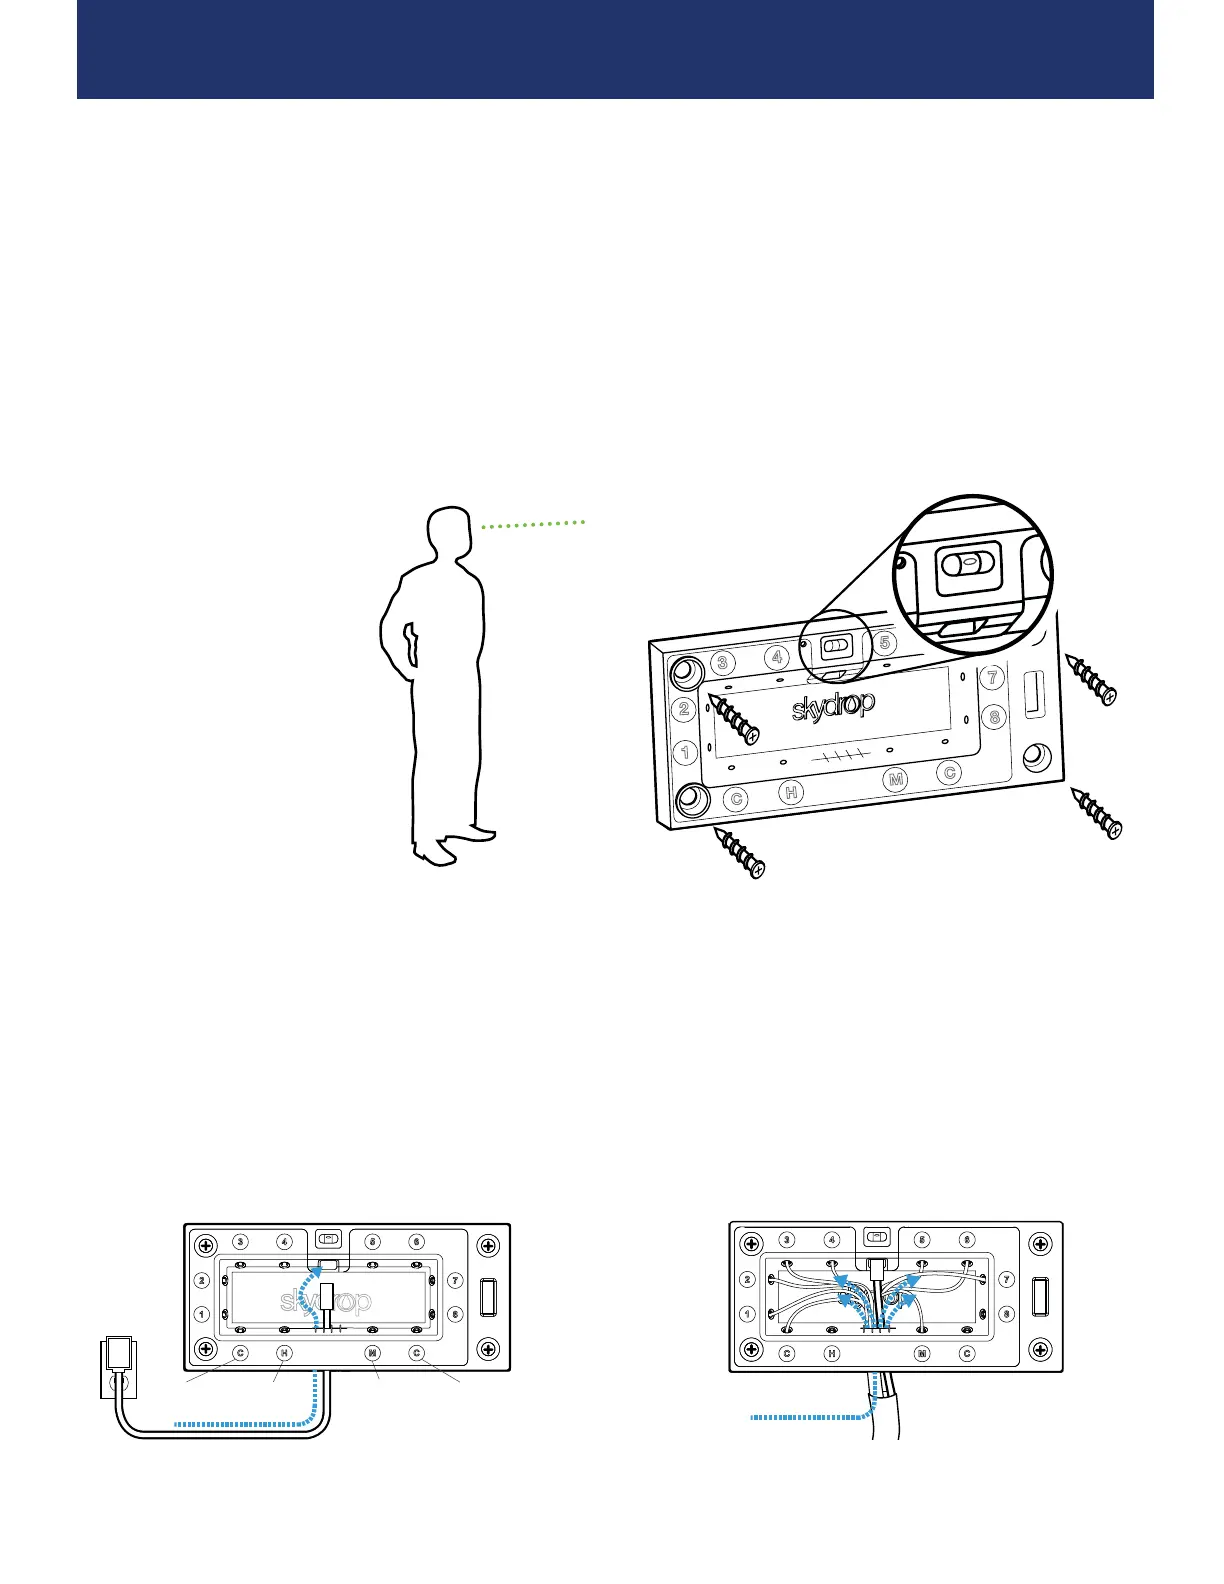
Step 2: Mount Your Controller Wall Plate
Common
Master Valve
(optional)
Common
Hot Position
(for testing)
Step 3: Power and Wiring
5
NOTE: Wall anchors are not necessary when mounting your Smart
Sprinkler Controller to drywall. Pre-drilling with a 1/8” (3mm) bit is
recommended when mounting to wood studs. Do not over-tighten
screws. Hand tightening is recommended.
Position the wall plate using the integrated level, and secure using anchor screws (included).
TIP: Mount your controller
at eye level for optimal
screen viewing.