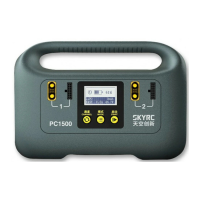
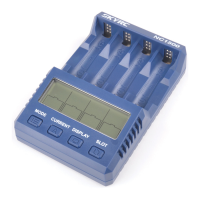
PC1500
Version: 1.0
1
2
CH1
39%05:18
FAST
3.833.823.833.83
3.833.833.823.82
3.823.82
0.000.00
3.83
3.83
LiPo
3
12/14S LiPo Batteies
96%
1
96%
3.0A
10000mAh
2
3.0A
10000mAh
25A
45.9V
0.000.000.000.00
0.000.000.000.00
0.000.00
0.000.00
0.00
0.00
LiPo
32%
5.9A
78mAh
LiPo
45.6V
1
28%02:28
3.803.803.803.80
3.803.803.803.80
3.80
3.80
0.000.00
3.80
3.80
LiPo
CH1
FAST
3.743.743.743.74
3.743.743.743.74
3.74
3.74
0.000.00
3.74
3.75
LiPo
SETTING
WATTING...
3.743.743.743.74
3.743.743.743.74
3.74
3.74
0.000.00
3.74
3.75
LiPo
0.000.000.000.00
0.000.000.000.00
0.000.00
0.000.00
0.00
0.00
LiHV
中⽂
ENGLISH
Instruction Manual
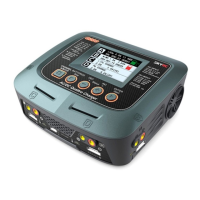
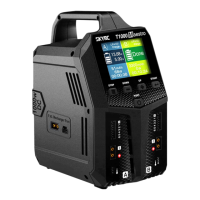
Dual Channel Intelligent 12/14S Battery Charger
INTRODUCTION
SkyRC PC1500 is a smart charger that integrates CAN communication for smart batteries and ordinary lithium
batteries. It can connect two batteries at the same time. The charger's maximum output power is up to 1500W. It has
three working modes of Fast Charge, Charge, and Storage. Additionally, PC1500 is capable of charging smart
batteries with customized CAN communication. It also comes with multiple protections: over-current, over-charge,
over-temperature protections, and LED indicator with easy operations and reliable performances.
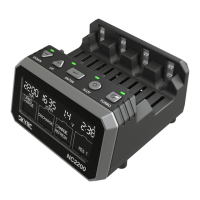
Handle
AC Input:
100-240V
Heat Dissipation
Outlet
Channel 1
Charge and
Balance Port
LCD
Display
Channel 2
Charge and
Balance Port
Control Panel
Channel
Button
Mode
Button
Start
Button
Support 2 packs of 12S or 14S LiPo batteries
Support 2 packs of 12S LiHV batteries
Three working modes of Fast Charge, Charge, and Storage
Maximum safety of short circuit protection,
reverse polarity protection & over-temperature protection
FEATURES
Support customization for CAN communication
Maximum Output Power of 1500W
Chinese & English language screen
Battery Voltage Meter
OPERATION PROCEDURE
Please make sure the AC power is well-grounded before using and strictly follow the operating procedures below.
The charger can connect up to 2 batteries.
1)Power on: Connect AC power, the charger will beep once, and the fan will start to rotate during self-check;
2)Select the language:
Initial Use: short-press the MODE button, choose the expected language in the interface, then press the START
button to confirm.
Routinely use: long-press the MODE button for 10 seconds to enter the language selection interface.
After choosing the expected
language, press and hold the
START button to confirm.
5) Select the Charge Mode: Fast Charge or Charge to long-press the START button for three seconds to start charging.
Note: 12S and 14S batteries cannot be charged simultaneously; short-press the START button to stop
charging or exit the abnormal state.
3) Select the battery type: Press and hold both the MODE & START buttons simultaneously for three seconds to
select the battery type: LiPo or LiHV.
4) Connect the Battery: please follow the diagram below to connect the battery.
(The charger will automatically detect the battery cells)
Charging Channel
Elapsed Time
Battery
Percentage
Battery Type
Total Battery
Pack Voltage
Charge
Current
Charging
Mode
Single Cell Voltage
Channel 1
Charged Capacity
Channel 1
Battery Percentage
Channel 2
Battery Percentage
Channel 2
Charged Capacity
Channel 1
Channel 2
BATTERY MAINTENANCE
If a Lithium battery will not be used for a long time, it's highly recommended to charge or discharge the single-cell
battery to 3.8V±0.05V with the STORAGE mode to extend the battery life.
If the battery voltage is lower than 3.8V±0.05V per cell, the charger will charge the battery to 3.8V±0.05V per cell in
the STORAGE mode;
If the battery voltage is higher than 3.8V±0.05V per cell, the charger will discharge the battery to 3.8V±0.05V per cell
in the STORAGE mode.
Select the STORAGE mode and long-press the START button for three seconds to start battery maintenance.
Short-press the START button to stop maintenance or exit the abnormal state.
BATTERY TYPE SWITCHING
Press and hold both the MODE & START buttons simultaneously for three seconds to select the battery type:
LiPo or LiHV.
Press and hold simultaneously
for three seconds
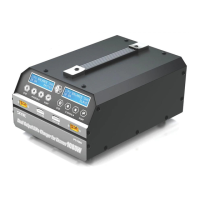
In the Box
PC1500 Charger *1
Instruction Manual *1
10A AC Power Cord *1
Instruction
Manual
CH1
STO
SETTING
WATTING...
STO
CH1
STODONE...
Long-press the START button for
three seconds to start
CH1
FAST
SETTING
WATTING...
CH1
FAST
SETTING
WATTING...