12
ASSEMBLY
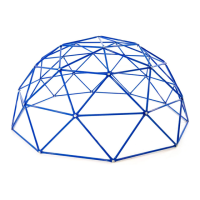
STEP 12
Tube 4 (x5)
Size: 638mm
4
M10 Washer
(x5)
10
(10)
(4)
(4)
(4)
(4)
(4)
(4)
(11)
Remove a nut from a M10X35mm bolt [10] of the fourth ring and place
a tube 4 (4) onto the bolt. Add a M10 washer [10] and lightly replace
the nut. Continue until all five tube 4’s have been placed. Angle the
tube 4’s to meet at the top of the geo dome. Each bolt should be
connecting six tubes.
Note: Do not tighten the nuts.
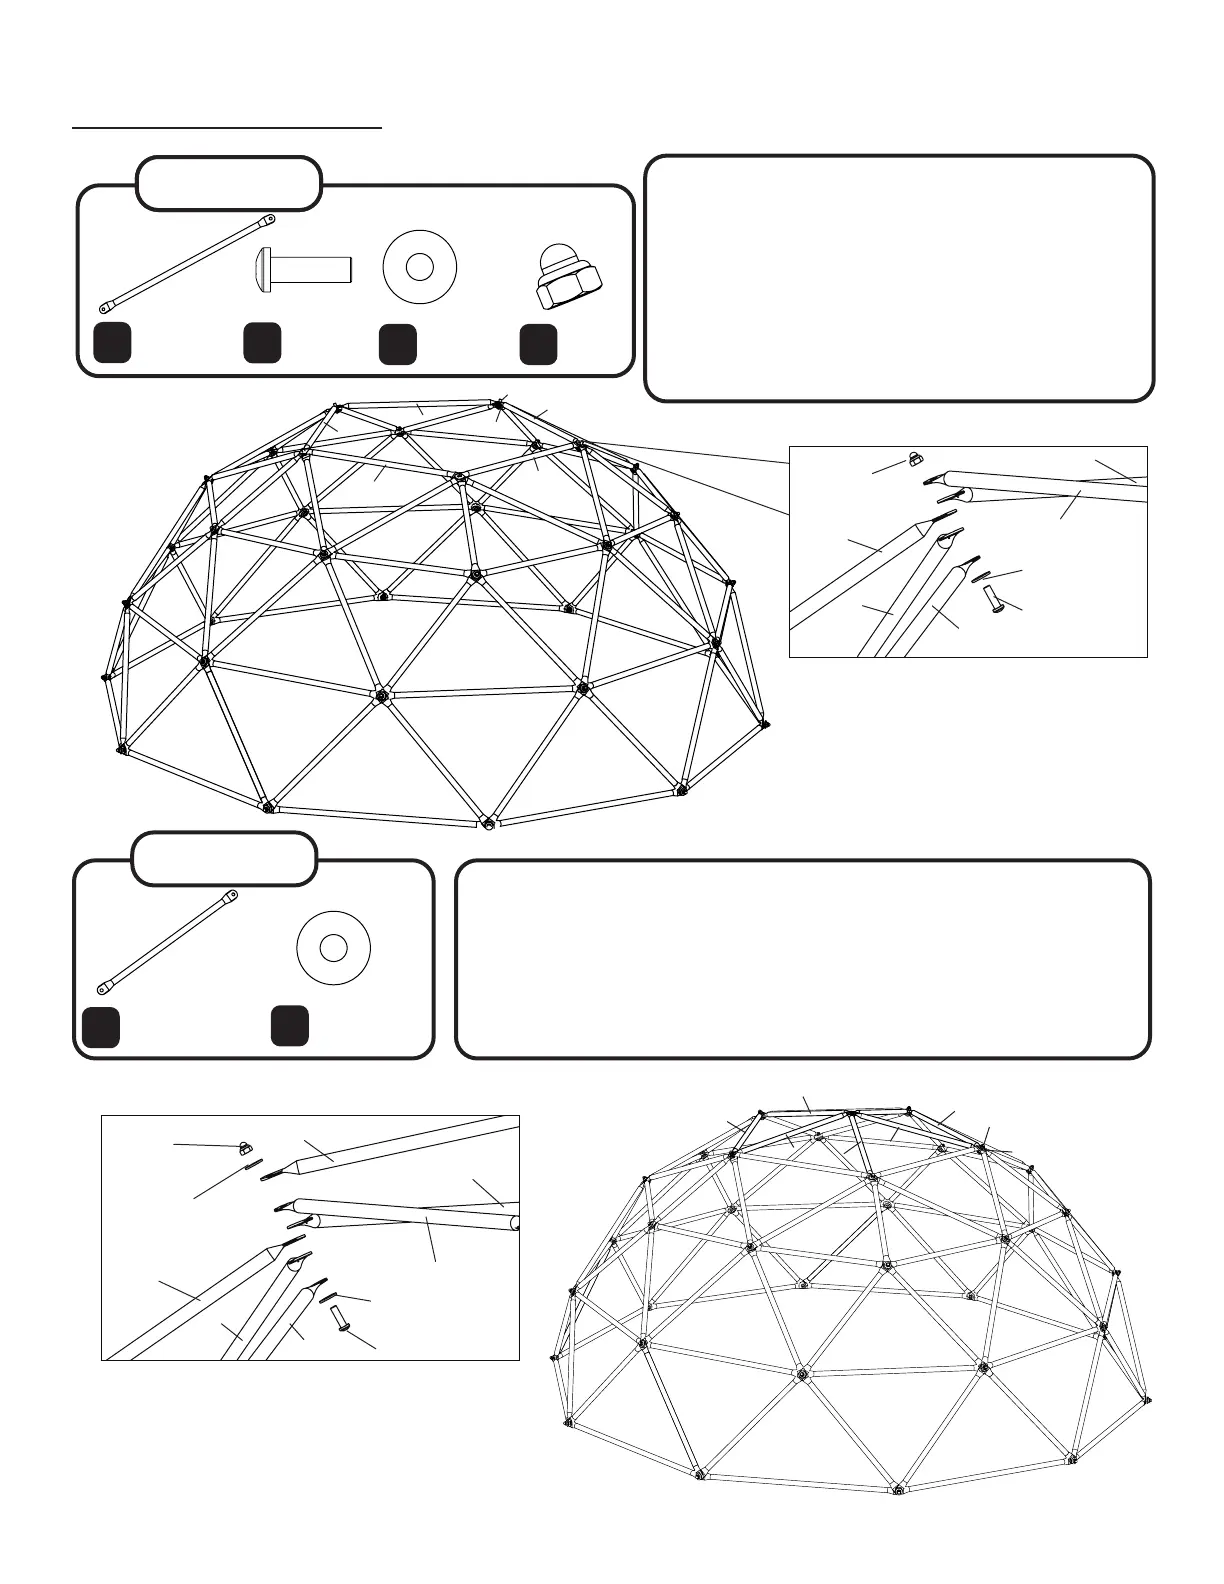
STEP 10
STEP 11
6
Tube 6 (x5)
Size: 732mm
8
Using tube 6’s (6), connect accross the tubes
from the previous step. Connect the tubes with
M10X35mm bolts [8], M10 washers [10] and M10 nuts
[11] [lightly place the nut as it will be removed in later
steps]. Continue attaching until all five tube 6’s are
connected. This completes the fourth and final ring
of the geo dome.
[You are almost done! Keep going, the finish is in
sight!!]
M10 Washer
(x5)
10
M10x35mm
Bolt (x5)
(6)
(6)
(6)
(6)
(6)
(10)
(8)
M10 Nut
(x5)
11
(11)
(2)
(5)
(6)
(2)
(6)
(10)
(8)
(11)
(4)
(10)
(10)
(8)
(6)
(6)(2)
(2)
(5)
 Loading...