13
ASSEMBLY
• Need phillips screw driver (included with trampoline) and 2 adjustable wrenches (for putting the trampoline together). A rubber
mallet is also recommended to make assembly easier.
• Assembly requires two adults. Keep children away from the trampoline and enclosure until they are completely put together.
• Use gloves to protect your hands from pinch points during assembly.
• Make sure that the trampoline is properly put together, with the frame pad correctly laid out, before you put together the trampoline
enclosure.
• The assembly steps refer to parts by their descriptions and key numbers (see the PARTS LIST on page 13 and make sure that all
listed parts are included. If a part is missing, refer to ORDERING REPLACEMENT PARTS at the bottom of page 13.
TR AMPOLINE PLACEMENT
1. Place the trampoline and enclosure on a level surface before you use it.
2. Adequate overhead clearance is essential. A minimum of 24 feet (7.3 meters) from the ground is recommended. Provide clearance
from wires, tree limbs, and other possible hazards. Lateral (sideways) clearance is also essential. Place the trampoline and enclosure
away from walls, structures, fences, and other play areas. Maintain a clear space on all sides of the trampoline and enclosure.
3. Use the trampoline in a well-lighted area. If the trampoline is indoors or in a shady areas you may need to use artificial (electrical)
lighting in the area.
4. Secure the trampoline and enclosure against unauthorized and unsupervised use.
5. Remove any objects from under the trampoline and enclosure.
6. The owner and supervisors of the trampoline are responsible to make all users aware of practices specified in this manual.
7. The trampoline enclosure is only to be used as an enclosure for a specific round trampoline.
Trampoline Assembly
ASSEMBLY (PUTTING THE TRAMPOLINE AND ENCLOSURE TOGETHER)
IMPORTANT ASSEMBLY INFORMATION
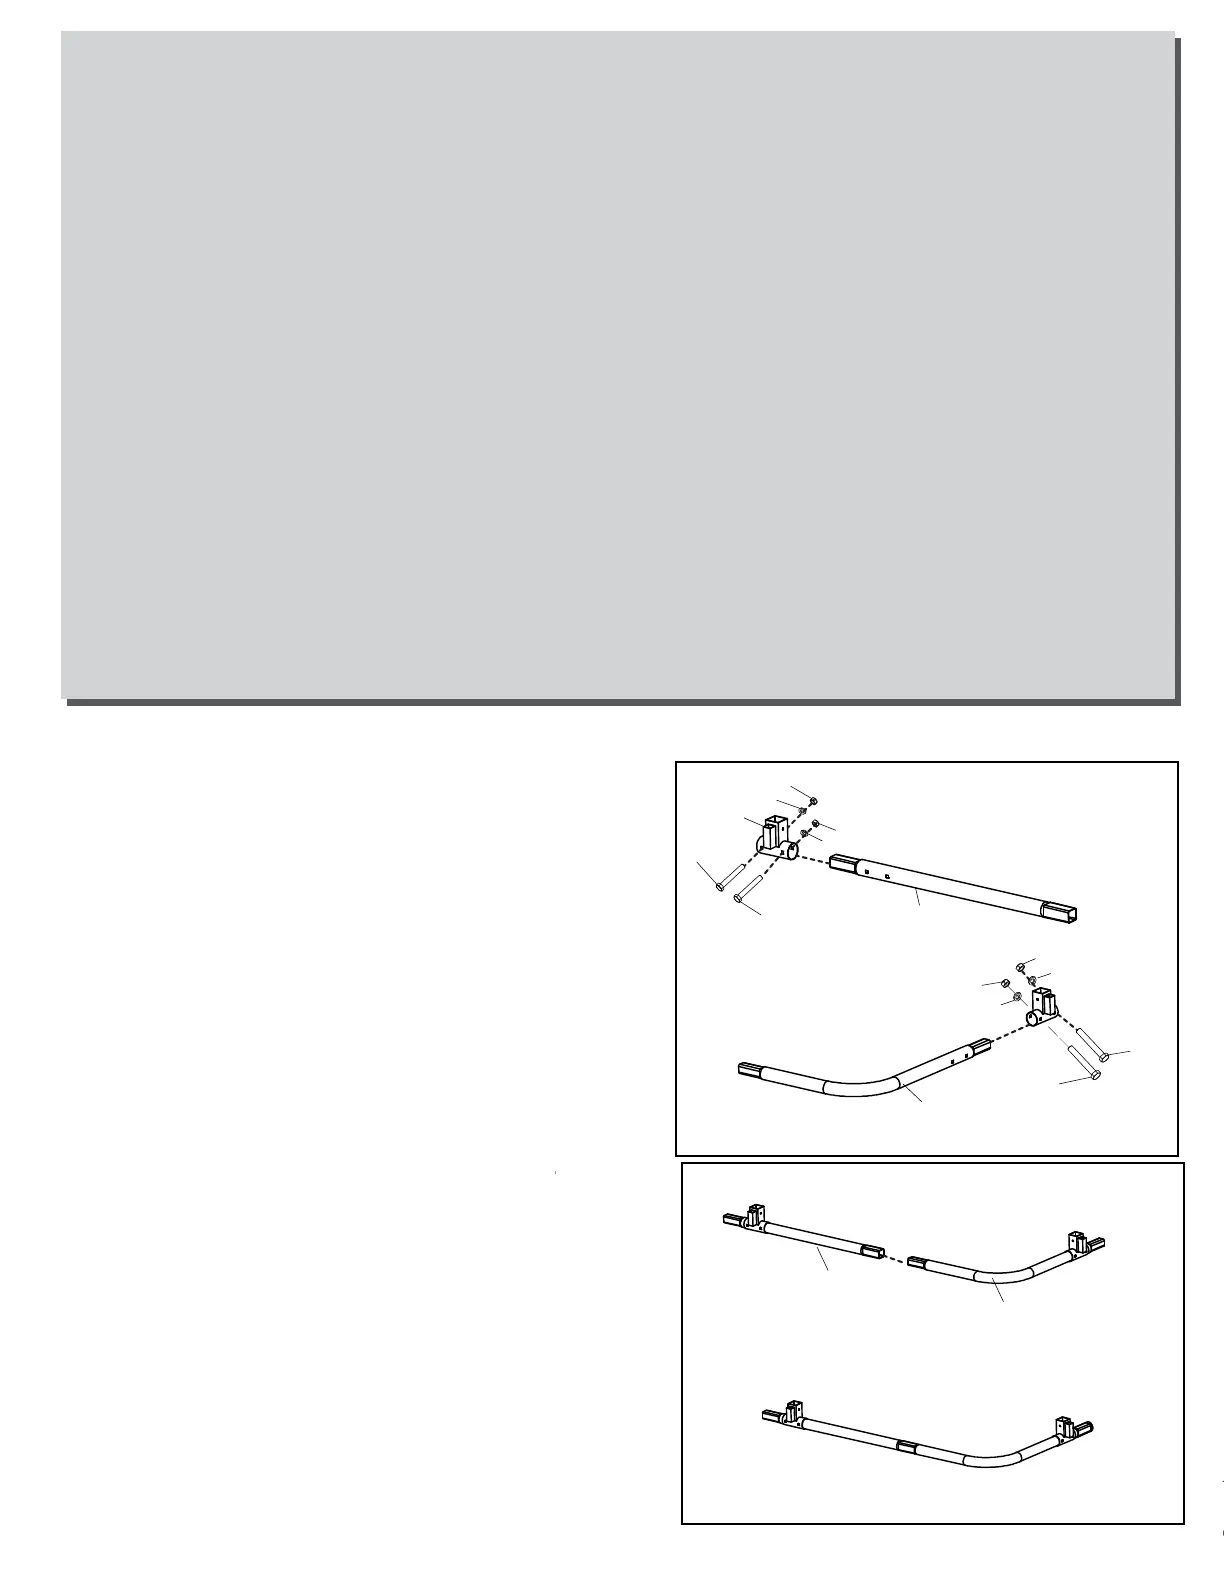
1, Lay the Frame tube(1) and Socket(2) on the ground
in the position shown , make sure the Frame tube are
turned so the small holes (spring holes) are facing the ground.
Insert the Frame tube(1) into the Socket(2) secure with
M10 X88mm Bolt(3) , M10 Nut(4) and M10 washer(5)
Lay the Right corner tube(6) and Socket(2) on the ground in the
position shown, make sure the Right Corner tube are turned so the
small holes (spring holes) are facing the ground.
Insert the Right corner tube(6) into the Socket(2) secure with M10 X 88mm
Bolt(3) , M10 Nut(4) and M10 Washer(5)
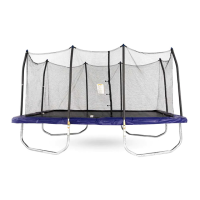
2, Attach the Frame tube(1) with Socket and Right Corner tube(6)
with socket as shown
Repeat above assembly steps until two assembly units (A) will be completed.
1
1
6
6
A
2
5
5
3
3
4
4
5
5
3
3
4
4
1
2