4 5
WARNING!
IF THE FRONT WHEEL IS NOT
FASTENED SECURELY,
IT WILL CAUSE THE FRONT
WHEEL TO COME OFF
AND MAY CAUSE A SERIOUS
ACCIDENT!
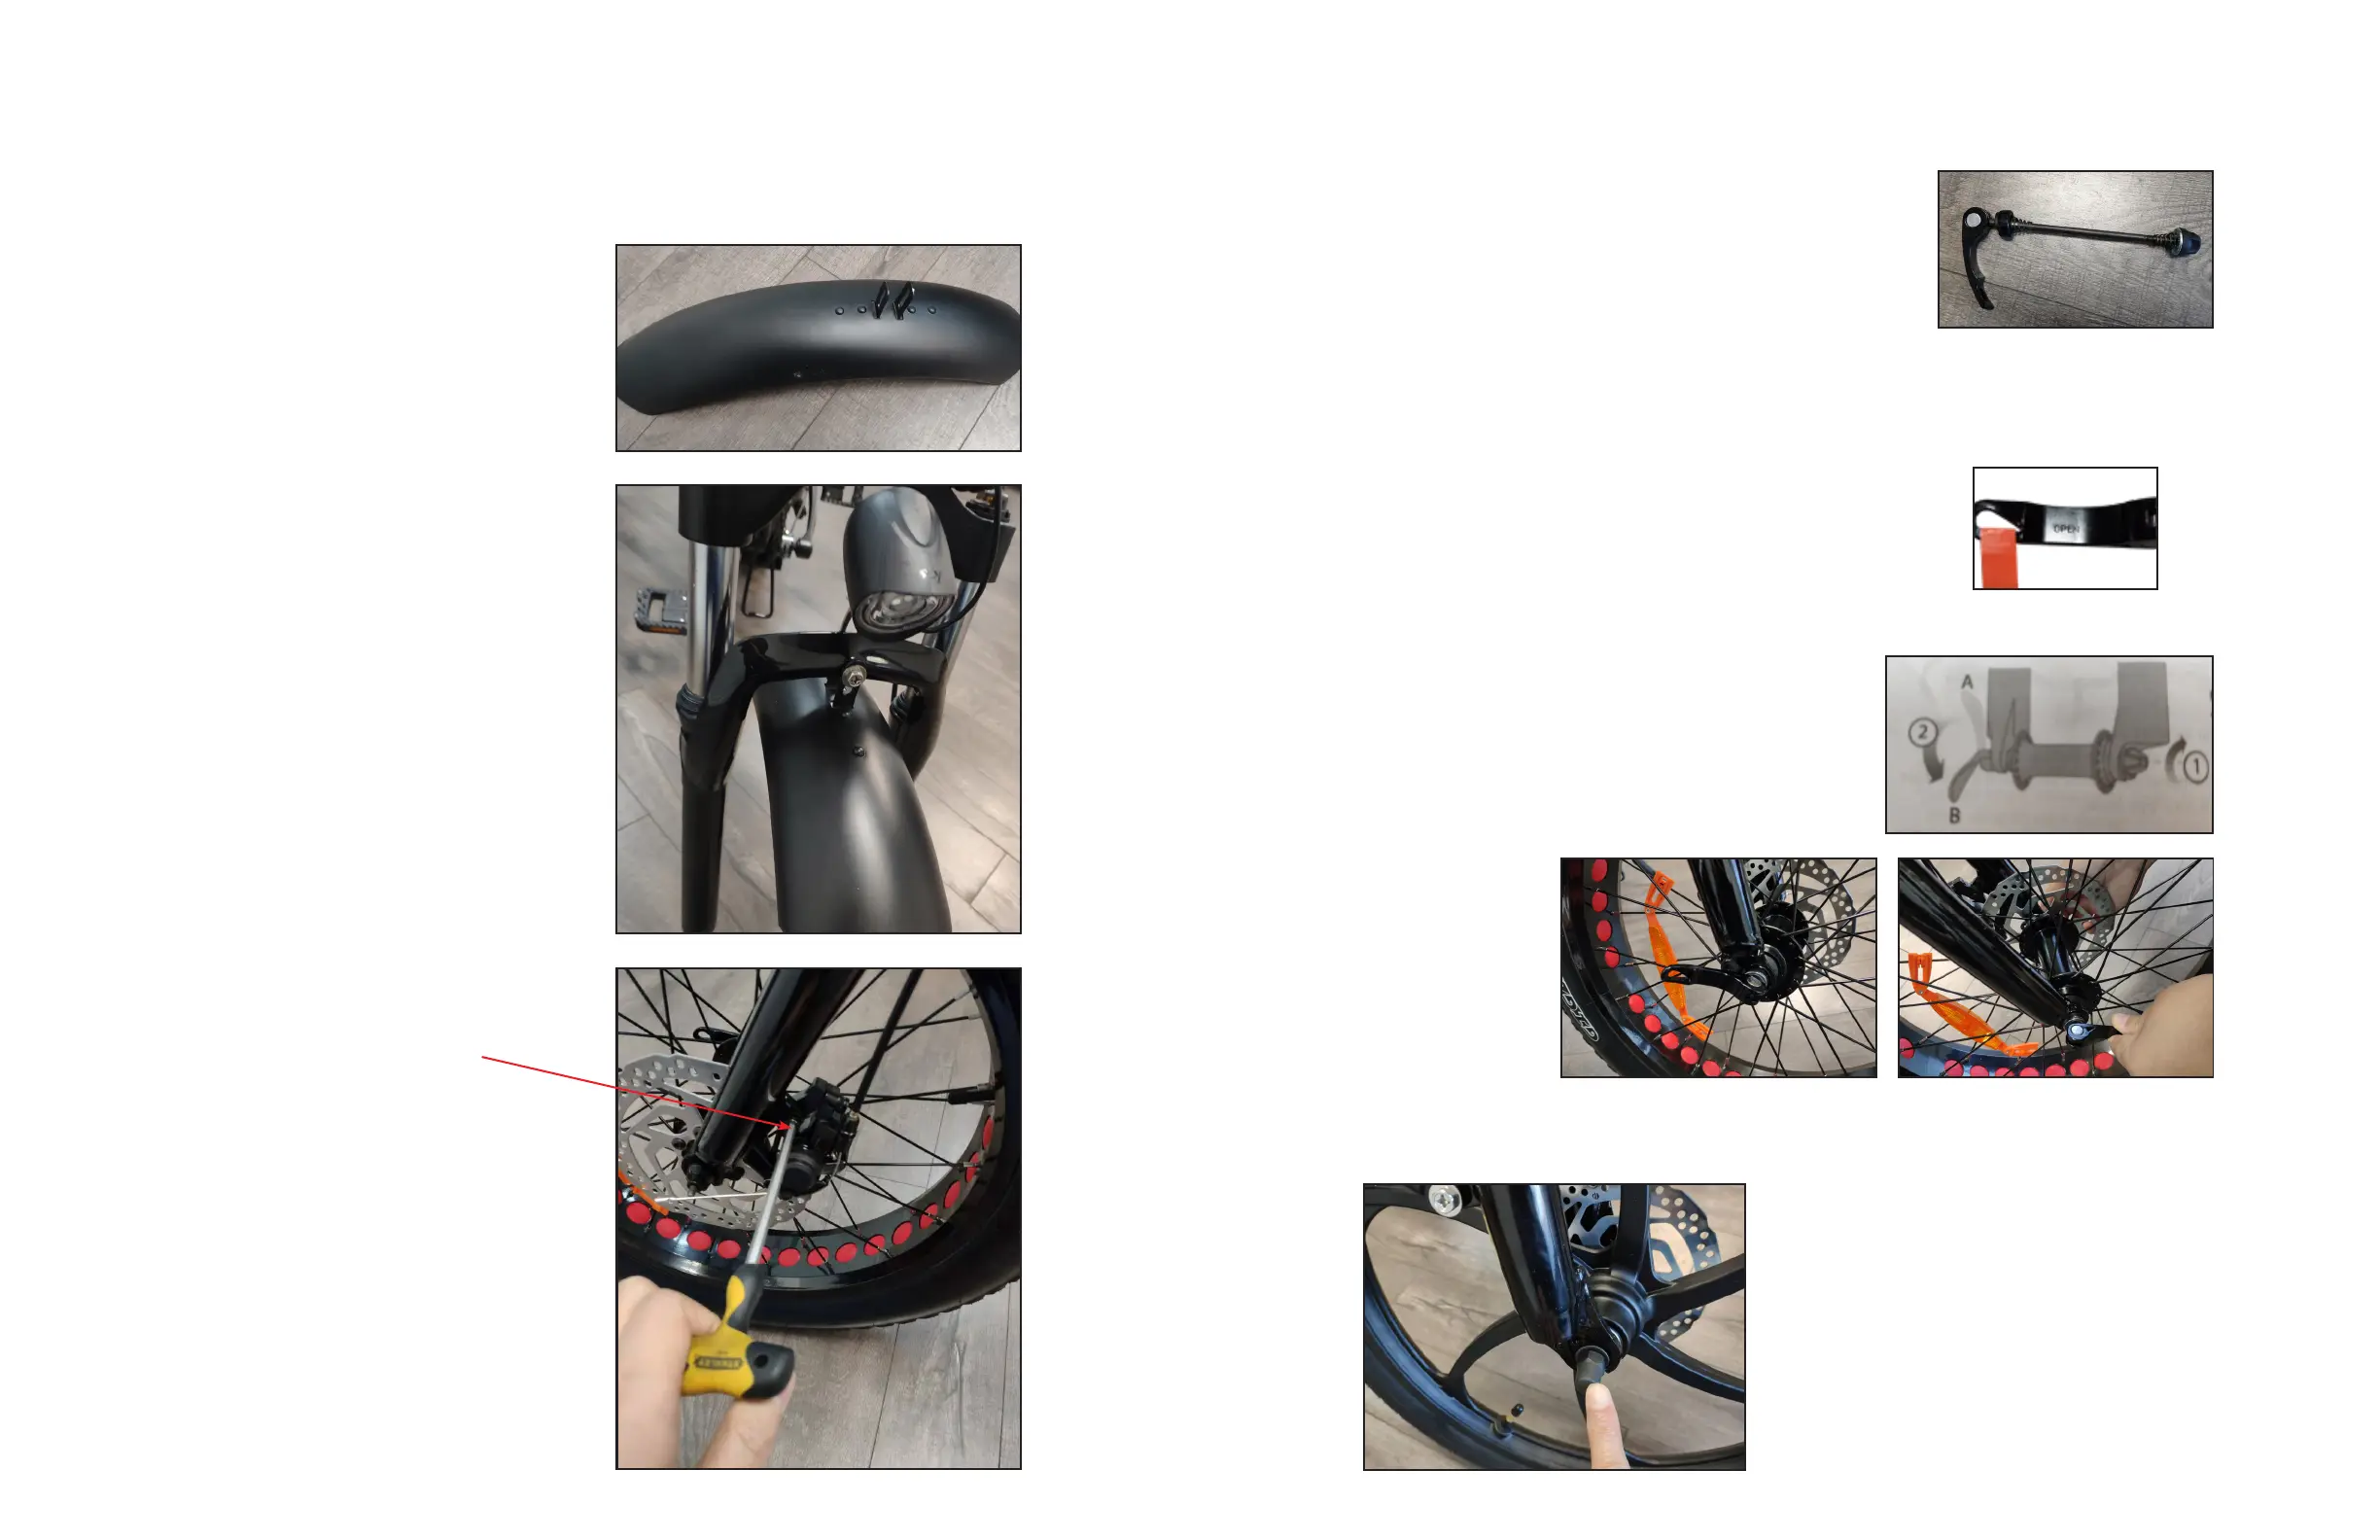
FRONT FENDER & WHEEL ASSEMBLY
1.Take the front fender out of the car-
ton. Loosen the nut of the front light
from the backside, then loosen the bolt
on the front side with a 10mm wrench,
put the fender’s hook and the front light
together, then tighten the front bolt,
then tighten the nut on the backside.
2. Take the quick release
(or nuts and bolts) out of the
packing box. When installing the
front wheel, make sure the disc
brake is correctly installed.
QUICK-RELEASE BINDER/LEVER
RIDEAU & COLUMBUS
This binder is used to attach wheels to
the frame and fork or tighten a seat
post into a frame. Binders allow for a tool-free,
quicker use than nuts and bolts but require
knowledge of proper use.
• Put the lever in an opened position (A)
• Tighten the adjustment nut (1) by small
increments until you need considerable force
to push (2) the lever to its closed position (B)
with your fingers or palm.
• Test wheel attachment by lifting the front
end of the bike and firmly hit downward on
the front wheel with your palm.
There should be no play in the connection.
RIDEAU, COLUMBUS & AURORA
• Insert the front wheel into the fork
• Make sure that the wheel is seated and centered
in the fork and the brake disc fits in between
the brake linings.
• Lightly apply a very thin layer of grease to the axle.
• Insert the axle through the wheel making sure
the larger diameter of the spring(s) faces outward
(see diagram C).
AURORA
The AURORA has a an axle that is attached
with nuts (no quick release binder).
Follow the “Install the front wheel instruc-
tions above, then tighten the nuts securely.
Test wheel attachment by lifting the front
end of the bike and firmly hit downward on
the front wheel with your palm.
There should be no play in the connection.
INSTALL THE FRONT WHEEL
• Open the box from the top, take the bike, parts and accessories box out.
• Carefully remove all protective carton pieces, foam pads, tie wraps, plastic fittings,
recycle all material that can be recycled, dispose of the rest.
C.
Sometimes the
quick-release lever
will be too difficult to
press down. Loosen it
in small increments, so
that the quick-release
lever can be pressed
in to lock hard. There
should be no play in
the connection.
OPEN POSITION
QUICK-RELEASE BINDER/LEVER
TIGHTEN
axle
adjustment
nut
centering
spring
lever