ML-17HD
7 8
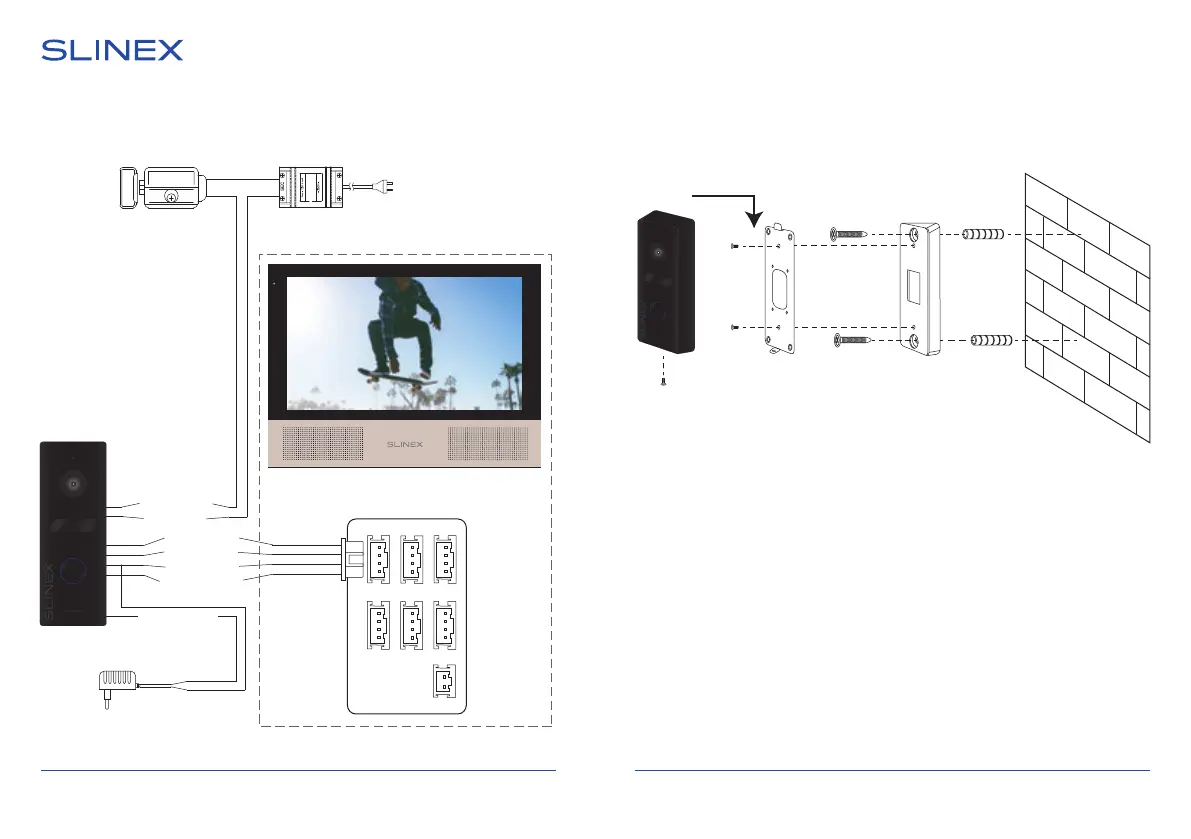
4. Schematic diagram
Angle mount
1) Take the angle bracket from the kit and place it 150-160 cm from the oor
line;
2) Mark and drill two halls inside the wall;
3) Take two anchors from the kit and hammer them into the drilled halls;
4) Fix angle bracket on the wall by two screws from the kit;
5) Fix wall mounting bracket on the angle bracket by two screws from the kit;
6) Connect all communication wires and x the door panel on the wall
mounting bracket by the screw from the down side.
5. Installation
Power (Red)
Audio (White)
GND (Black)
Video (Yellow)
N.O. (Blue)
COM.(Green)
Lock Lock power
supply
Camera power
(Red & White)
Camera
power
suppply
(Optional for using cameara as
a source of video for DVR)
Door 1
Door 2
CCTV 1
CCTV 2
Input
Output
Power
Sonik 7
ML-17HD