Normal Mode Operation
In normal operation, the red LED is OFF.
In wake up, the red LED flashes ON with two
quick flashes.
In alarm mode, the red LED stays ON for 4
seconds. Sends an alarm message to the
Touchscreen.
In trouble or maintenance mode, the red LED
does not activate after a wake up test.
In low battery mode, a message is sent to the
Touchscreen.
Note: Modes can be viewed from the
Touchscreen.
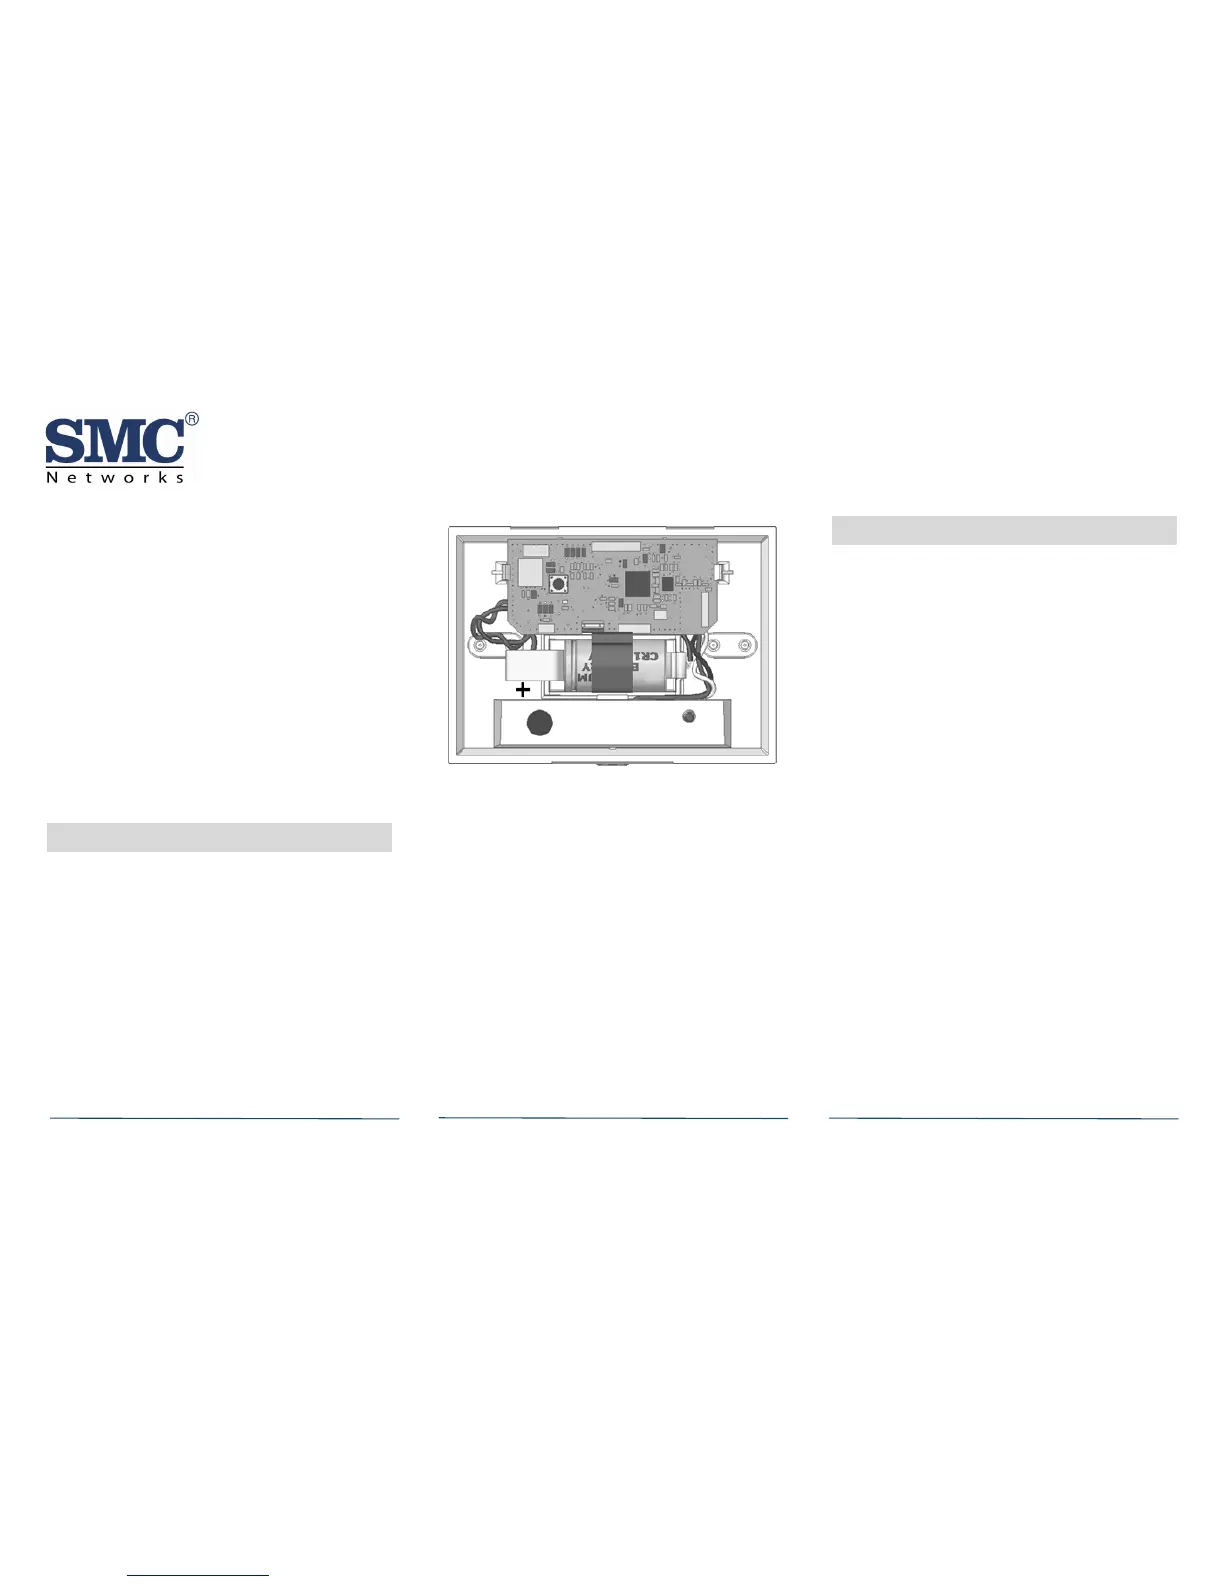
6 Installing/Replacing Battery
The SMCGB10-Z comes with one battery
preinstalled. When you need to replace the
battery, use the following procedure.
Note: Place the Touchscreen into sensor test
mode prior to replacing the batteries. Otherwise,
an alarm/tamper condition may be indicated.
A. Remove the product top cover.
B. If replacing the battery, remove the old
battery and properly dispose of it as
recommended by the battery manufacturer.
C. Install the new battery. Note the polarity
illustration in the battery compartment.
C. Replace the top cover.
D. Replace the front screw.
When replacing the battery, use one of the
following approved brands:
Duracell Ultra
Panasonic
Note: Using a different battery may have a
detrimental effect on the product's operation.
Constant exposures to high or low humidity may
reduce battery life.
After installing or changing the batteries,
reinstall the SMCGB10-Z top cover. Test your
SMCGB10-Z using a wake-up test.
7 Adding to Touchscreen
Each SMCGB10-Z is programmed with a unique ID
when manufactured. The unique ID is enrolled
into the Touchscreen at the time of installation,
allowing the SMCGB10-Z to communicate with
that specific Touchscreen.
A. Log in to the Settings app with an Installer
code.
B. In the Settings menu, tap Sensors & Zones >
Add a Sensor/Zone.
C. Place the SMCGB10-Z in Search mode and
prepare it to be added to the Touchscreen
(refer to the installation documentation for
your sensors). Available sensors meet the
following requirements:
- Defaulted.
- Not currently paired with another
Touchscreen device.
- Currently in Search mode.
D. At the Locating Wireless Sensors screen, tap
Next. A Done button appears on the screen
and the Touchscreen searches for sensors
that are available to be added. As sensors
are found, a grayed icon appears for that
sensor.
E. Fault each found sensor to pair it to the
Touchscreen. The icon for each sensor is
undarkened as it is faulted and the
Touchscreen beeps. The sensor is paired to
the Touchscreen.
 Loading...