EasyManua.ls Logo

Smeg Linea SFA6101TVB - User Manual

Smeg Linea SFA6101TVB
52 pages
Print Icon
To Next Page IconTo Next Page
Loading...
Contents
3
EN
1Instructions 4
1.1 General safety instructions 4
1.2 Appliance purpose 8
1.3 Manufacturer’s liability 8
1.4 This user manual 8
1.5 Disposal 9
1.6 Identification plate 9
1.7 How to read the user manual 10
1.8 To save energy 10
2 Description 11
2.1 General description 11
2.2 Control panel 12
2.3 Other parts 13
2.4 Available accessories 13
3Use 15
3.1 Using the accessories 16
3.2 Using the oven 17
3.3 Cooking advice 24
3.4 Special functions 27
3.5 Settings 31
4 Cleaning and maintenance 35
4.1 Cleaning the surfaces 35
4.2 Cleaning the door 35
4.3 Cleaning the oven cavity 38
4.4 Vapor Clean (on some models only) 41
4.5 Pyrolytic function (on some models only) 44
4.6 Extraordinary maintenance 47
5Installation 49
5.1 Electrical connection 49
5.2 Positioning 50
We advise you to read this manual carefully, which contains all the instructions for
maintaining the appliance’s aesthetic and functional qualities.
For further information on the product: www.smeg.com
TRANSLATION OF THE ORIGINAL INSTRUCTIONS
Question and Answer IconNeed help?

Do you have a question about the Smeg Linea SFA6101TVB and is the answer not in the manual?

Overview

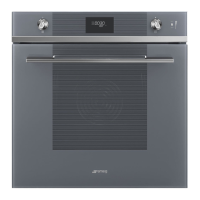
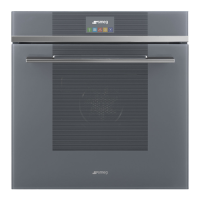
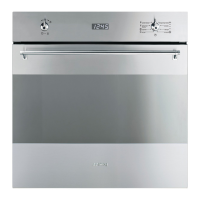
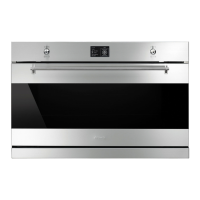
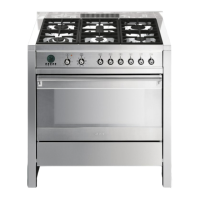
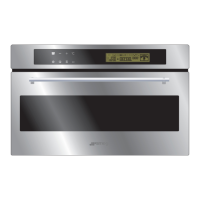
This document describes a Smeg oven, providing detailed instructions for its use, installation, and maintenance.

Function Description

The Smeg oven is designed for cooking food in a home environment. It offers various cooking functions, including:

  • Static: Traditional cooking, ideal for preparing a single dish, such as roasts, meats, bread, and pies.
  • Fan Assisted: Intense and uniform cooking, ideal for biscuits, cakes, and cooking on more than one level.
  • Circulaire: Heat is distributed quickly and uniformly, suitable for all dishes, ideal for cooking on multiple levels without mixing smells or flavors.
  • Turbo: Allows rapid cooking on multiple levels without mixing aromas, ideal for large volumes of food or intense cooking.
  • Grill: Produces excellent grilling and gratinating results, used at the end of cooking for browning dishes.
  • Fan with Grill: Allows optimal grilling, even for thick slices of meat, perfect for larger cuts of meat.
  • Bottom: Heat comes from the bottom of the cavity, perfect for cakes, pies, tarts, and pizzas.
  • Circulaire + Bottom: Allows quick finish cooking for food that is already cooked on the surface but not internally, ideal for quiches and suitable for all kinds of dishes.
  • ECO: Low energy cooking, particularly suitable for cooking on a single shelf with low energy consumption. It is recommended for all types of food except those that may produce a large amount of moisture (e.g., vegetables). To obtain maximum energy savings and reduce cooking times, it is recommended to place food in the oven without preheating.
  • Pizza: Function designed for cooking pizza, perfect not just for pizzas, but also for biscuits and cakes.

The oven also features special functions:

  • Defrost: Thaws food based on a selectable time.
  • Proving: For successful proving, a container of water should be placed in the bottom of the oven.
  • Sabbath: Allows cooking to proceed indefinitely, without preheating, and with the oven light disabled. The cooking temperature can be selected between 60-100 °C. The oven light can be disabled, and any operation such as opening the door or manual activation with the knob will not activate the light. The internal fan remains turned off. Knob illumination and audible prompts remain disabled.

Important Technical Specifications

Electrical Connection:

  • The appliance must be connected to earth in compliance with electrical system safety standards.
  • Use cables that can withstand temperatures of at least 90°C.
  • The tightening torque of the screws of the terminal supply wires must be 1.5 - 2 Nm.
  • If the power cable becomes damaged, contact technical support immediately to arrange for it to be replaced in order to avoid possible hazards.
  • The appliance operates at 220-240 V~.
  • It uses a three-core cable (3 x 1.5 mm² internal conductors).
  • The ground connection uses a wire that is 20 mm longer than the other wires.

Appliance Overall Dimensions (mm):

  • Width: 597 mm
  • Height: 592 mm
  • Depth: 509 mm (excluding front panel)
  • Recess dimensions for installation:
    • Width: 560 mm
    • Height: 583-585 mm
    • Depth: 554-564 mm (for mounting under worktops)
    • Depth: 400-554 mm (for mounting into a column)

Cooking Information Table: The manual provides a detailed table with recommended food types, weight, function, shelf position, temperature, and cooking time for various dishes, including:

  • Lasagne (3-4 kg): Static, shelf 1, 220-230 °C, 45-50 minutes.
  • Pasta bake (3-4 kg): Static, shelf 1, 220-230 °C, 45-50 minutes.
  • Veal roast (2 kg): Turbo/Fan assisted, shelf 2, 180-190 °C, 90-100 minutes.
  • Pork loin (2 kg): Turbo/Fan assisted, shelf 2, 180-190 °C, 70-80 minutes.
  • Sausages (1.5 kg): Fan with grill, shelf 4, 280 °C, 15 minutes.
  • Roast beef (1 kg): Turbo/Fan assisted, shelf 2, 200 °C, 40-45 minutes.
  • Roast rabbit (1.5 kg): Circulaire/Fan assisted, shelf 2, 180-190 °C, 70-80 minutes.
  • Turkey breast (3 kg): Turbo/Fan assisted, shelf 2, 180-190 °C, 110-120 minutes.
  • Roast pork neck (2-3 kg): Turbo/Fan assisted, shelf 2, 180-190 °C, 170-180 minutes.
  • Roast chicken (1.2 kg): Turbo/Fan assisted, shelf 2, 180-190 °C, 65-70 minutes.
  • Pork chops (1.5 kg): Fan with grill, shelf 4, 280 °C, 15 minutes.
  • Spare ribs (1.5 kg): Fan with grill, shelf 4, 280 °C, 10 minutes.
  • Bacon (0.7 kg): Grill, shelf 5, 280 °C, 7-8 minutes.
  • Pork fillet (1.5 kg): Fan with grill, shelf 4, 280 °C, 10 minutes.
  • Beef fillet (1 kg): Grill, shelf 5, 280 °C, 7 minutes.
  • Salmon trout (1.2 kg): Turbo/Fan assisted, shelf 2, 150-160 °C, 35-40 minutes.
  • Monkfish (1.5 kg): Turbo/Fan assisted, shelf 2, 160 °C, 60-65 minutes.
  • Turbot (1.5 kg): Turbo/Fan assisted, shelf 2, 160 °C, 45-50 minutes.
  • Pizza (1 kg): Turbo/Fan assisted, shelf 2, 280 °C, 8-9 minutes.
  • Bread (1 kg): Circulaire/Fan assisted, shelf 2, 190-200 °C, 25-30 minutes.
  • Focaccia (1 kg): Turbo/Fan assisted, shelf 2, 180-190 °C, 20-25 minutes.
  • Bundt cake (1 kg): Circulaire/Fan assisted, shelf 2, 160 °C, 55-60 minutes.
  • Tart (1 kg): Circulaire/Fan assisted, shelf 2, 160 °C, 35-40 minutes.
  • Ricotta cake (1 kg): Circulaire/Fan assisted, shelf 2, 160-170 °C, 55-60 minutes.
  • Jam tarts (1 kg): Turbo/Fan assisted, shelf 2, 160 °C, 20-25 minutes.
  • Paradise cake (1.2 kg): Circulaire/Fan assisted, shelf 2, 160 °C, 55-60 minutes.
  • Profiteroles (1.2 kg): Turbo/Fan assisted, shelf 2, 180 °C, 80-90 minutes.
  • Sponge cake (1 kg): Circulaire/Fan assisted, shelf 2, 150-160 °C, 55-60 minutes.
  • Rice pudding (1 kg): Turbo/Fan assisted, shelf 2, 160 °C, 55-60 minutes.
  • Brioches (0.6 kg): Circulaire/Fan assisted, shelf 2, 160 °C, 30-35 minutes.

Usage Features

General Safety Instructions:

  • Children must not play with the appliance.
  • Keep children under the age of 8 at a safe distance unless they are constantly supervised.
  • Keep children under the age of 8 away from the appliance when it is in use.
  • Cleaning and maintenance must not be carried out by unsupervised children.
  • The cooking process must always be monitored. A short cooking process must be continuously monitored.
  • Never leave the appliance unattended during cooking operations where fats or oils could be released, as these could then heat up and catch fire. Be very careful.
  • Do not pour water directly onto very hot trays.
  • Keep the oven door closed during cooking.
  • If you need to move food or at the end of cooking, open the door 5 cm for a few seconds, let the steam come out, then open it fully.
  • Do not insert pointed metal objects (cutlery or utensils) into the slots in the appliance.
  • Switch off the appliance immediately after use.
  • Do not use or store flammable materials near the appliance.
  • Do not use aerosols in the vicinity of this appliance whilst it is in use.
  • Do not modify this appliance.
  • Installation and servicing should be carried out by qualified personnel in accordance with current standards.
  • Racks and trays should be inserted as far as they will go into the side guides. The mechanical safety locks that prevent them from being removed must face downwards and towards the back of the oven cavity.
  • Do not use steam jets to clean the appliance.
  • Do not spray any spray products near the appliance.
  • (On some models only) Before starting the pyrolytic cycle, remove any food residues or large spills from previous cooking operations from the inside of the oven.
  • Do not obstruct ventilation openings and heat dispersal slots.
  • Fire hazard: never leave objects in the oven cavity.
  • Do not for any reason use the appliance as a space heater.
  • Do not use plastic cookware or containers when cooking food.
  • Do not put sealed tins or containers in the oven.
  • Do not cover the bottom of the oven cavity with aluminium or tin foil sheets.
  • Do not place pans or trays directly on the bottom of the oven cavity.
  • If you wish to use greaseproof paper, place it so that it will not interfere with the hot air circulation inside the oven.
  • Do not use the open door to rest pans or trays on the internal glass pane.
  • Never use the oven door to lever the appliance into place when fitting.
  • Avoid exerting too much pressure on the oven door when open.
  • Do not use the handle to lift or move the appliance.

Controls: The oven features a function knob and a select knob.

  • Function knob: Used to turn the appliance on and off, and select a function.
  • Select knob: Used to set the cooking temperature, duration, programmed cooking procedures, current time, and temporarily start or stop a function.
  • Display: Shows the current time, the function, the selected cooking temperature, power, and any time that has been set.
  • Indicators: Clock, timer, cooking, end of cooking, door lock, controls lock, showroom, defrost, vapor clean.

Using the Oven:

  • First use: Remove any protective film, labels, and accessories. Clean the oven cavity. Heat the empty oven at maximum temperature to burn off any residues left by the manufacturing process.
  • Using accessories: Racks and trays have to be inserted into the side guides until they come to a complete stop. Mechanical safety locks prevent the rack from being removed accidentally.
  • Setting the time: Turn the function knob, then the select knob to set the hours and minutes.
  • Timer: Set a countdown timer for a specific duration.
  • Switching on the oven: Turn the function knob to the right or left to select the required temperature.
  • Timed cooking: Set a cooking duration.
  • Programmed cooking: Set a cooking duration and an end time.
  • Special functions: Defrost, Proving, Sabbath.
  • Settings: Current time, controls lock (child safety), showroom (for exhibitors only), keep warm.

Maintenance Features

Cleaning and Maintenance:

  • General: Do not use steam jets, abrasive or corrosive detergents, scouring powders, stain removers, metallic sponges, or rough/abrasive materials. Use normal, non-abrasive products and a wooden or plastic tool. Rinse thoroughly and dry with a soft cloth or a microfibre cloth.
  • Food stains or residues: Do not allow residues of sugary foods (such as jam) to set inside the oven. If left to set for too long, they might damage the enamel lining of the oven.
  • Cleaning the door: Remove the door and place it on a tea towel. To remove the door, open it completely and insert two pins into the holes on the hinges. To reassemble, follow the steps in reverse.
  • Removing the internal glass panes: Pull the rear part gently upwards, following the movement indicated by the arrows. Pull the front part upwards. The 4 pins attached to the glass detach from their housings in the oven door. Use absorbent kitchen roll, wash with a damp sponge and neutral detergent.
  • Cleaning the oven cavity: Clean regularly after it cools down. Remove all removable parts (door, rack/tray support frames, oven seal). If using specific cleaning products, run the oven at maximum temperature for 15-20 minutes to eliminate any residue.
  • Drying: After cooking, let the appliance cool, remove dirt, dry with a soft cloth, and leave the door open until the inside is completely dry.
  • Removing rack/tray support frames: Pull the frame towards the inside of the oven cavity to unhook it from groove A. Then slide it out of the seats at the back B.
  • Regeneration of self-cleaning panels (catalytic cycle) (on some models only): Clean the base and the upper guard first. Set a regeneration cycle by selecting a fan assisted function at maximum temperature for one hour. If panels are dirty, remove them and wash them with neutral washing up liquid. Put panels back in the oven and set a fan assisted function at 180°C for one hour.
  • Cleaning the roof of the oven (on some models only): Gently lower the heating element until it stops.
  • Vapor Clean (on some models only): An assisted cleaning procedure that facilitates the removal of dirt. Pour approx. 40 cc of water onto the floor of the oven. Close the door. During the assisted cleaning cycle, wash the self-cleaning panels (where fitted), which were previously removed, separately in warm water and a small amount of detergent.
  • Pyrolytic function (on some models only): A high-temperature cleaning procedure that causes dirt to dissolve. Remove all accessories from inside the oven. For very stubborn encrustations, spray an oven cleaning product onto the glass. Remove the rack/tray support frames. Close the door.
  • Extraordinary maintenance:
    • Removing and installing the door seal: Release the clips located in the 4 corners and pull the seal outwards. Hook the clips in the 4 corners onto the seal.
    • Replacing the internal light bulb: Unplug the appliance. Use protective gloves. Remove all accessories from inside the oven. Remove the rack/tray support frames. Use a tool (e.g., a spoon) to remove the bulb cover. Replace the light bulb with one of the same type (40W). Refit the cover. Press the cover completely down so that it attaches perfectly to the bulb support.

Smeg Linea SFA6101TVB Specifications

General IconGeneral
BrandSmeg
ModelLinea SFA6101TVB
CategoryOven
LanguageEnglish

Related product manuals