Do you have a question about the Smeg P775PO and is the answer not in the manual?
This document provides comprehensive instructions for the proper use, safety, installation, and maintenance of the cooking hob. It is intended for both users and qualified technicians, ensuring safe and efficient operation of the appliance.
The cooking hob is designed for domestic use, specifically for cooking and heating food. It features multiple cooking zones of varying diameters and power, clearly indicated by circles on the glass surface. These zones are of the HIGH-LIGHT type, activating quickly after a few seconds. Heating intensity can be adjusted using control knobs or push-buttons, depending on the model, from a minimum setting of 1 to a maximum of 6 or 9. Some cooking zones offer dual heating, allowing for heating within an inner circle or both inner and outer circles.
The hob offers different control mechanisms:
Hobs with Knobs: Each knob corresponds to a specific plate. To heat, turn the knob to the desired position (1 to 6). Adjustment is continuous, allowing for intermediate values. For dual plates, turning the knob to a specific position (1 to 6) heats the inner zone. To heat both inner and outer zones, turn the knob to 'O' and release; it will return to 9, and heating intensity can then be adjusted anticlockwise. To revert to inner-zone heating, set the knob to 0 and then to the desired position (1 to 6).
Hobs with Push-buttons: Upon first connection, an operating check illuminates all indicator lights for a few seconds. When not in use, all components are off. Pressing a push-button for a few seconds switches on the hob, and circular sectors indicating the controlled plate illuminate. The power level must be set within 30 seconds, or the hob will switch off automatically. Power levels are adjusted using '▲' or '▼' push-buttons. Pressing '▲' once shows '0' (plate on), and again shows '9' (full power). '▼' decreases power from 9 to 1, while '▲' increases it from 1 to 9. To switch off, repeatedly press '▼' or '▲' until the display reads '0'. A "BEEP" confirms button presses.
Plate Lock-out: After 20 seconds of inactivity following the last power adjustment, the plate enters "lock-out" status, preventing further power level adjustments. This is indicated by a dot next to the power level. To deactivate, press and hold '▲' or '▼' for 2-3 seconds.
Timer (on some models): To activate, press and hold the timer symbol for a few seconds. Two displays will show a flashing '30'. Use '▲' or '▼' to set the desired cooking time. After 5 seconds of inactivity, the minutes display stops flashing, and '0' flashes on the power display. The power level must be set within another 5 seconds, or the hob will switch off. Timed cooking begins 5 seconds after the last power adjustment. At the end of the set time, three beeps will sound, repeated five times at 5-second intervals. Beeps can be stopped manually by pressing '▲' or '▼'. During timed cooking, '▲' or '▼' can modify the plate's power. After 5 seconds of inactivity, a BEEP sounds, and the time display flashes, allowing for time adjustment.
Residual Heat Warning: Each plate has a residual heat warning device. After a plate is switched off, a flashing 'H' may appear, indicating the cooking zone is still very hot (above 60°C). Cooking can be restarted while 'H' is flashing.
Control Circuit Board Thermal Protection: If plates overheat, the internal electronics board automatically switches off power to the front plates, and 'H' and 'F' flash alternately on the power LEDs. If cooling is insufficient, power to all plates is cut, and 'HEE' is displayed. Cooking resumes once the temperature drops below the safety threshold.
Operator Error: If an incorrect button is pressed, an 'E' appears on the power display and remains until the button is released.
Switching Off: The hob switches off when all displays read '0'. After 30 seconds, the hob automatically switches off. If plates are hot, 'H' appears after 5 seconds, warning of residual heat.
"DEMO" Mode: Some models have a DEMO function that deactivates plates. To deactivate, within 60 seconds of switching on, press the leftmost '▲' once, the third '▲' from the left twice, and the second '▲' from the left three times.
Cleaning the Glazed Ceramic Hob: The hob should be cleaned regularly, ideally after each use, once the residual heat signal lamps have turned off.
Cleaning Stainless Steel (Ordinary Daily Cleaning):
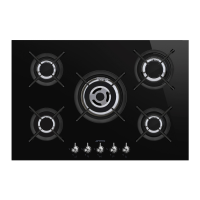
| Type | Gas Hob |
|---|---|
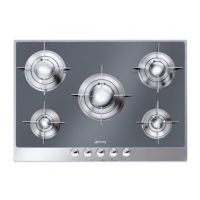
| Number of Burners | 5 |
| Width | 75 cm |
| Material | Stainless Steel |
| Ignition Type | Automatic |
| Control Type | Knobs |
| Total Power | 11.5 kW |
| Dimensions (WxD) | 750 x 510 mm |
| Burner Types | Auxiliary, Rapid |