EasyManua.ls Logo

Smith S103E - User Manual

Default Icon
2 pages
Print Icon
To Next Page IconTo Next Page
Loading...
4. Assemble Wand to XR Valve
Screw on Wand Assembly to XL Valve using a 13/16”
wrench. (See Figure E)
Figure E
182563 XL VALVE
Wand Assembly
3. Assemble XL Valve to Hose
Screw on XL Valve to end of hose from sprayer. Using
a 9/16” wrench for sprayer hose and a 3/4” wrench for
the XL Valve tighten securely. (See Figure D)
Figure D
182563 XL Valve
182571 Sprayer Hose
2. Assemble 24” Brass Wand
Place 176332 check valve inside of 182566 brass wand.
Then place brass teejet nozzle and cap on top and
screw into place (See Figure C)
176332 Check Valve
182566 Brass Wand
Figure C
Brass Teejet
1. Assemble Hose To Tank
IMPORTANT: Do not attempt to heat or alter hose
or hose nut.
1. Align hose and scew on to tank. (See Figure A).
2. Tighten with a 5/8” wrench. (See Figure B).
Figure B
Figure A
SETTING UP YOUR INDUSTRIAL CONCRETE
S103E SPRAYER
190448
Question and Answer IconNeed help?

Do you have a question about the Smith S103E and is the answer not in the manual?

Summary

Setting Up Your Industrial Concrete Sprayer

Assemble Hose to Tank

Connect the sprayer hose to the tank securely using a 5/8" wrench as shown in figures.

Assemble 24 Brass Wand

Insert check valve into brass wand and attach brass teejet nozzle and cap.

Assemble XL Valve to Hose

Screw XL Valve onto the hose end from sprayer using specified wrenches for tightening.

Assemble Wand to XR Valve

Connect the Wand Assembly to the XL Valve using a 13/16" wrench for proper assembly.
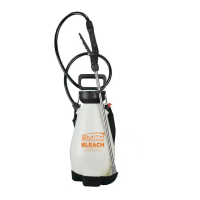
Parts Included with Sprayer

Smith S103E Specifications

General IconGeneral
BrandSmith
ModelS103E
CategoryPaint Sprayer
LanguageEnglish

Related product manuals