4
Note: If wrench is powered up in torque only measurement mode, angle is not zeroed until mode is
changed to angle measurement mode, at which time torque and angle zeroing begins
automatically after 2 seconds. Wrench should be placed on a stable surface with no torque
applied.
Note: Pressing ENTER button while angle is zeroing will abort zeroing function to allow user to
select another measurement mode.
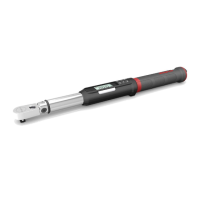
Torque Mode
1. Set Target.
Use UP /DOWN buttons to change TORQUE target value.
2. Select Units of Measure.
Repeatedly press UNITS U button while on target TORQUE screen until desired units are
displayed.
3. Apply TORQUE.
Grasp center of handle, (DO NOT pull on battery end-cap) and slowly apply torque to fastener
until progress lights display green and a ½ second audible alert and handle vibration alerts user
to stop.
4. Release TORQUE.
Note peak TORQUE reading flashing on LCD display for 10 seconds. Pressing
BACKLIGHT button while peak torque is flashing will continue to display value until button is
released. Momentarily press UP /DOWN , ENTER or UNITS U button to immediately
return to target TORQUE screen. Reapplying TORQUE will immediately start another TORQUE
measurement cycle.
5. Recall Peak TORQUE Reading
To recall last peak TORQUE measurement, press and hold BACKLIGHT button for
approximately 3 seconds. Peak TORQUE will flash for 10 seconds.
Angle Mode
Note: Do not apply torque while torque and angle are zeroing otherwise torque zero offset will be
incorrect and wrench will indicate an angle reading when torque is released. If this occurs, re-
zero wrench by momentarily pressing POWER button with wrench setting on a stable surface
with no torque applied.
1. Angle Zero
If "ANGLE ZERO REQ" message is displayed, wait 2 seconds for automatic angle zeroing sequence
before applying torque or moving wrench.
2. Set target.
Use UP /DOWN buttons to change target ANGLE value.
3. Apply Torque and Rotate Wrench.
Grasp center of handle, (DO NOT pull on battery end-cap) and slowly apply torque to fastener
and rotate wrench at a moderate consistent speed until progress lights display green and a ½
second audible alert and handle vibration alerts user to stop.
4. Release torque.
Note alternating peak TORQUE and ANGLE readings flashing on LCD display for 10 seconds.
Pressing BACKLIGHT button while peak angle is flashing will continue to display value until
button is released. Momentarily press UP /DOWN , ENTER or UNITS U button to
immediately return to target ANGLE screen. Reapplying torque (ratcheting) before target screen
is displayed will continue ANGLE accumulation as wrench is rotated.
5. Recall Peak ANGLE Reading
To recall last peak ANGLE measurement, press and hold BACKLIGHT button for
approximately 3 seconds. Peak TORQUE and ANGLE will be displayed alternately for 10 seconds.