EasyManua.ls Logo

SnapAV WattBox IP User Manual

SnapAV WattBox IP
5 pages
To Next Page IconTo Next Page
Page #1 background imageLoading...
Page #1 background image
LAN IP Setup Quick Start Guide
© 2018 WattBox® Rev. 180531-1550
Page 1
Introduction
Follow this document to congure WattBox IP device web interface access using the WattBox-IP Utility. This may be
completed in addition to OvrC setup for access to all of the settings in the WattBox IP interface.
Before You Begin–Firmware Updates
Always check the rmware version of a new WattBox IP before conguring settings in the web interface or OvrC.
300, 500, and 700 series models: rmware can be updated using OvrC. Instructions and the rmware les are
available directly from OvrC.
For 200, 400, and 600 series models: rmware must be updated using the WattBox IP utility software or the web
interface. Download the newest rmware .zip le from the product support tab at SnapAV.com before continuing.
Setup Instructions
1. Install the WattBox
Follow the installation manual to complete hardware setup, then follow the directions found on the OvrC QSG to claim
the device. Update the rmware using OvrC if a new version is available (300/500/700 models only).
Internet
Web Browser
Access
Mobile Apps
Web Interface / Utility
Router
WB-700-IPV-12
OvrC Server
2. Install the WattBox IP Utility Software
Download the WattBox Utility from the Product page on the SnapAV website (utility is not Mac-compatible) and install the
software.
Search “WattBox” in the Start menu
search bar to nd the installed utility.
Question and Answer IconNeed help?

Do you have a question about the SnapAV WattBox IP and is the answer not in the manual?

SnapAV WattBox IP Specifications

General IconGeneral
BrandSnapAV
ModelWattBox IP
CategoryNetwork Hardware
LanguageEnglish

Summary

Initial Setup and Configuration

Install the WattBox Hardware

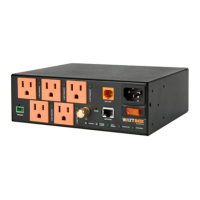
Follow manual for hardware setup, claim device via OvrC, update firmware if needed for 300/500/700 models.

Install WattBox IP Utility Software

Download and install WattBox Utility from SnapAV website (not Mac-compatible).

Run the WattBox IP Utility

Close VPN connections, run WattBox IP Utility. Run as administrator if prompted.

Update Firmware Version

Highlight devices, click Firmware Upgrade, browse for file, click Download. Devices reboot automatically.

Configure IP Settings

Set static IP, optionally custom HTTP/telnet port. Complete port forwarding in router for offsite access.

Log in to WB-IP Web Interface

Click Launch Web User Interface, enter default credentials: username 'wattbox', password 'wattbox'.

Configure System Time

Select correct time zone from dropdown and click Apply to save the setting.

Change Default Login Password

Change default admin credentials to avoid unauthorized access. Record credentials safely.

Product Usage and Support

What to Do Next

Device is ready to use. Consult full manual for hardware, scheduling, and monitoring features.

Contacting Technical Support

Phone: 866.838.5052, Email: TechSupport@SnapAV.com for assistance.