Assemble the Enclosure
11
Guide for Enclosure
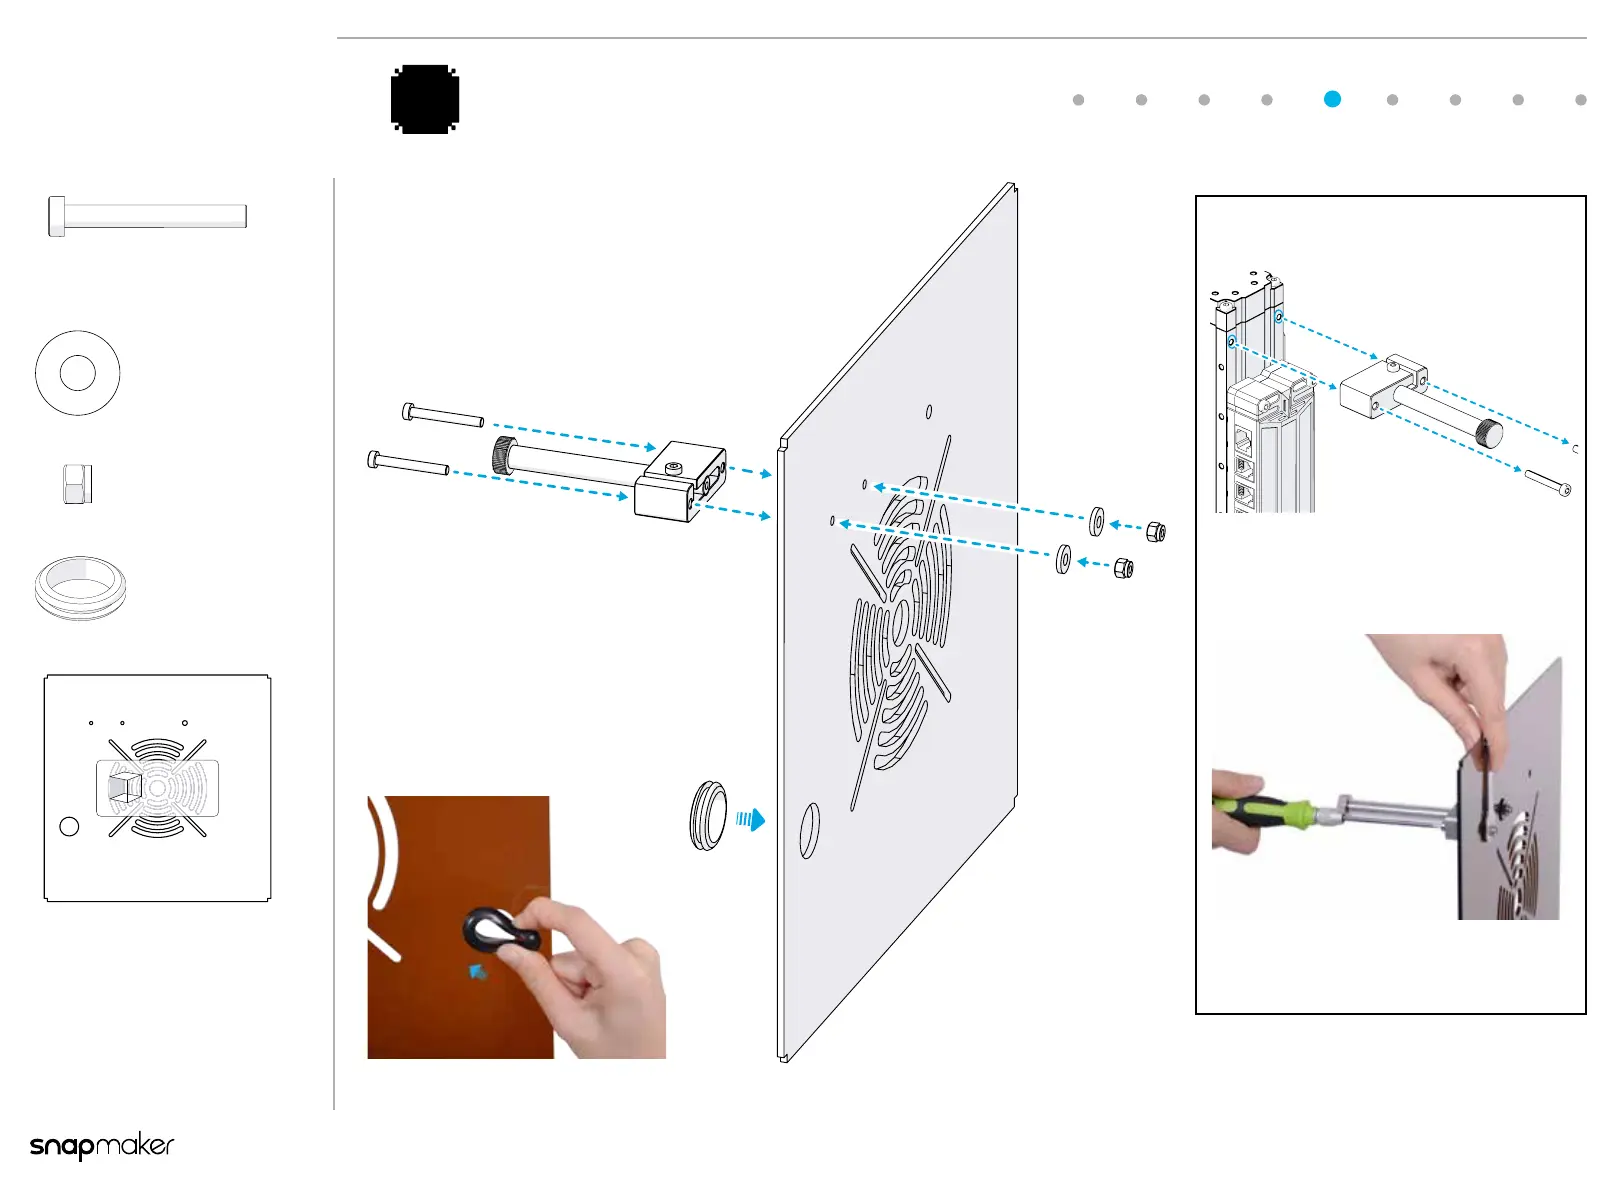
Attach the lament holder and the protective ring
to the Back Plate as illustrated.
5
Tips
You need to detach the lament holder
from the Z Axis of your 3D printer
before this step.
Use the spanner to immobilize the M4
Locknut while tightening the screw.
Back Plate x 1
M4x15x1 Nylon
Spacer
x 2
M4 Locknut
x 2
Protective Ring
x 1
M4 x 32 Screw x 2
Back
1:1
1:1
1:1