snapnrack.com
11
TopSpeed™ Mount Skirt Installation
INSTALLATION INSTRUCTIONS
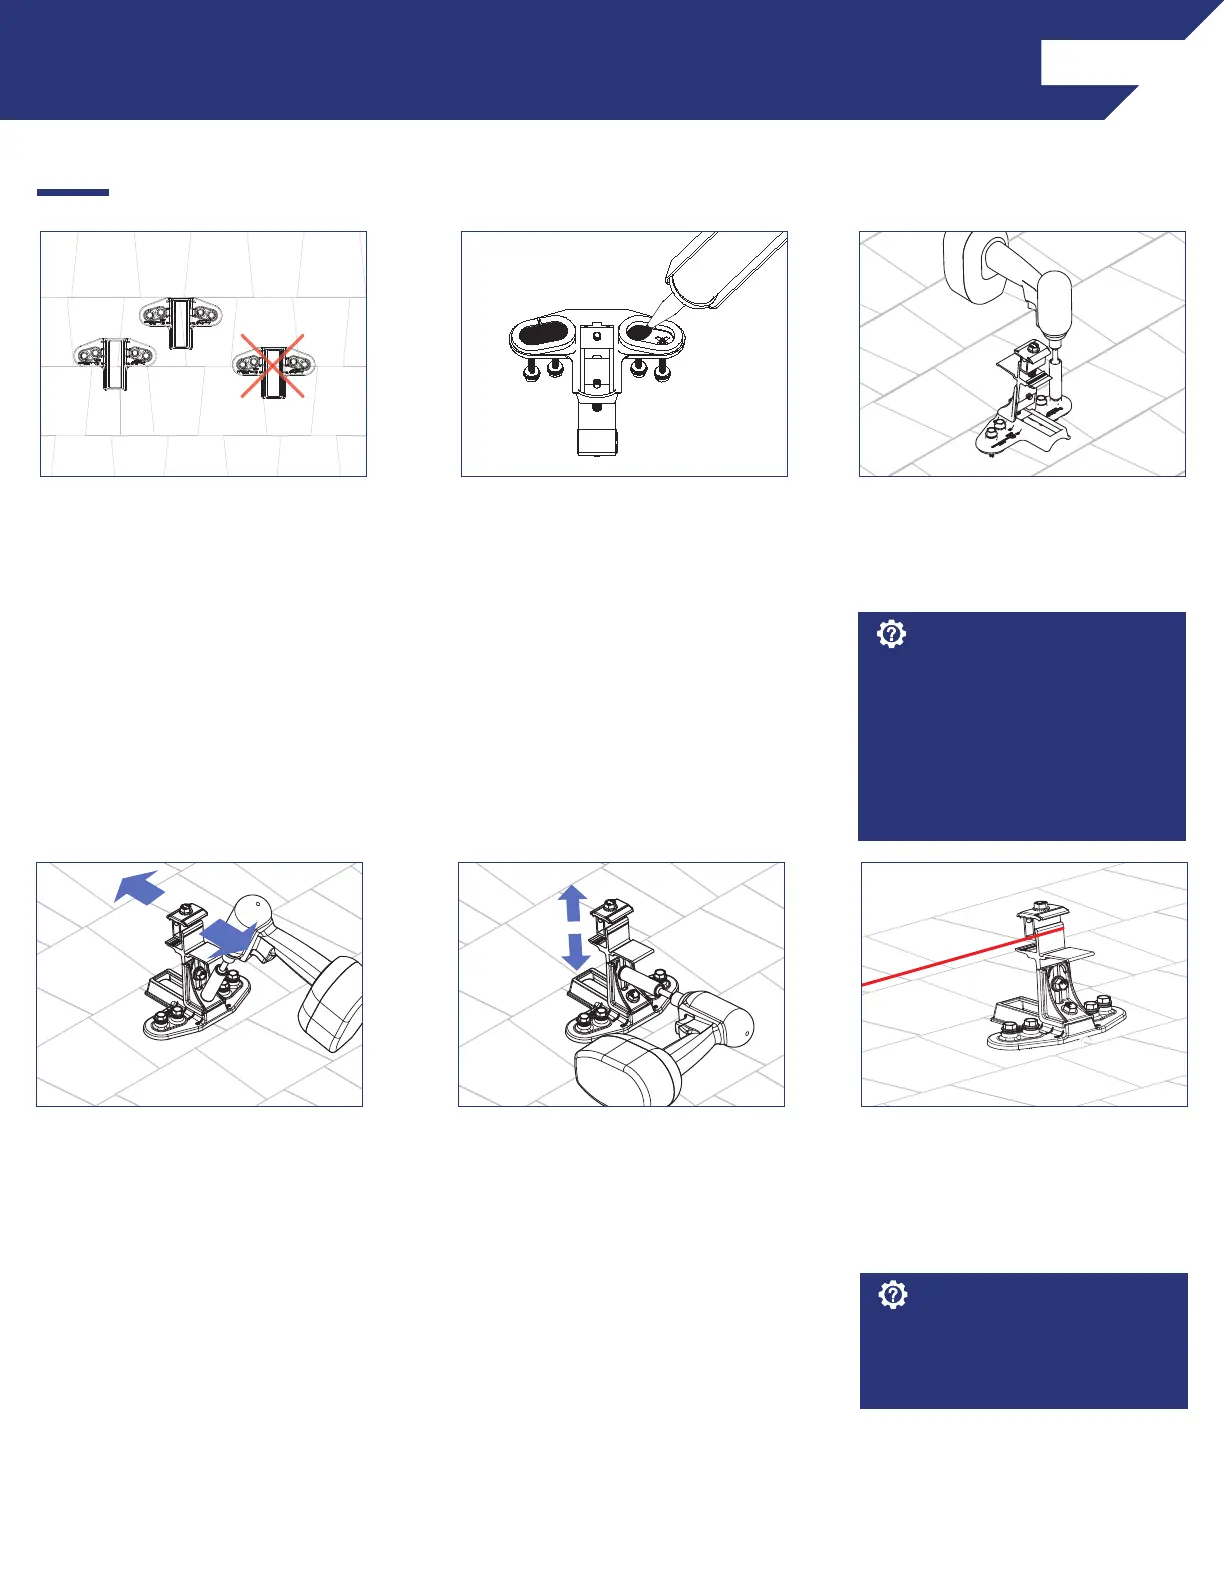
4) Loosen Course Adjustment bolt
and adjust end Mounts up or down
until aligned with bottom edge of
array as marked on the roof, then
tighten the Course Adjustment bolt.
5) To set the TopSpeed™ Mount
level loosen the Leveling bolt and
move the clamp up or down, then
tighten the Leveling bolt and torque
to 16 ft-lb.
1) Install TopSpeed™ Mounts
at locations drawn during the
skirt layout. Mounts must be
installed entirely on one course of
composition.
2) Fill both cavities on bottom
of TopSpeed™ Mount created by
SpeedSeal™ gasket with roof sealant
to ensure a watertight seal.
3) Attach TopSpeed™ Mount to roof
using the (4) SnapNrack #14 Wood
Screws with 1/2" hex head that are
captured in the Mount.
Use the string line alignment feature
on Mounts to level and align the
Mounts.
Install Note:
Roof sealant should be expelled from
both vents of the TopSpeed™ Mount
as it is installed to assure the proper
amount of roof sealant has been
applied. If sealant is not expelled from
all four vents, remove TopSpeed™
Mount, add more sealant to the cavity,
then reinstall.
Install Note:
6) Pull string line tight from one
corner mount to opposite corner
mount to align and level all
TopSpeed™ Mounts between the
end mounts.